IoT を使ってみる(その8:AWS IoT Device Client編)
Back to Top最近はAWS関連の話題から少し遠ざかっていたので、今回は AWS IoT Device Client を紹介します。
AWS IoT Device Client とは
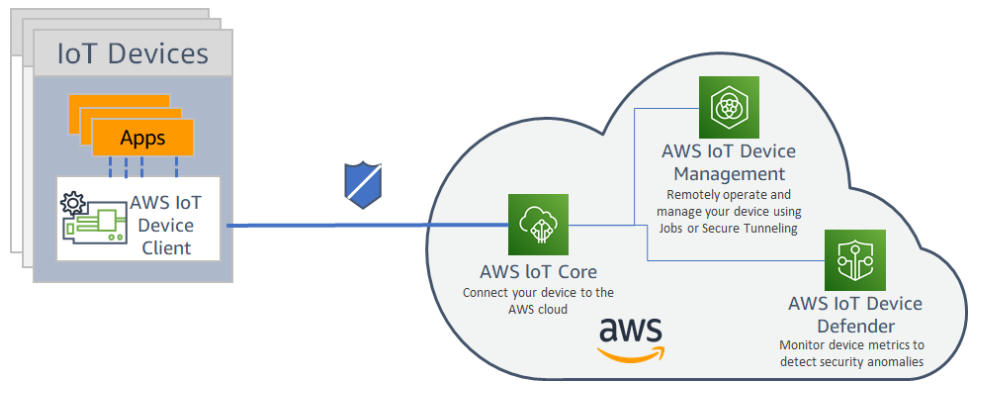
#AWS IoT Device Client はAWSのIoTデバイスのリファレンス実装であり、概念実証(PoC)環境を簡単に構築することができます。
AWS IoT Device Client は AWS IoT Core はもちろん、AWS IoT Device Management や AWS IoT Device Defender と連携してアプリケーション構築を検証できます。
AWSの次のサイトから関連情報にアクセスできます。
インストール
#次のチュートリアルを参照して AWS IoT Device Client をインストールしていきましょう。
Raspberry Pi 3b+にインストールを試みましたが、Raspberry Piが32ビット版だったためか、AWS IoT Device Client のインストールが成功しなかったので、Jetson Nano にインストールを行いました。
Jetson Nano には Ubuntu 18.04 LTS を載せています。
Ubuntu 18.04.6 LTS (GNU/Linux 4.9.201-tegra aarch64)
前準備として Ubuntu を更新しておきます。
sudo apt-get -y update
sudo apt-get -y upgrade
sudo apt-get -y autoremove
予めCmake等のモジュールをインストールしておきます。
sudo apt-get -y install build-essential libssl-dev cmake unzip git python3-pip
AWS IoT Device Client を Github からダウンロードします。
cd ~
git clone https://github.com/awslabs/aws-iot-device-client aws-iot-device-client
mkdir ~/aws-iot-device-client/build && cd ~/aws-iot-device-client/build
cmake ../

次のコマンドでビルドします。
cmake --build . --target aws-iot-device-client
私の環境では、Logファイル出力部分がパーミッションエラーになってしまい、ビルドが成功しませんでした。
上記のチュートリアルには書かれていませんが、"enable-sdk-logging" の設定を次のように false に変更し、ビルドを実行しました。
  "logging": {
    "enable-sdk-logging": false,
以下のようにビルドが完了しました。
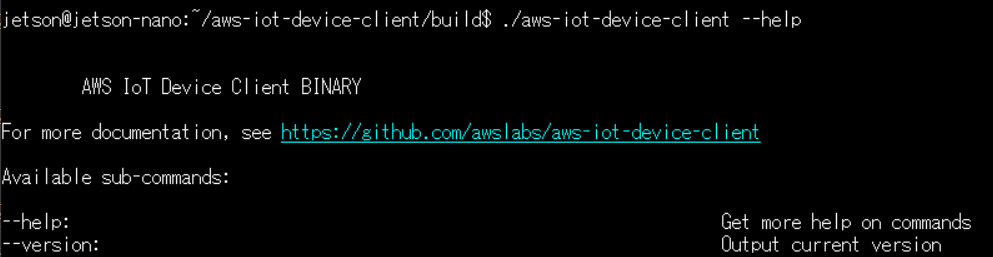
次のコマンドで AWS IoT Device Client がビルド出来ていることを確認します。
./aws-iot-device-client --help
実行が確認できました。
チュートリアル用のフォルダ作成
#チュートリアルを実行するために、以下のフォルダを作成し権限を設定します。
mkdir ~/dc-configs
mkdir ~/policies
mkdir ~/messages
mkdir ~/certs/testconn
mkdir ~/certs/pubsub
mkdir ~/certs/jobs
chmod 745 ~
chmod 700 ~/certs/testconn
chmod 700 ~/certs/pubsub
chmod 700 ~/certs/jobs
AWS Cliの設定
#AWS Cli(※Ver2である必要があるようです)で以下の情報を設定します。
- Access Key ID
- Secret Access Key
- AWS region code
- output format (jsonで良い)
以下のコマンドを実行します。
aws configure
AWSアカウントの情報を入力します。
AWS Access Key ID [****************YXYX]: your Access Key ID
AWS Secret Access Key [****************YXYX]: your Secret Access Key
Default region name [ap-northeast-1]: your AWS region code
Default output format [json]: json
デバイス証明書ファイルを作成およびダウンロードする
#次のコマンドを入力して、デバイス証明書ファイルを作成します。
mkdir ~/certs/testconn
aws iot create-keys-and-certificate \
--set-as-active \
--certificate-pem-outfile "~/certs/testconn/device.pem.crt" \
--public-key-outfile "~/certs/testconn/public.pem.key" \
--private-key-outfile "~/certs/testconn/private.pem.key"
次のようなレスポンスが返されるので、後で使用できるように「certificateArn」の値を記録しておきます。
{
    "certificateArn": "arn:aws:iot:ap-northeast-1:XXXXXXXX:cert/xxxxxxxxxxxxxxxxxxxxxxxxxxxxxxxxxxxxxxxxxxxxx",
    "certificateId": "xxxxxxxxxxxxxxxxxxxxxxxxxxxxxxxxxxxxxx",
    "certificatePem": "-----BEGIN CERTIFICATE-----\xxxxxxxxxxxxxxxxxx_SHORTENED_FOR_EXAMPLE_Lgn4jfgtS\n-----END CERTIFICATE-----\n",
    "keyPair": {
        "PublicKey": "-----BEGIN PUBLIC KEY-----\xxxxxxxxxxxxxxxxxxx_SHORTENED_FOR_EXAMPLE_ImwIDAQAB\n-----END PUBLIC KEY-----\n",
        "PrivateKey": "-----BEGIN RSA PRIVATE KEY-----\xxxxxxxxxxxxxxxxxxx_SHORTENED_FOR_EXAMPLE_T9RoDiukY\n-----END RSA PRIVATE KEY-----\n"
    }
}
証明書ディレクトリとそのファイルに対するアクセス許可を設定します。
chmod 745 ~
chmod 700 ~/certs/testconn
chmod 644 ~/certs/testconn/*
chmod 600 ~/certs/testconn/private.pem.key
AWS IoT リソースの作成
#次のコマンドを入力して、AWS アカウント のデバイスデータエンドポイントのアドレスを取得します。
aws iot describe-endpoint --endpoint-type IoT:Data-ATS
次のようなレスポンスが返されるので、後で使用できるように「endpointAddress」の値を記録しておきます。
{
    "endpointAddress": "xxxxxxxxxx-ats.iot.ap-northeast-1.amazonaws.com"
}
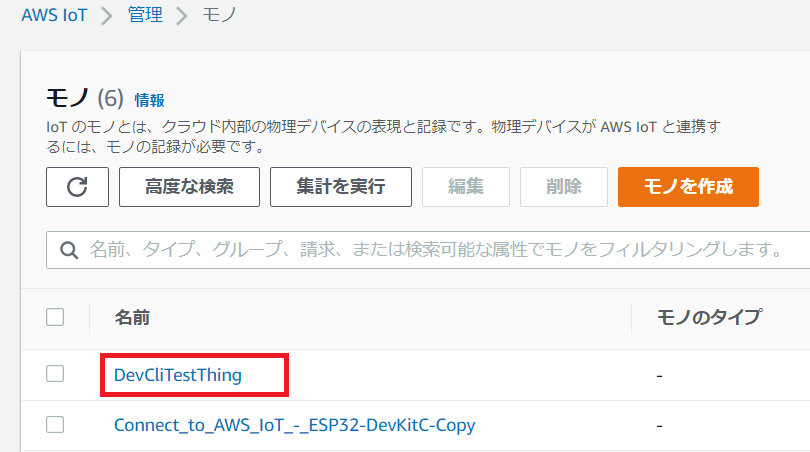
次のコマンドを入力して、AWS IoT のモノのリソースを作成します。
aws iot create-thing --thing-name "DevCliTestThing"
AWS コンソールを開き、IoTの「モノ」が作成されていることを確認します。
AWS IoT ポリシーの作成
#Jetson Nano上で、テキストエディタを使って
~/policies/dev_cli_test_thing_policy.json
というファイルを作成し、次のデータを書き込みます。
{
    "Version": "2012-10-17",
    "Statement": [
        {
            "Effect": "Allow",
            "Action": [
                "iot:Publish",
                "iot:Subscribe",
                "iot:Receive",
                "iot:Connect"
            ],
            "Resource": [
                "*"
            ]
        }
    ]
}
次のコマンドを実行して、AWS IoT ポリシーを作成します。
aws iot create-policy \
--policy-name "DevCliTestThingPolicy" \
--policy-document "file://~/policies/dev_cli_test_thing_policy.json"
AWS コンソールを開き、ポリシーが作成されていることを確認します。

次のコマンドを実行して、ポリシーをデバイス証明書にアタッチします。
(「certificateArn」の部分は前に保存しておいた値に置き換えます)
aws iot attach-policy \
--policy-name "DevCliTestThingPolicy" \
--target "certificateArn"
aws iot attach-thing-principal \
--thing-name "DevCliTestThing" \
--principal "certificateArn"
設定ファイルを作成する
#設定ファイルを作成して AWS IoT Device Client をテストします。
以下のフォルダを作成します。
mkdir ~/dc-configs
chmod 745 ~/dc-configs
Jetson Nano上で、テキストエディタで
~/dc-configs/dc-testconn-config.json
を作成し、以下のデータを書き込みます。
(「endpoint」の部分は前に保存しておいたものに書き換えます)
{
  "endpoint": "xxxxxxxxx-ats.iot.ap-northeast-1.amazonaws.com",
  "cert": "~/certs/testconn/device.pem.crt",
  "key": "~/certs/testconn/private.pem.key",
  "root-ca": "~/certs/AmazonRootCA1.pem",
  "thing-name": "DevCliTestThing",
  "logging": {
    "enable-sdk-logging": true,
    "level": "DEBUG",
    "type": "STDOUT",
    "file": ""
  },
  "jobs": {
    "enabled": false,
    "handler-directory": ""
  },
  "tunneling": {
    "enabled": false
  },
  "device-defender": {
    "enabled": false,
    "interval": 300
  },
  "fleet-provisioning": {
    "enabled": false,
    "template-name": "",
    "template-parameters": "",
    "csr-file": "",
    "device-key": ""
  },
  "samples": {
    "pub-sub": {
      "enabled": true,
      "publish-topic": "test/dc/pubtopic",
      "publish-file": "",
      "subscribe-topic": "test/dc/subtopic",
      "subscribe-file": ""
    }
  },
  "config-shadow": {
    "enabled": false
  },
  "sample-shadow": {
    "enabled": false,
    "shadow-name": "",
    "shadow-input-file": "",
    "shadow-output-file": ""
  }
}
ファイルのアクセス権を以下のように設定します。
chmod 644 ~/dc-configs/dc-testconn-config.json
MQTTクライアントで確認する
#AWS IoT コンソールで、MQTTテストクライアントを選択し、「トピックをサブスクライブする」タブのトピックのフィルターに「#」を入力し、サブスクライブをクリックして、すべての MQTTトピックをサブスクライブします。
Jetson Nanoのターミナルから「AWS IoT Device Client」を実行します。
cd ~/aws-iot-device-client/build
./aws-iot-device-client --config-file ~/dc-configs/dc-testconn-config.json
AWS側のサブスクリプションウィンドウで、トピック「test/dc/pubtopic」にメッセージ「Hello World!」が送信されたことを確認します。
(形式エラーが出ていますが、とりあえずは気にしません)

「トピックに公開する」も実行してみます。
以下のように設定し、実行ボタンを押します。
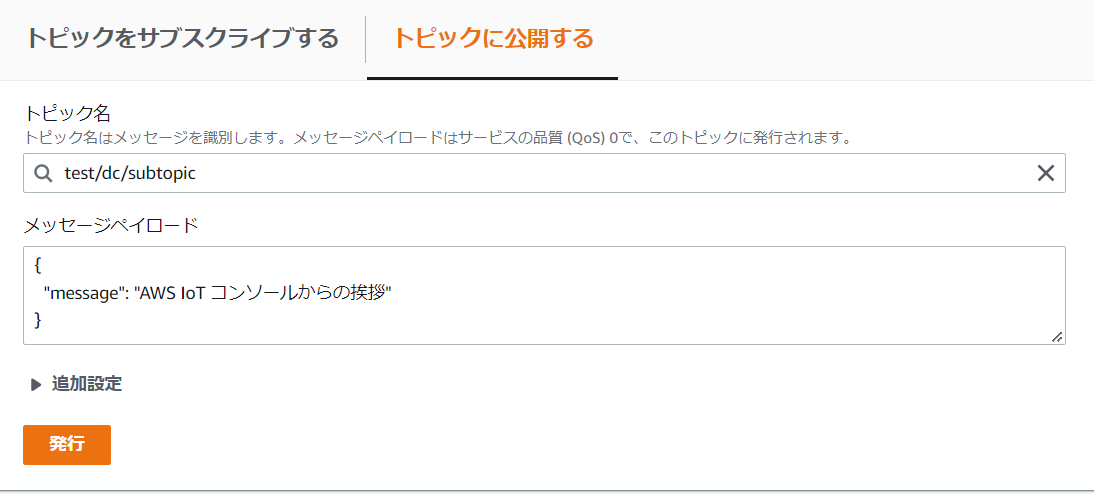
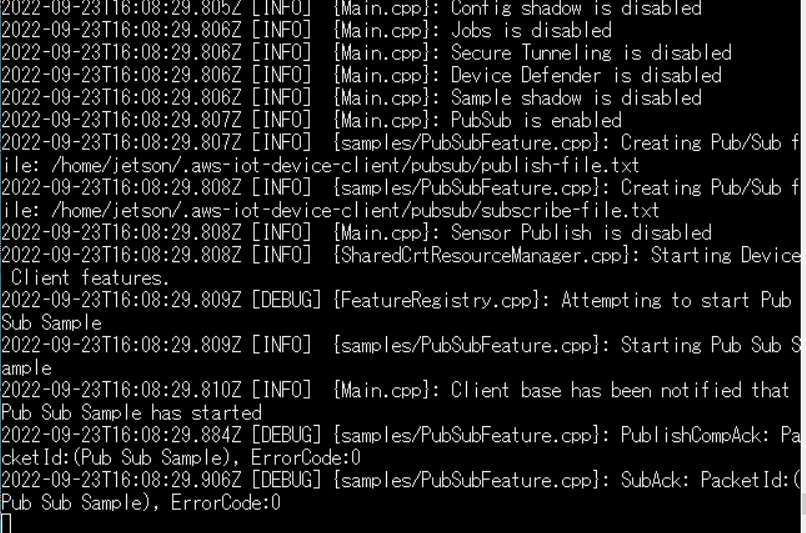
Jetson Nanoのターミナル上に以下のようなメッセージが表示されました。
データを受信したことがわかります。

まとめ
#AWS IoT Device Client を使ってJetson NanoとAWS IoT Coreの間でMQTT通信を行うことが出来ました。
AWS IoT Device Client は簡単にPoCを実施できると謳っていますが、インストールと設定はかなり手間のかかる作業だと感じました。
サービスがリリースされてまだそれほど時間が経っていないので、今後の改善に期待したいところです。
IoTに関するチュートリアルや実践テクニックをまとめています。
IoT活用の参考になれば幸いです。