Creating a Universal TUI Application with Deno Tui
Back to TopTo reach a broader audience, this article has been translated from Japanese.
You can find the original version here.
Introduction
#Deno Tui is a Deno library for creating TUI (Terminal User Interface) applications.
GitHub - Im-Beast/deno_tui: 🦕 Deno module for creating Terminal User Interfaces
TUI is a UI that operates literally in the terminal, and many people may have used it in Linux installers, etc.
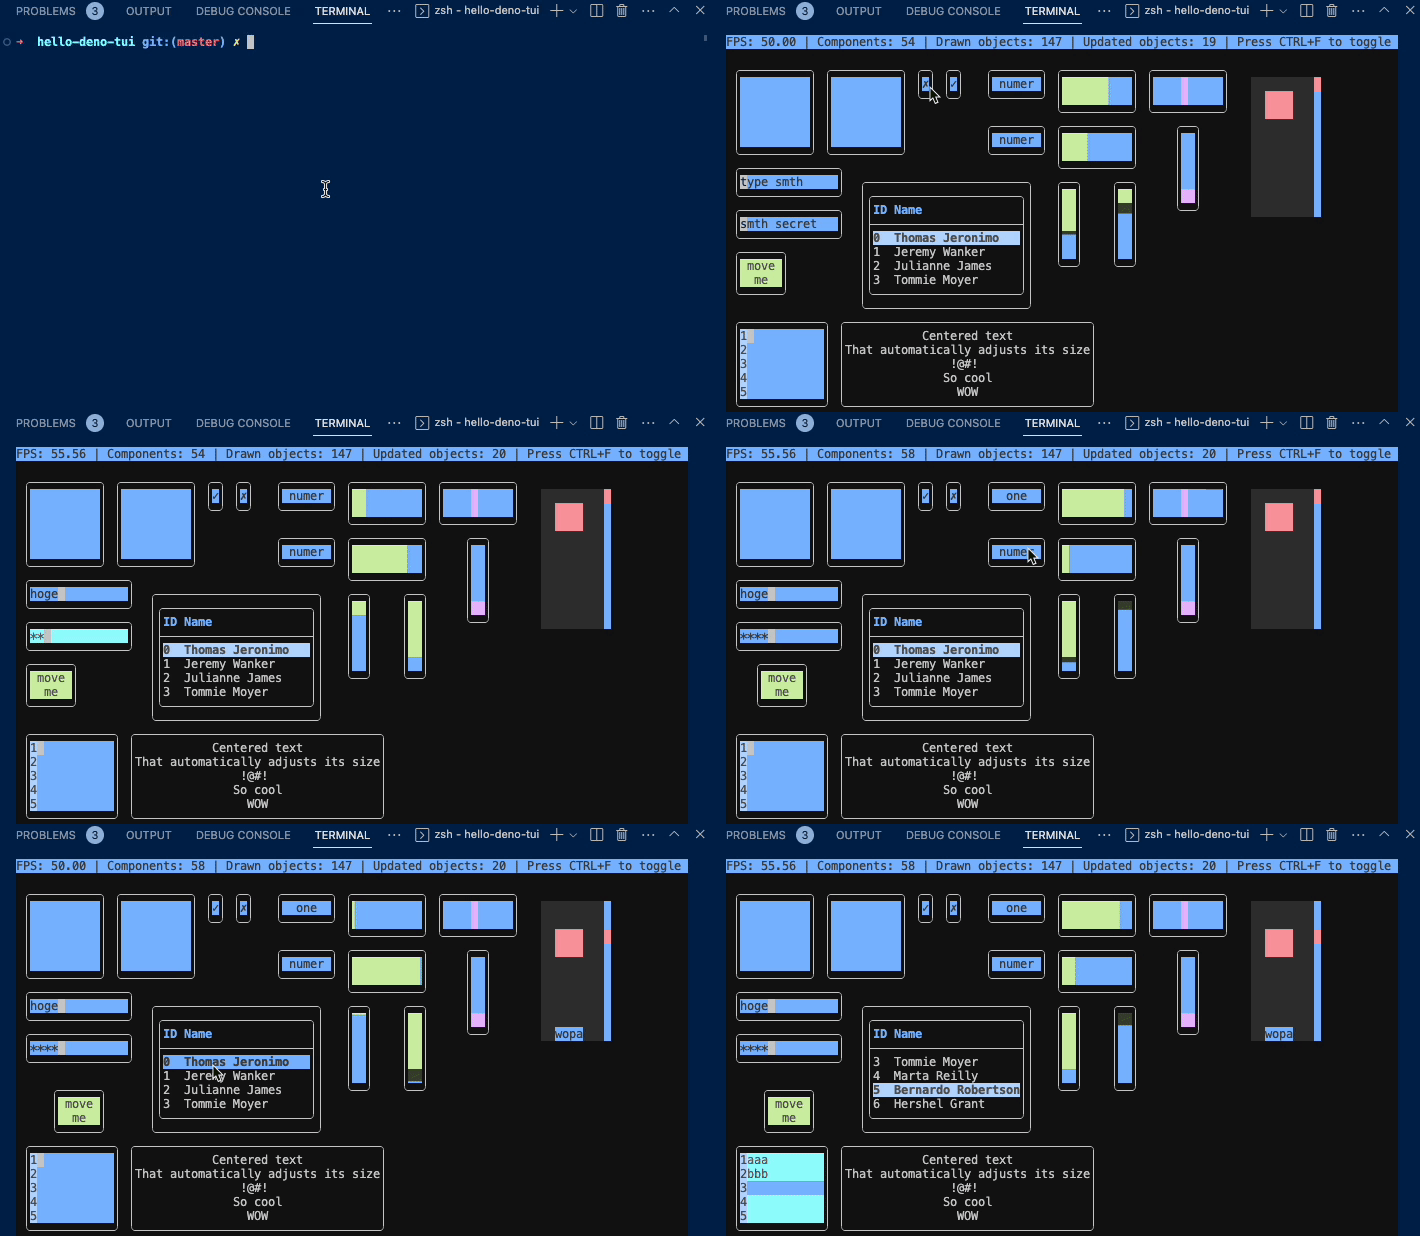
Here is the Deno Tui Demo sample in action.
Mouse operations are also possible, making it quite a rich UI. This capture is from the macOS terminal (specifically the VS Code terminal), but of course, it works properly in Windows Terminal as well.
The author loves using Tig for Git operations, which is also a TUI application.
Deno Tui APIs
#Core APIs for rendering and event handling are in the following module.
https://deno.land/x/tui@2.1.4/mod.ts
Components like buttons and text boxes are in a separate module.
https://deno.land/x/tui@2.1.4/src/components/mod.ts
Crayon is recommended for UI styling, but it is not mandatory.
GitHub - crayon-js/crayon: 🖍️ Terminal styling done light and fast.
Sample Operation Confirmation
#First, let's run the sample described in the README.
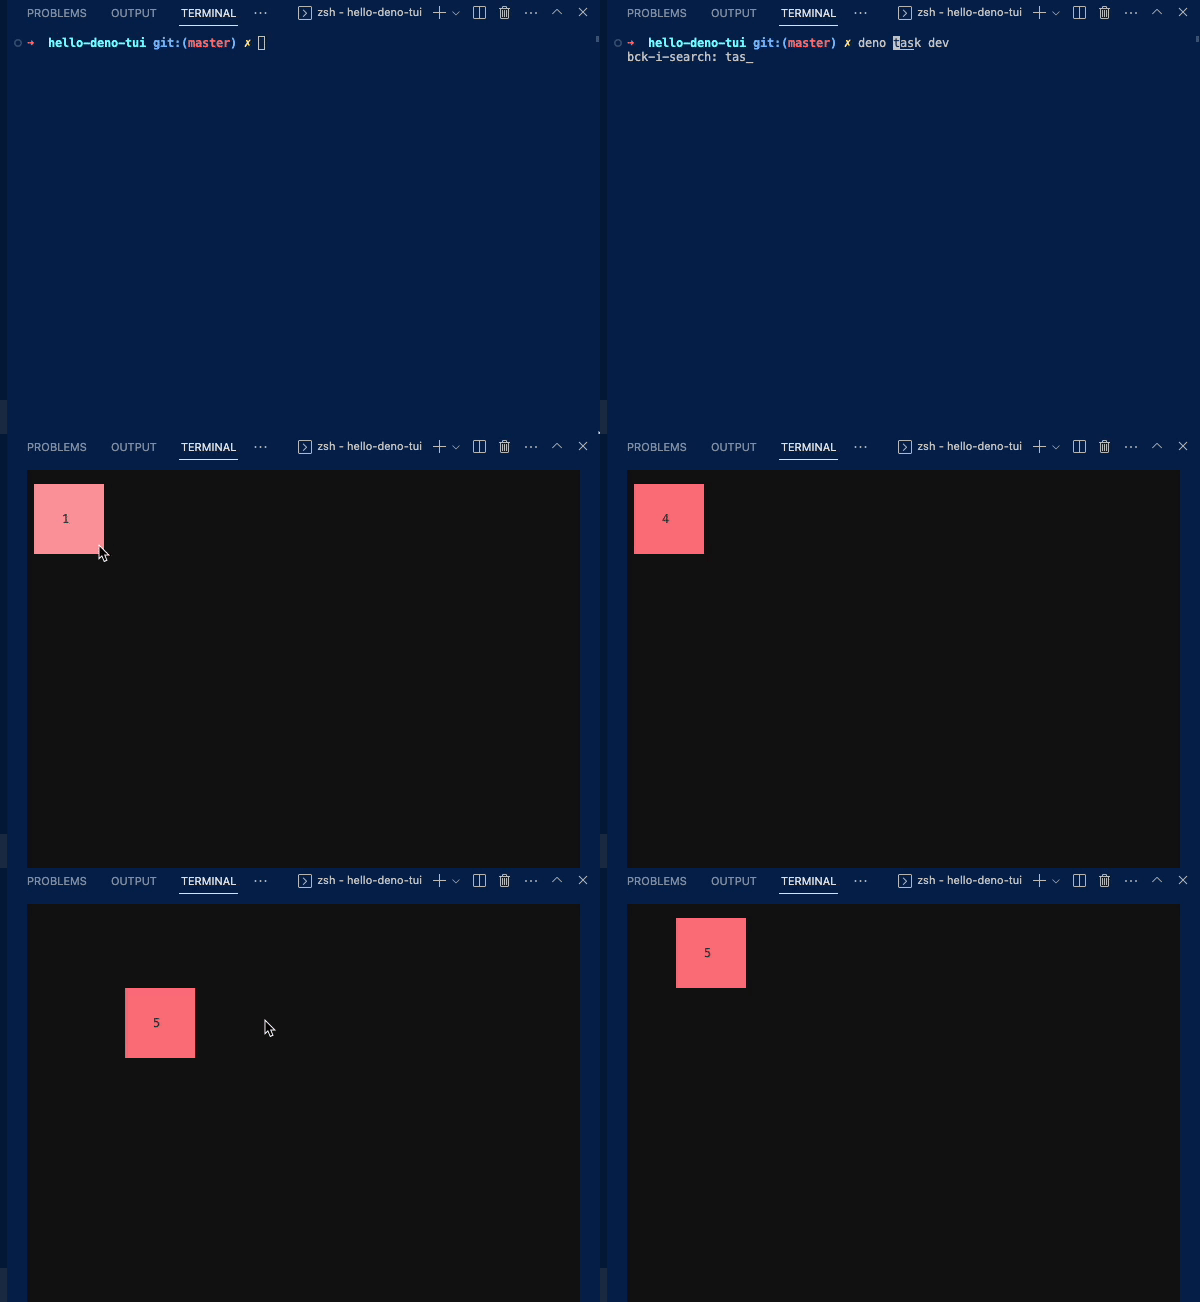
It draws a button and adds the following behavior:
- The button label's value increments when it becomes active by a mouse or key event.
- The button moves according to mouse drag.
Here is the source code.
- main.ts
import { crayon } from "https://deno.land/x/crayon@3.3.3/mod.ts";
import { Tui,  handleInput, handleKeyboardControls, handleMouseControls, Signal, Computed } from "https://deno.land/x/tui@2.1.4/mod.ts";
import { Button } from "https://deno.land/x/tui@2.1.4/src/components/mod.ts";

const tui = new Tui({             // 1
  style: crayon.bgBlack,
  refreshRate: 1000 / 60,
});

handleInput(tui);                 // 2
handleMouseControls(tui);
handleKeyboardControls(tui);

tui.dispatch();                   // 3
tui.run();                        // 4

const number = new Signal(0);     // 5

const button = new Button({       // 6
  parent: tui,
  zIndex: 0,
  label: {
    text: new Computed(() => number.value.toString()),
  },
  theme: {
    base: crayon.bgRed,
    focused: crayon.bgLightRed,
    active: crayon.bgYellow,
  },
  rectangle: {
    column: 1,
    row: 1,
    height: 5,
    width: 10,
  },
});

button.state.subscribe((state) => {  // 7
  if (state === "active")  {
    ++number.value;
  }
});

button.on("mousePress", ({ drag, movementX, movementY }) => { // 8
  if (!drag) return;

  // Use peek() to get signal's value when it happens outside of Signal/Computed/Effect
  const rectangle = button.rectangle.peek();
  rectangle.column += movementX;
  rectangle.row += movementY;
});
- Declares the root element of the app with Tui. Sets the background color and refresh rate.
- Handles mouse and keyboard input.
- Allows termination with Ctrl+C (handling SIGTERM, etc.).
- Runs the application.
- Generates a Signal object for the button label's value.
- Defines the button. The label is set to reactively reflect the Signal defined in step 5 using a Computed object. Also sets the theme and rectangle.
- Sets an event for the button's state change, incrementing the Signal's value when it becomes active.
- Handles mouse events to change the button's rectangle according to mouse movement. Calls
peek()to get the Signal's value when it occurs outside Signal/Computed/Effect.
As described above, the GUI part is declarative, allowing reactive processing, and you can write event handling callbacks for components like buttons, making it a modern GUI library.
Creating a Simple Application
#I wrote an application that lists Kubernetes Pods in a Table. It displays the result of kubectl in a Table and reflects the index of the selected row in a label.
Here is the full source code.
- kube.ts
import { crayon } from "https://deno.land/x/crayon@3.3.3/mod.ts";
import { Tui, handleInput, handleKeyboardControls, handleMouseControls, Signal, Computed} from "https://deno.land/x/tui@2.1.4/mod.ts"
import { Button, Label, Table } from "https://deno.land/x/tui@2.1.4/src/components/mod.ts";

const tui = new Tui({
  style: crayon.bgBlack,
  refreshRate: 1000 / 60,
});

handleInput(tui);
handleMouseControls(tui);
handleKeyboardControls(tui);
tui.dispatch();
tui.run();

new Button({
  parent: tui,
  zIndex: 0,
  label: {
    text: "refresh",
  },
  theme: {
    base: crayon.bgRed,
    focused: crayon.bgLightRed,
    active: crayon.bgYellow,
  },
  rectangle: {
    column: 1,
    row: 1,
    height: 1,
    width: 10,
  },
}).state.subscribe(async (state) => {        // 1
  if (state == "active") {
    const rows = await kubeOutput();
    createTable(rows);
  }
});

const selected = new Signal(0);              // 2

new Label({
  parent: tui,
  text: new Computed(() => "selected: " + selected.value.toString()),  // 3
  align: {
    horizontal: "center",
    vertical: "center",
  },
  theme: {
    base: crayon.magenta,
  },
  rectangle: {
    column: 1,
    row: 3,
  },
  zIndex: 0,
 });

let table: Table;

function createTable(data: string[][]) {
  if (table) {
    return;
  }
  table = new Table({                                   // 4
    parent: tui,
    theme: {
      base: crayon.bgBlack.white,
      frame: { base: crayon.bgBlack },
      header: { base: crayon.bgBlack.bold.lightBlue },
      selectedRow: {
        base: crayon.bold.bgBlue.white,
        focused: crayon.bold.bgLightBlue.white,
        active: crayon.bold.bgMagenta.black,
      },
    },
    rectangle: {
      column: 1,
      row: 4,
      height: data.length + 4 < 10 ? data.length + 4 : 10,  // 5
    },
    headers: [                                              // 6
      { title: "NAMESPACE" },
      { title: "NAME" },
      { title: "READY" },
      { title: "STATUS" },
    ],
    data: data,                                             // 7
    charMap: "rounded",
    zIndex: 0,
  });
  table.state.subscribe((state) => {                        // 8
    if (state == "active") {
      selected.value = table.selectedRow.value;
    }
  });
}

async function kubeOutput(): Promise<string[][]> {
  const { code, stdout, stderr } = await new Deno.Command(  // 9
    "kubectl", {args: ["get", "pods", "-A"]}
  ).output();

  let rows: string[][] = [];
  if (code === 0) {
    const lines = new TextDecoder().decode(stdout).split("\n");
    lines.shift(); // remove header
    rows = lines.map((line) => line.split(/\s+/).slice(0, 4)).filter(row => row.length > 3);
  }
  return rows;
}
- Defines a Button and handles the event when the button becomes active. Passes the output result of
kubectlto the function for creating the table. - Creates a Signal object to manage the selected row of the Table.
- Defines a Label and sets a Computed object so that the Label's text is rewritten when the selected row of the Table changes.
- Defines the Table.
- The height attribute specification of TableOptions' rectangle is a bit tricky, but it adjusts to the length of the data array plus the length for drawing the header.
- The table headers specify the first four columns from the output of
kubectl get pod. - Sets the data to be displayed.
- Updates the Signal object when the selected row of the Table changes. This updates the display of the Label defined in step 3.
- Executes
kubectl get pods -Awith Deno.Command and stores the result in a 2D string array.
Deno.Command is a standard API in Deno for executing external programs. It is also introduced in the following article.
Trying Out the Stabilized Process Launch API Deno.Command in Deno 1.31
To execute, specify the --allow-run flag.
deno run --allow-run kube.ts
Build and Distribute as a Single Binary
#Using Deno's compile, you can distribute the created TUI application as a single binary. Since this application requires the --allow-run flag, specify it during compilation as well.
deno compile --allow-run kube.ts
The generated binary is over 100MB, but it is convenient for distribution.
$ ls -lh kube
-rwxrwxrwx  1 kondoh  staff   101M 11  3 12:24 kube
You can execute it with the following command.
./kube
By cross-compiling, you can create and distribute binaries for Windows and Linux.
Conclusion
#Deno Tui is quite a unique UI library. The Table API could be a bit more user-friendly.
Since TUI applications can be distributed as single binaries, they might be suitable for tools for system operations.


