rclone - CLI で クラウドストレージのファイルを同期する (Google Drive 編)
Back to Topはじめに
#Google Drive の特定のフォルダを定期的に別の場所に同期したいということが最近ありました。最初は GAS(Google App Script) でスクリプトを書こうかなと思いましたが、ちょっと調べると rclone というツールがあることを知りました。これを使うと rsync っぽく手軽に同期できそうということで試してみました。
結論から先に言うと、設定さえしてしまえば以下のコマンドで Google Drive のフォルダ ID を指定してローカルへの同期が可能です(逆にリモートへの同期も可能)。
rclone sync mydrive: ./foo \
   --drive-root-folder-id ************************* \
rclone とは
#rclone はクラウドストレージのファイルを同期するための Go で書かれた汎用 CLI ツールです。Linux をはじめ、macOS、Windows など各プラットフォームでバイナリが提供されており、Google ドライブだけでなく 70 以上のクラウドストレージでサポートされているそうです。
シェルで使えるのはもちろん、HTTP Server として起動して REST API をホストすることも可能です。
GitHub リポジトリを見るとコントリビュータが800人を超えていて活発に開発されているようです。
インストール
#macOS では Homebrew でもインストール可能です。
brew install rclone
Google Drive 用のセットアップ
#rclone config で対話的に設定していきます。
rclone config
リモート設定を新規作成するので、n を入力して Enter を押します。
2025/07/16 13:05:55 NOTICE: Config file "/Users/kondoh/.config/rclone/rclone.conf" not found - using defaults
No remotes found, make a new one?
n) New remote
s) Set configuration password
q) Quit config
n/s/q>  # n を入力して Enter
リモート設定の名前をつけます。ここでは mydrive としました。
Enter name for new remote.
name>  # mydrive など名前を入力
設定するストレージをリストから選択します。Google Drive は22でした。22 か Google Drive を入力して Enter を押します。
Option Storage.
Type of storage to configure.
Choose a number from below, or type in your own value.
 1 / 1Fichier
   \ (fichier)
 2 / Akamai NetStorage
   \ (netstorage)
   :
Storage>  # 列挙されている番号か、Google Drive と入力
Google Application のクライアント ID を聞いてきます。今回は使用しないので、未入力で Enter を押します。
Option client_id.
Google Application Client Id
Setting your own is recommended.
See https://rclone.org/drive/#making-your-own-client-id for how to create your own.
If you leave this blank, it will use an internal key which is low performance.
Enter a value. Press Enter to leave empty.
client_id> # 未入力で Enter
Google Application のクライアントシークレットを聞いてきます。今回使用しないので、未入力で Enter。
Option client_secret.
OAuth Client Secret.
Leave blank normally.
Enter a value. Press Enter to leave empty.
client_secret> # 未入力で Enter
スコープを聞かれます。今回は、ダウンロード専用ということで Read-only acccess で事足りるため 2 を入力して Enter。
Option scope.
Comma separated list of scopes that rclone should use when requesting access from drive.
Choose a number from below, or type in your own value.
Press Enter to leave empty.
 1 / Full access all files, excluding Application Data Folder.
   \ (drive)
 2 / Read-only access to file metadata and file contents.
   \ (drive.readonly)
   / Access to files created by rclone only.
 3 | These are visible in the drive website.
   | File authorization is revoked when the user deauthorizes the app.
   \ (drive.file)
   / Allows read and write access to the Application Data folder.
 4 | This is not visible in the drive website.
   \ (drive.appfolder)
   / Allows read-only access to file metadata but
 5 | does not allow any access to read or download file content.
   \ (drive.metadata.readonly)
scope> # 必要なスコープの番号を入力
Google Cloud のサービスアカウントを聞いてきます。今回使用しないので、未入力で Enter。
Option service_account_file.
Service Account Credentials JSON file path.
Leave blank normally.
Needed only if you want use SA instead of interactive login.
Leading `~` will be expanded in the file name as will environment variables such as `${RCLONE_CONFIG_DIR}`.
Enter a value. Press Enter to leave empty.
service_account_file> # SA を使わない場合は未入力で Enter
アドバンス設定を編集するか聞いてきます。しないので、未入力で Enter。
Edit advanced config?
y) Yes
n) No (default)
y/n> # アドバンス設定不要の場合未入力で Enter
ブラウザを使用して rclone を Google アカウントで自動的に認証するかを聞かれます。デフォルトが Yes なので未入力で Enter。
Use web browser to automatically authenticate rclone with remote?
 * Say Y if the machine running rclone has a web browser you can use
 * Say N if running rclone on a (remote) machine without web browser access
If not sure try Y. If Y failed, try N.

y) Yes (default)
n) No
y/n>  # ブラウザで認証するので未入力で Enter
以下のメッセージの後、自動でブラウザ画面が開きます。デフォルトブラウザが Google アカウントにログインしていないなどのケースでは、メッセージに表示されている URL (下記の例では 127.0.0.1:53682) を手動で入力することも可能です。
2025/06/16 13:20:52 NOTICE: Make sure your Redirect URL is set to "http://127.0.0.1:53682/" in your custom config.
2025/06/16 13:20:52 NOTICE: If your browser doesn't open automatically go to the following link: http://127.0.0.1:53682/auth?state=Az0tpk3imw8yP-UJ34bpJA
2025/06/16 13:20:52 NOTICE: Log in and authorize rclone for access
2025/06/16 13:20:52 NOTICE: Waiting for code...
2025/06/16 13:21:30 NOTICE: Got code
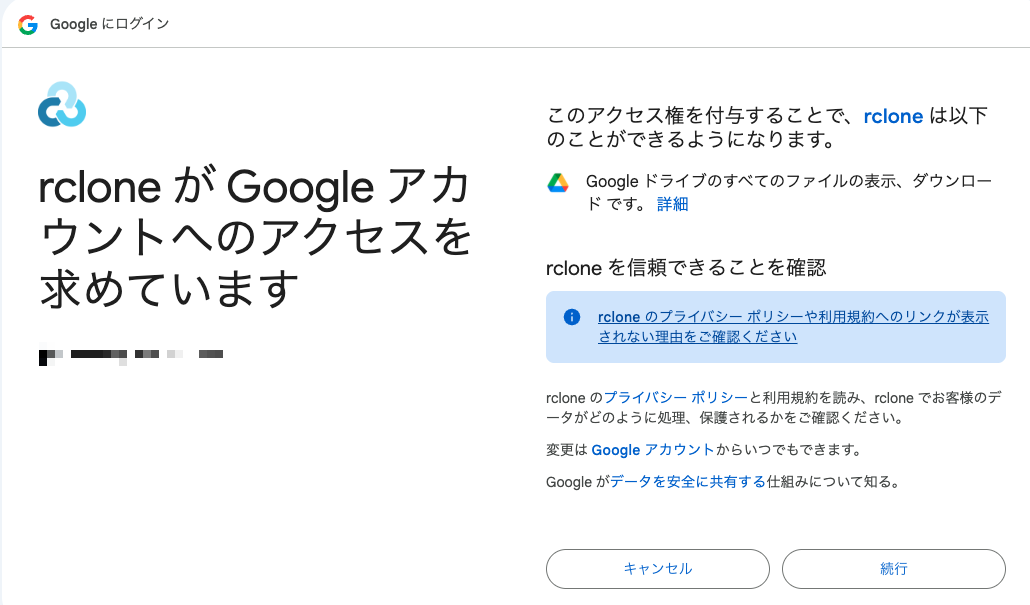
「続行」をクリックし、Success 表示されれば認証完了です。
続いて、共有ドライブの設定を聞かれます。何もしないので未入力で Enter。
Configure this as a Shared Drive (Team Drive)?

y) Yes
n) No (default)
y/n> # 未入力で Enter
設定が完了し、OAuth2 のアクセストークン、リフレッシュトークンが表示されます。これは、macOS の場合、~/.config/rclone/rclone.conf に保存されます。
Configuration complete.
Options:
- type: drive
- scope: drive.readonly
- token: {"access_token":"xxxxxxxxx","token_type":"Bearer","refresh_token":"************","expiry":"2025-07-16T14:21:29.59725+09:00"}
- team_drive:
この設定をそのままにするか、編集するか、削除するかを聞かれます。そのままにするので未入力で Enter。
Keep this "mydrive" remote?
y) Yes this is OK (default)
e) Edit this remote
d) Delete this remote
y/e/d> # 未入力で Enter
mydrive という名前で設定が作られたので q でメニューを終了します。
Current remotes:

Name                 Type
====                 ====
mydrive              drive

e) Edit existing remote
n) New remote
d) Delete remote
r) Rename remote
c) Copy remote
s) Set configuration password
q) Quit config
e/n/d/r/c/s/q> # q で終了
以上で Google Drive の設定は完了です。
ここでは OAuth2 の設定をしましたが、ファイアウォールなど環境の問題で認証が通らない場合、Google Cloud Console で専用のサービスアカウント(SA)を作成して利用する方法もあります(上記設定では未入力でスキップしたもの)。ただし、SA に対象のファイルやフォルダを共有する必要があり、組織のドメインポリシーによっては利用できないことがあります。
また、ドメインポリシーにより Drive API の使用が禁止されている場合は rclone の実行自体できません。
Google Drive への接続を試す
#remote 設定名 mydrive を指定して、ディレクトリ一覧を取得するコマンドです。Google Drive の場合、マイドライブ配下のディレクトリが1階層分取得されます。再起的に取得する場合は -R を指定します。
rclone lsd mydrive:
会社の Google Drive の場合は以下のような感じで取れました。
           0 2025-03-03 14:53:31        -1 Google AI Studio
           0 2025-06-23 17:47:11        -1 Meet Recordings
           0 2015-07-07 07:38:55        -1 PreSales
           0 2015-09-08 00:07:01        -1 Projects
           0 2016-01-24 07:47:45        -1 books
           0 2022-12-27 09:37:35        -1 デベロッパーサイト
           0 2014-05-29 08:40:18        -1 事務処理
           0 2018-11-26 04:21:22        -1 社内資料
フォルダの ID を --drive-root-folder-id で指定することで、任意のフォルダ配下のリストを取得できます。Google Drive の場合、https://drive.google.com/drive/u/1/folders/<フォルダID> の形式の URL になっていますので、以下のように指定すれば、ディレクトリを除くファイル一覧が取得できます。
rclone ls mydrive: --drive-root-folder-id <フォルダID>
デフォルトでは再起的に全ファイルをリストしてしまいますので、必要に応じて --max-depth で深さを指定します。
rclone ls mydrive: --max-depth 1 --drive-root-folder-id <フォルダID>
「デベロッパーサイト」のフォルダを指定すると、過去のイベントの集計用 Excel ファイルが格納されていることが分かります。
       -1 2024春の新人向け連載のXでの反応.xlsx
       -1 アドカレ2022記事別インプレッション.xlsx
       -1 豆蔵デベロッパーサイト集計.xlsx
Google Drive からファイルをコピー
#フォルダを指定して、リアルタイムに進捗を表示しながらダウンロードするには以下のようにします。
rclone copy mydrive: dest \
  --drive-root-folder-id <フォルダID> \
  --progress
デベロッパーサイトのフォルダを指定して実行。
rclone copy mydrive: ./analytics \
   --drive-root-folder-id ************************* \
   --progress
ダウンロードがリアルタイムな進捗表示とともに実行されます。
Transferred:   	  399.134 KiB / 399.134 KiB, 100%, 28.509 KiB/s, ETA 0s
Checks:                 0 / 0, -, Listed 43
Transferred:           52 / 61, 85%
Elapsed time:        14.5s
Transferring:
 * X-Analytics/tweet_acti…240401_20240501_ja.csv: transferring
 * X-Analytics/tweet_acti…240501_20240601_ja.csv: transferring
 * X-Analytics/tweet_acti…40501_20240601_ja.xlsx: transferring
 *           X-Analytics/X投稿アナリティクス2024年10月.xlsx: transferring
Google Drive とファイルを同期
#rsync のように使うには、サブコマンド sync を使用します。
ローカルのフォルダに同期したい場合、copy を sync に置き換えるだけです。初回は copy と同様全量取得します。
rclone sync mydrive: ./analytics \
   --drive-root-folder-id ************************* \
   --progress
全量なので32.2秒かかりました。
Transferred:   	  467.332 KiB / 467.332 KiB, 100%, 18.135 KiB/s, ETA 0s
Checks:                 0 / 0, -, Listed 43
Transferred:           68 / 68, 100%
Elapsed time:        32.2s
ドライブ側のファイルを一つ更新して、rsync を再実行してみました。更新されたファイルのみダウンロードされ、2.1秒で完了しました。
Transferred:   	   15.388 KiB / 15.388 KiB, 100%, 0 B/s, ETA -
Checks:                42 / 42, 100%, Listed 86
Transferred:            2 / 2, 100%
Elapsed time:         2.1s
メタ情報を取得
#前述のように Google Drive のファイルやフォルダには個々に ID が振られており、URL で参照できるようになっています。しかし、copy や sync でダウンロードしたファイルにはこのようなメタ情報がついておらず、URL と紐付けることができません。サブコマンド lsjson で別途取得して Path により関連づけるのがよさそうです。
rclone lsjson mydrive: \
   --drive-root-folder-id ******************* | jq -r
以下のように、ファイルの Path ごとに MimeType、作成日時、ディレクトリかファイルか、URL に使われる ID などが取得できます。
[
  {
    "Path": "2024春の新人向け連載のXでの反応.xlsx",
    "Name": "2024春の新人向け連載のXでの反応.xlsx",
    "Size": -1,
    "MimeType": "application/vnd.openxmlformats-officedocument.spreadsheetml.sheet",
    "ModTime": "2024-07-01T03:07:31.075Z",
    "IsDir": false,
    "ID": "********************************************"
  },
  {
    "Path": "X-Analytics",
    "Name": "X-Analytics",
    "Size": 0,
    "MimeType": "inode/directory",
    "ModTime": "2023-10-01T01:40:16.756Z",
    "IsDir": true,
    "ID": "********************************************"
  },
  {
    "Path": "アドカレ2022記事別インプレッション.xlsx",
    "Name": "アドカレ2022記事別インプレッション.xlsx",
    "Size": -1,
    "MimeType": "application/vnd.openxmlformats-officedocument.spreadsheetml.sheet",
    "ModTime": "2022-12-27T05:06:50.943Z",
    "IsDir": false,
    "ID": "********************************************"
  },
  {
    "Path": "豆蔵デベロッパーサイト集計.xlsx",
    "Name": "豆蔵デベロッパーサイト集計.xlsx",
    "Size": -1,
    "MimeType": "application/vnd.openxmlformats-officedocument.spreadsheetml.sheet",
    "ModTime": "2025-07-22T13:37:01.116Z",
    "IsDir": false,
    "ID": "********************************************"
  }
]
さいごに
#以上、rclone による Google Drive の同期方法の紹介でした。今回は、ダウンロードしか使いませんでしたが、もちろんアップロードも可能です。ローカルのファイルを定期的にクラウドストレージにバックアップ(および暗号化)するような使い方も簡単です。--dry-run オプション付きで実行して実際のファイルを操作する前にテストすることも可能です。
CI パイプラインで Google Drive のデータをメタデータとともに同期するといったユースケースでも有効だと思います。