尝试使用 JetBrains 的 Junie(入门篇)
Back to Top为了覆盖更广泛的受众,这篇文章已从日语翻译而来。
您可以在这里找到原始版本。
本文是2025年夏季接力连载的第11篇文章。
我是盐田,作为咖喱的配菜,与福神渍菜相比,我更喜欢腌渍小葱头。
今年4月,JetBrains 公司公开发布了 AI 代理 Junie。
作为 AI 代理,还有 Claude Code 和 Cursor 等。
我平时经常使用 IntelliJ IDEA,因此这次想写篇文章介绍 JetBrains 的 Junie。
什么是 Junie
#Junie 是 JetBrains 公司开发的自主型 AI 编程代理。
笔者之前曾使用过 JetBrains 的 AI Assistant。在 is 开发者网站上也曾发布过关于 AI Assistant 的文章。
与传统的代码补全或基于提示的代码生成不同,Junie 的特点在于它可以在理解整个项目上下文的基础上,从代码生成到测试执行都自主完成。
不过写到这里可能还不太好想象,简单地介绍到此,马上开始使用 Junie 吧。
需要说明的是,Junie 也支持 IntelliJ IDEA Community Edition,因此本文写作将使用免费版的 IntelliJ IDEA 和 Junie。
免费版可能会有功能限制,还请谅解。
除了 IntelliJ IDEA,Junie 也支持 JetBrains 的其他 IDE,例如 PyCharm 或 WebStorm 等。
此外,也可以在 Google 提供的 Android Studio 中使用。
安装 Junie
#前提是已安装 IntelliJ IDEA,下面从安装 Junie 开始。
没有任何复杂之处。启动 IntelliJ IDEA,在 Marketplace 中搜索 Junie 并安装插件。就是这么简单。
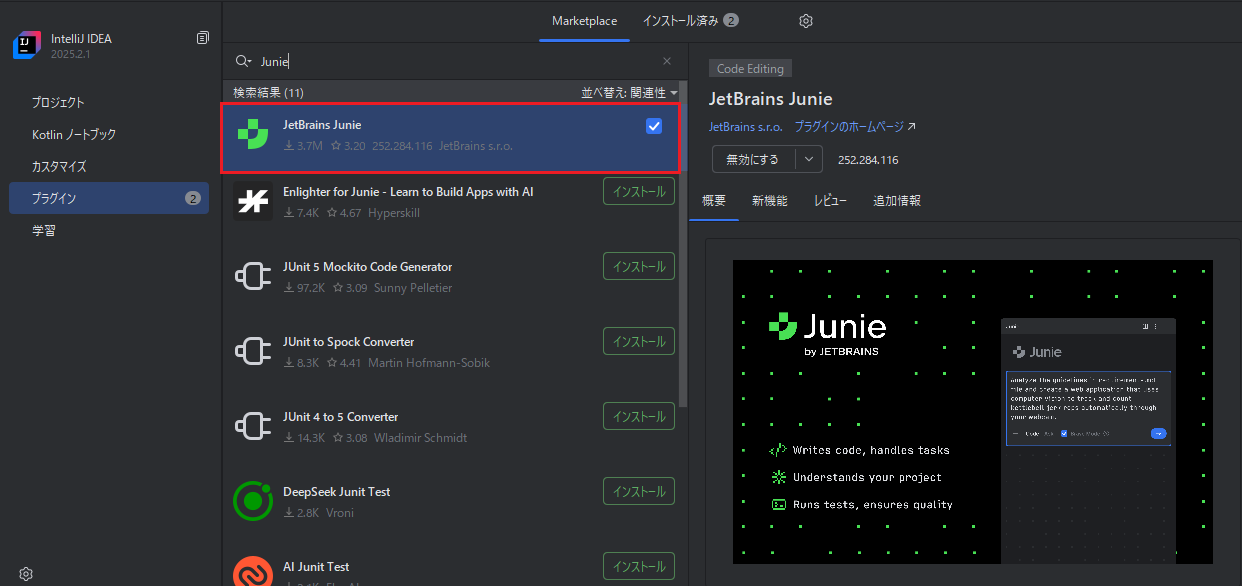
笔者使用的 IntelliJ IDEA 版本是 2025.2.1。
如果 Junie 安装不成功,请确认 IntelliJ IDEA 的版本号。
项目准备
#安装完 Junie 后,请使用 Spring Initializr 等工具准备一个空项目。
当然,也可以不是 Spring Boot 项目,只要在 IntelliJ IDEA 支持范围内,选择自己喜欢的即可。
本篇文章中,我将使用 Junie 来开发一个 REST API 的 Spring Boot 应用。
笔者准备的项目如下图,几乎是个空壳。
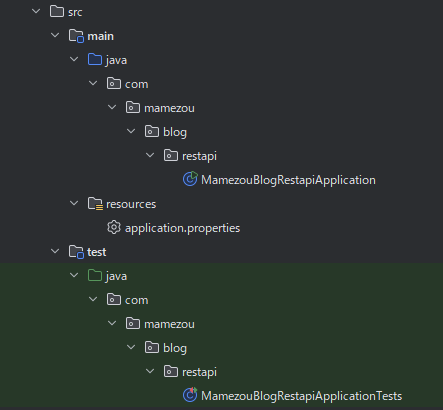
build.gradle 中只写了最少的依赖,没有包含 Spring MVC 或 Spring Data JPA 的启动器库。
dependencies {
  implementation 'org.springframework.boot:spring-boot-starter'
  compileOnly 'org.projectlombok:lombok'
  developmentOnly 'org.springframework.boot:spring-boot-devtools'
  annotationProcessor 'org.springframework.boot:spring-boot-configuration-processor'
  annotationProcessor 'org.projectlombok:lombok'
  testImplementation 'org.springframework.boot:spring-boot-starter-test'
  testRuntimeOnly 'org.junit.platform:junit-platform-launcher'
}
使用 Junie 之前
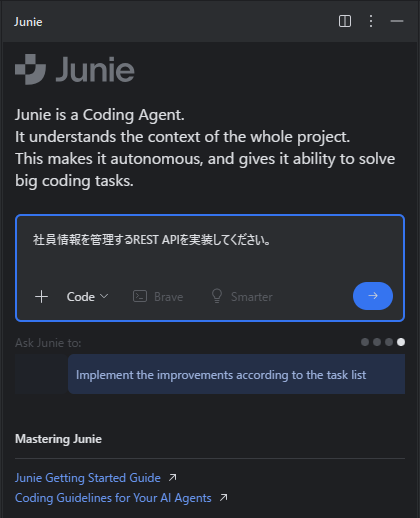
#在 IntelliJ IDEA 中打开刚才的项目后,你会在右侧边栏看到 Junie 的图标,点击它就能打开 Junie 工具窗口。
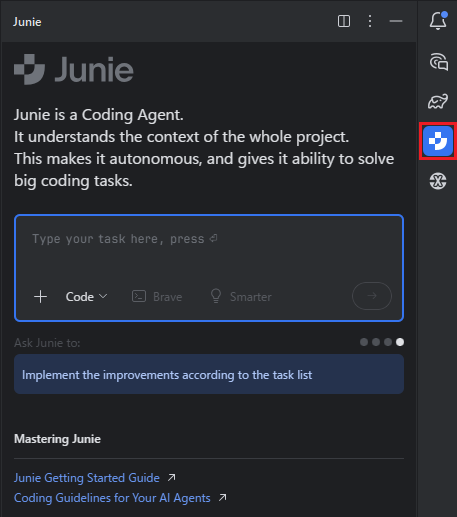
最初的印象是“啊,支持日语吗~”,看来 Junie 的确支持日语,算是安心了。
Junie 的运行模式
#Junie 有两种运行模式:“Code 模式”和“Ask 模式”。
| 运行模式 | 概述 |
|---|---|
| Code 模式 | Junie 自主执行从添加或编辑代码到运行测试的模式。 |
| Ask 模式 | 可以与 Junie 进行自然语言交互,就设计或实现方针等进行“咨询”的模式。 |
从 JetBrains 的官网或博客可以看到,他们设想的使用方式是先在 Ask 模式下确定设计方针,然后基于此在 Code 模式下实现和测试。由于时间关系,这次仅介绍 Code 模式。
Junie 使用的 LLM
#想查看 Junie 使用的 LLM 时打开了设置界面,发现默认选择的是 OpenAI 的 GPT-5。
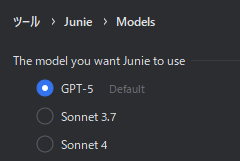
我打算不更改 Junie 的设置,继续使用 GPT-5。
试用 Junie
#下面开始体验一下使用 Junie 后,项目会如何变化。
我不多想,直接在提示框中输入了 请实现管理员工信息的 REST API。
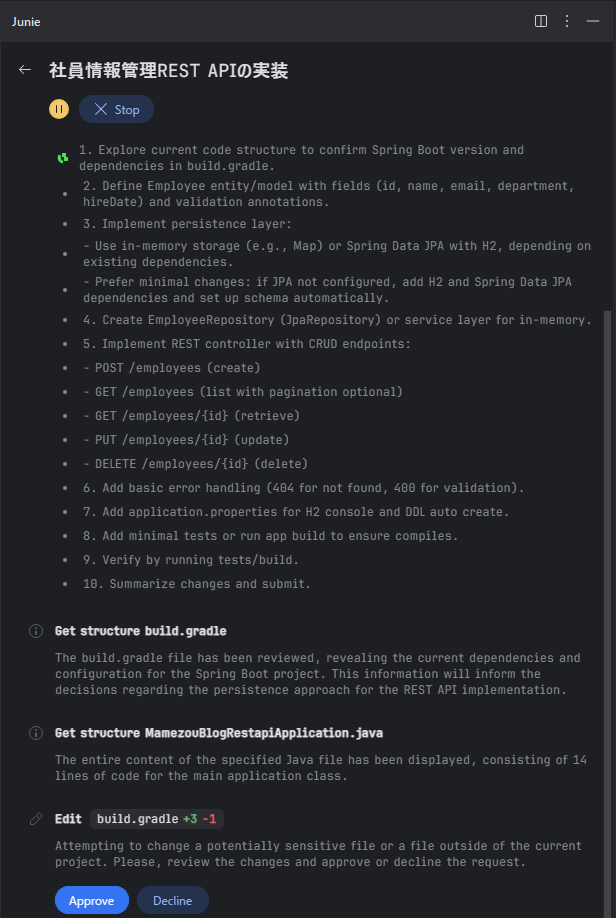
于是,生成了如下的计划步骤,并会按顺序执行每个步骤。
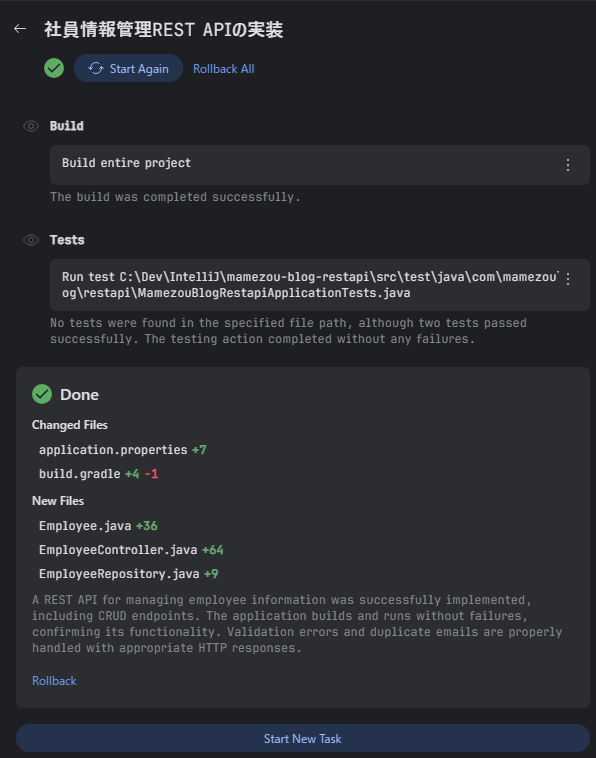
多次点击 Approve 按钮后,当构建及测试执行完成,所有步骤的完成情况都会被通知。
实际查看生成的代码时,令人大吃一惊,竟然在没有提供详细指示的情况下,已经齐备了处理员工信息(资源)所需的一整套源代码。除了 REST API,还存在实体类和存储库接口。
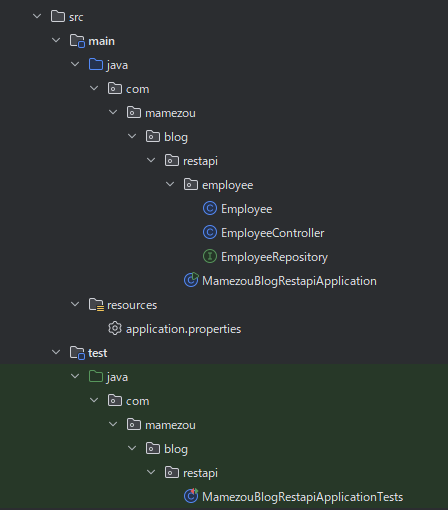
在此我暂且不讨论包结构和层结构。
@Entity
@Table(name = "employees")
@Data
@NoArgsConstructor
@AllArgsConstructor
public class Employee {
  @Id
  @GeneratedValue(strategy = GenerationType.IDENTITY)
  private Long id;

  @NotBlank private String name;

  @Email
  @NotBlank
  @Column(unique = true)
  private String email;

  @NotBlank private String department;

  @PastOrPresent private LocalDate hireDate;
}
public interface EmployeeRepository extends JpaRepository<Employee, Long> {
  Optional<Employee> findByEmail(String email);
}
@RestController
@RequestMapping("/employees")
public class EmployeeController {

  // ---------- <省略> ---------- //

  @PostMapping
  @ResponseStatus(HttpStatus.CREATED)
  public Employee create(@RequestBody @Valid Employee employee) {
    try {
      employee.setId(null);
      return repository.save(employee);
    } catch (DataIntegrityViolationException e) {
      throw new ResponseStatusException(HttpStatus.CONFLICT, "Email already exists");
    }
  }

  @GetMapping
  public List<Employee> list() {
    return repository.findAll();
  }

  @GetMapping("/{id}")
  public Employee get(@PathVariable Long id) {
    return repository
        .findById(id)
        .orElseThrow(() -> new ResponseStatusException(HttpStatus.NOT_FOUND));
  }

  @PutMapping("/{id}")
  public Employee update(@PathVariable Long id, @RequestBody @Valid Employee updated) {
    Employee existing =
        repository
            .findById(id)
            .orElseThrow(() -> new ResponseStatusException(HttpStatus.NOT_FOUND));

    // ---------- <省略> ---------- //

    try {
      return repository.save(existing);
    } catch (DataIntegrityViolationException e) {
      throw new ResponseStatusException(HttpStatus.CONFLICT, "Email already exists");
    }
  }

  @DeleteMapping("/{id}")
  @ResponseStatus(HttpStatus.NO_CONTENT)
  public void delete(@PathVariable Long id) {
    if (!repository.existsById(id)) {
      throw new ResponseStatusException(HttpStatus.NOT_FOUND);
    }
    repository.deleteById(id);
  }
}
当然,build.gradle 和 application.yaml 也都被编辑过了。
dependencies {
    implementation 'org.springframework.boot:spring-boot-starter-web'
    implementation 'org.springframework.boot:spring-boot-starter-validation'
    implementation 'org.springframework.boot:spring-boot-starter-data-jpa'
    runtimeOnly 'com.h2database:h2'

    // ---------- <省略> ---------- //
}
build.gradle 如上所示,已将在项目创建时未写入的 Spring MVC 和 Spring Data JPA 等库作为依赖添加进来了。
spring:
  application:
    name: mamezou-blog-restapi
  datasource:
    url: jdbc:h2:mem:employees;DB_CLOSE_DELAY=-1;DB_CLOSE_ON_EXIT=FALSE
    driverClassName: org.h2.Driver
    username: sa
    password: ""
  jpa:
    hibernate:
      ddl-auto: update
  h2:
    console:
      enabled: true
      path: /h2-console
此外,项目创建时的应用属性文件是 application.properties,但出于个人喜好将其更改为 application.yaml。
这也是使用 Junie 完成的。
使用 Junie 添加测试
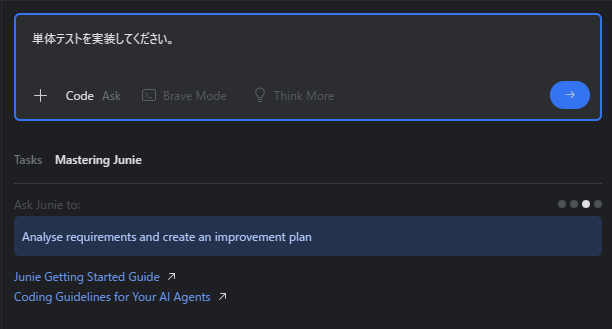
#在前述的「使用 Junie」阶段,还没有实现测试类。因此,为了添加测试类,我在 Junie 的提示框中输入了 请实现单元测试。
是的,如图所示,已添加了 EmployeeController 类的测试类,也就是 EmployeeControllerTest 类。
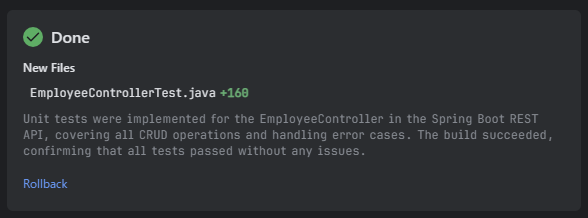
也可以确认已为 EmployeeController 类的 REST API(处理方法)实现了测试方法。
@WebMvcTest(EmployeeController.class)
class EmployeeControllerTest {

  @Autowired MockMvc mockMvc;
  @Autowired ObjectMapper objectMapper;

  @MockBean EmployeeRepository repository;

  private Employee sample(Long id) {
    return new Employee(id, "Taro Yamada", "taro@example.com", "IT", LocalDate.of(2020, 1, 1));
  }

  @Test
  @DisplayName("POST /employees - creates employee and returns 201")
  void create_success() throws Exception {
    Employee input = sample(null);
    Employee saved = sample(1L);

    when(repository.save(any(Employee.class))).thenReturn(saved);

    mockMvc
        .perform(
            post("/employees")
                .contentType(MediaType.APPLICATION_JSON)
                .content(objectMapper.writeValueAsString(input)))
        .andExpect(status().isCreated())
        .andExpect(jsonPath("$.id").value(1))
        .andExpect(jsonPath("$.email").value("taro@example.com"));
  }

  // ---------- <省略> ---------- //

  @Test
  @DisplayName("GET /employees/{id} - returns employee or 404")
  void get_by_id() throws Exception {
    when(repository.findById(1L)).thenReturn(Optional.of(sample(1L)));
    when(repository.findById(99L)).thenReturn(Optional.empty());

    mockMvc
        .perform(get("/employees/1"))
        .andExpect(status().isOk())
        .andExpect(jsonPath("$.id").value(1));
    mockMvc.perform(get("/employees/99")).andExpect(status().isNotFound());
  }

  // ---------- <后略> ---------- //

}
由于实体类和存储库接口不包含行为,因此似乎没有生成对应的测试类。
已经确认,在 Junie 生成测试类后,所有测试均能成功通过。
为谨慎起见,重新运行了一次测试,如下所示所有测试均已成功通过。

在测试类中使用的 MockBean 注解在 Spring Boot 3.4.0 及之后被弃用并计划废止。
建议改为使用 MockitoBean 注解。
最后
#关于 JetBrains 的 Junie,到此感觉如何?
我目前只使用了 Junie 的部分功能,但感觉非常便利。
平常开发中使用 IntelliJ IDEA 的朋友,不妨引入 Junie 试一试,亲身体验一下。
若使用个人许可证,则可从月费 1,540 日元起,负担也较轻。
这次尝试了使用 Junie 的 Code 模式进行代码生成。今后,我还想尝试与 Ask 模式的结合,以及 Brave 模式等。
此外,在项目根目录放置 .junie/guidelines.md 并编写编码规范等,就可以生成或编辑符合该规范的代码。
关于这些内容,也计划在下次及以后的文章中进行介绍。
那么,感谢您阅读至此,真的非常感谢。