QtWidgets vs QtQuick
Back to TopTo reach a broader audience, this article has been translated from Japanese.
You can find the original version here.
Teaching pendants are indispensable devices for configuring robot systems.
Our company often adopts Qt as the GUI development framework for teaching pendants.
Qt offers two user interfaces: QtWidgets and QtQuick, and as someone responsible for GUI development, I often struggle with which one to choose.
This time, I would like to compare QtWidgets and QtQuick.
Overview of QtWidgets
#What is QtWidgets?
#QtWidgets is a framework that provides a classic desktop-style user interface. Widgets represent GUI components (buttons, windows, text boxes, etc.), and applications are created by combining these widgets.
Features and Advantages of QtWidgets
#- Native Look and Feel
- Applications created with QtWidgets provide a native window and operation familiar to users.
- Compatibility with Legacy Code
- Existing QtWidgets applications can be easily ported and extended.
- Plugins and Extensibility
- QtWidgets adopts a plugin-based architecture, allowing the creation of custom widgets.
Overview of QtQuick
#What is QtQuick?
#QtQuick is a framework that enables modern UI design, using a language called QML, which has a syntax similar to CSS.
QtQuick provides a rich UX with animations, transitions, and visual effects.
Features and Advantages of QtQuick
#- Modern User Interface Design
- QtQuick provides tools and features for designing contemporary user interfaces.
- Freedom in Animation and Design
- QML allows intuitive setting of animations and transitions.
- Integration with JavaScript
- QtQuick applications can integrate with JavaScript code to create dynamic UIs.
Comparison of QtWidgets and QtQuick
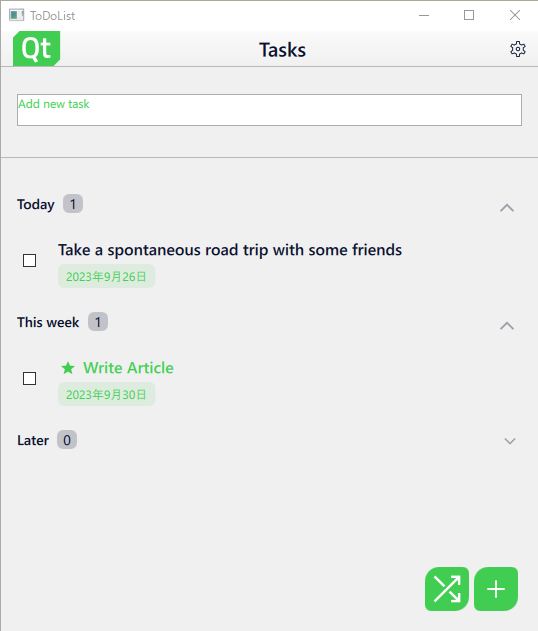
#We created a simple application with both QtWidgets and QtQuick and compared them.
The application reflects the text in a text area to a label with animation upon button press.
Designing and Developing the User Interface
#Introducing the UI development methods for each.
QtWidgets
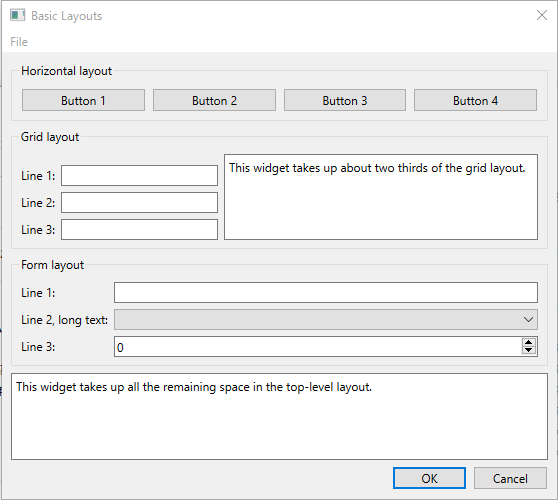
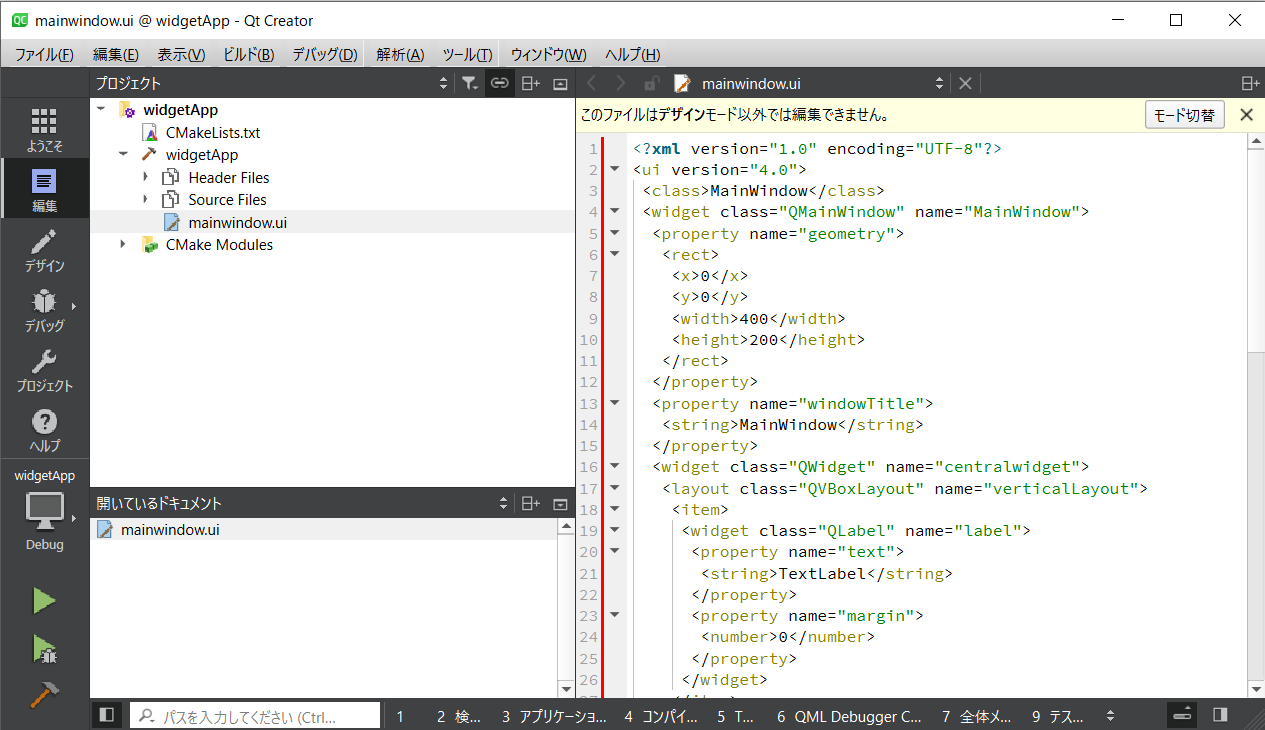
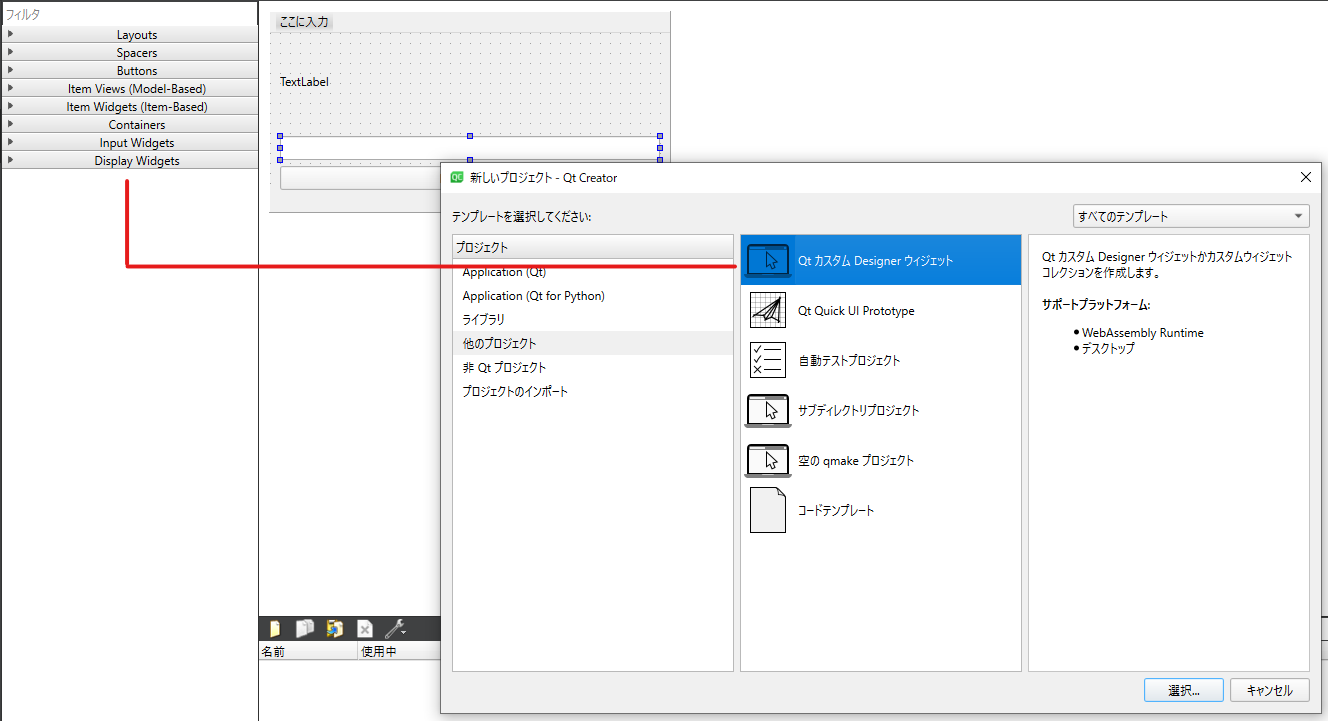
#To create a UI with QtWidgets, use Qt Designer.
You can easily create a UI by dragging and dropping widgets onto the window.
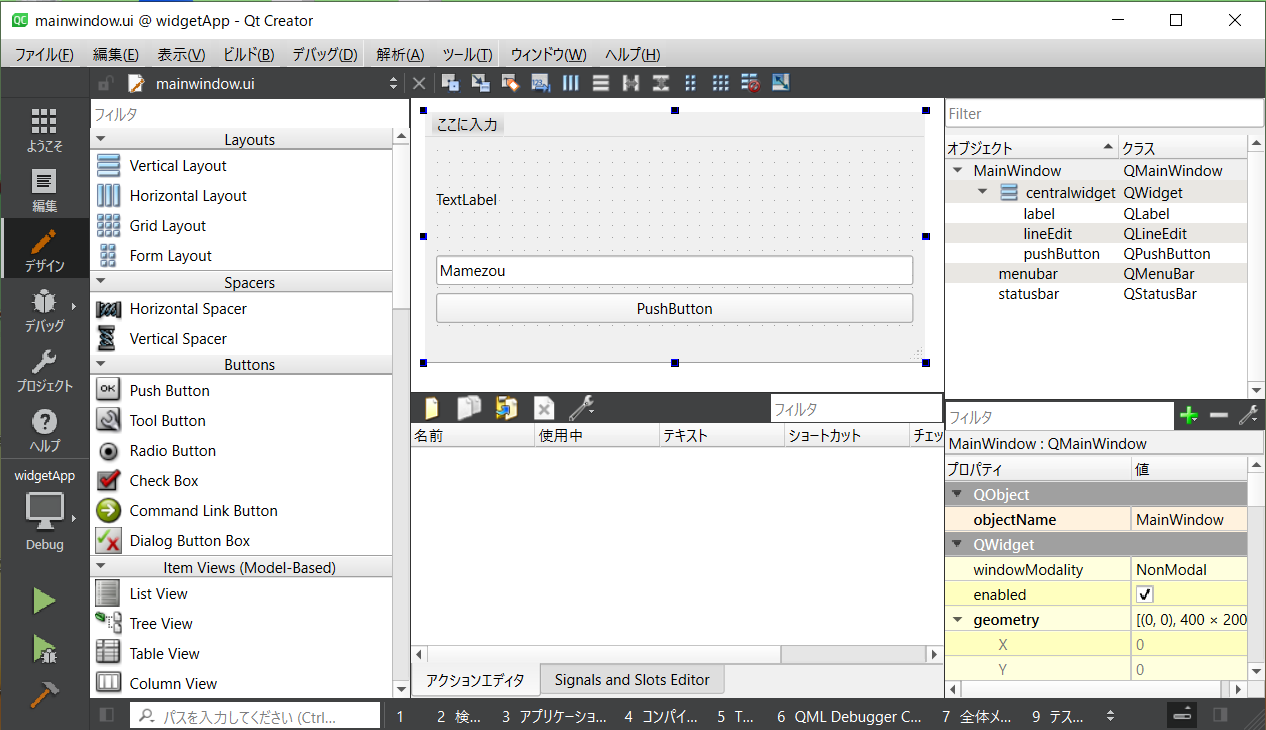
The created UI is automatically generated as a file with the ui extension in XML format.
It is a non-editable file and does not need to be read directly.
QtQuick
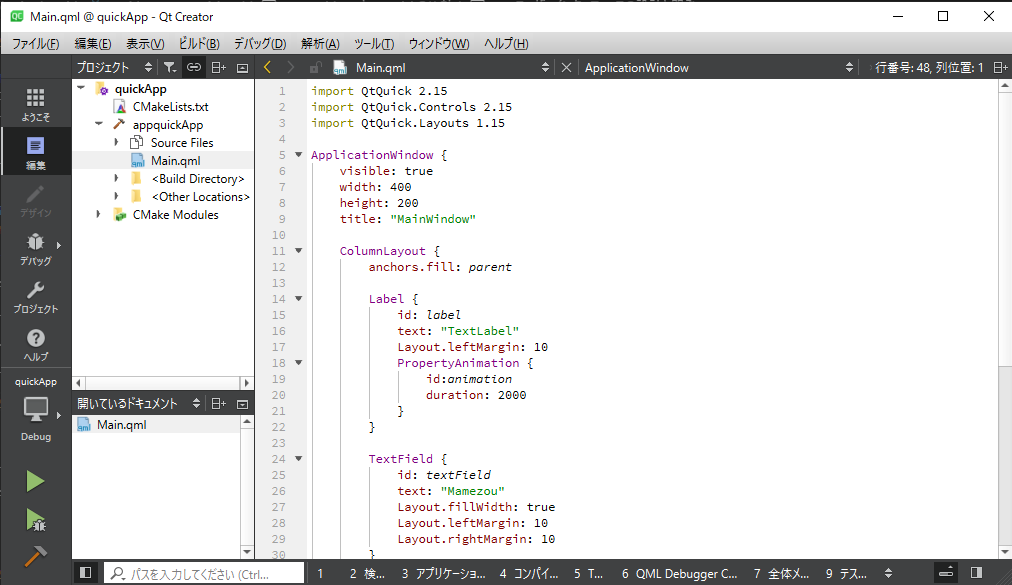
#To create a UI with QtQuick, edit the QML file.
After declaring the type of object, curly braces follow, and within the curly braces, you can declare the properties of the object.
The learning difficulty of QML is not high, but since QtWidgets can generate UI without code, it is easy even for beginners.
QtWidgets have components determined for each function, so no matter what kind of application you create, it provides a similar look and feel.
It is a so-called mature technology, not cutting-edge, but widely used with accumulated know-how.
Additionally, it is a stable technology as most bugs have been ironed out.
On the other hand, QtQuick can provide unique UI to users.
For example, languages like HTML create unique UIs for each site in the same web world.
Since QML is also a markup language, the nature is quite similar.
Moreover, new features are added with each release of QtQuick, and it is continuously developed.
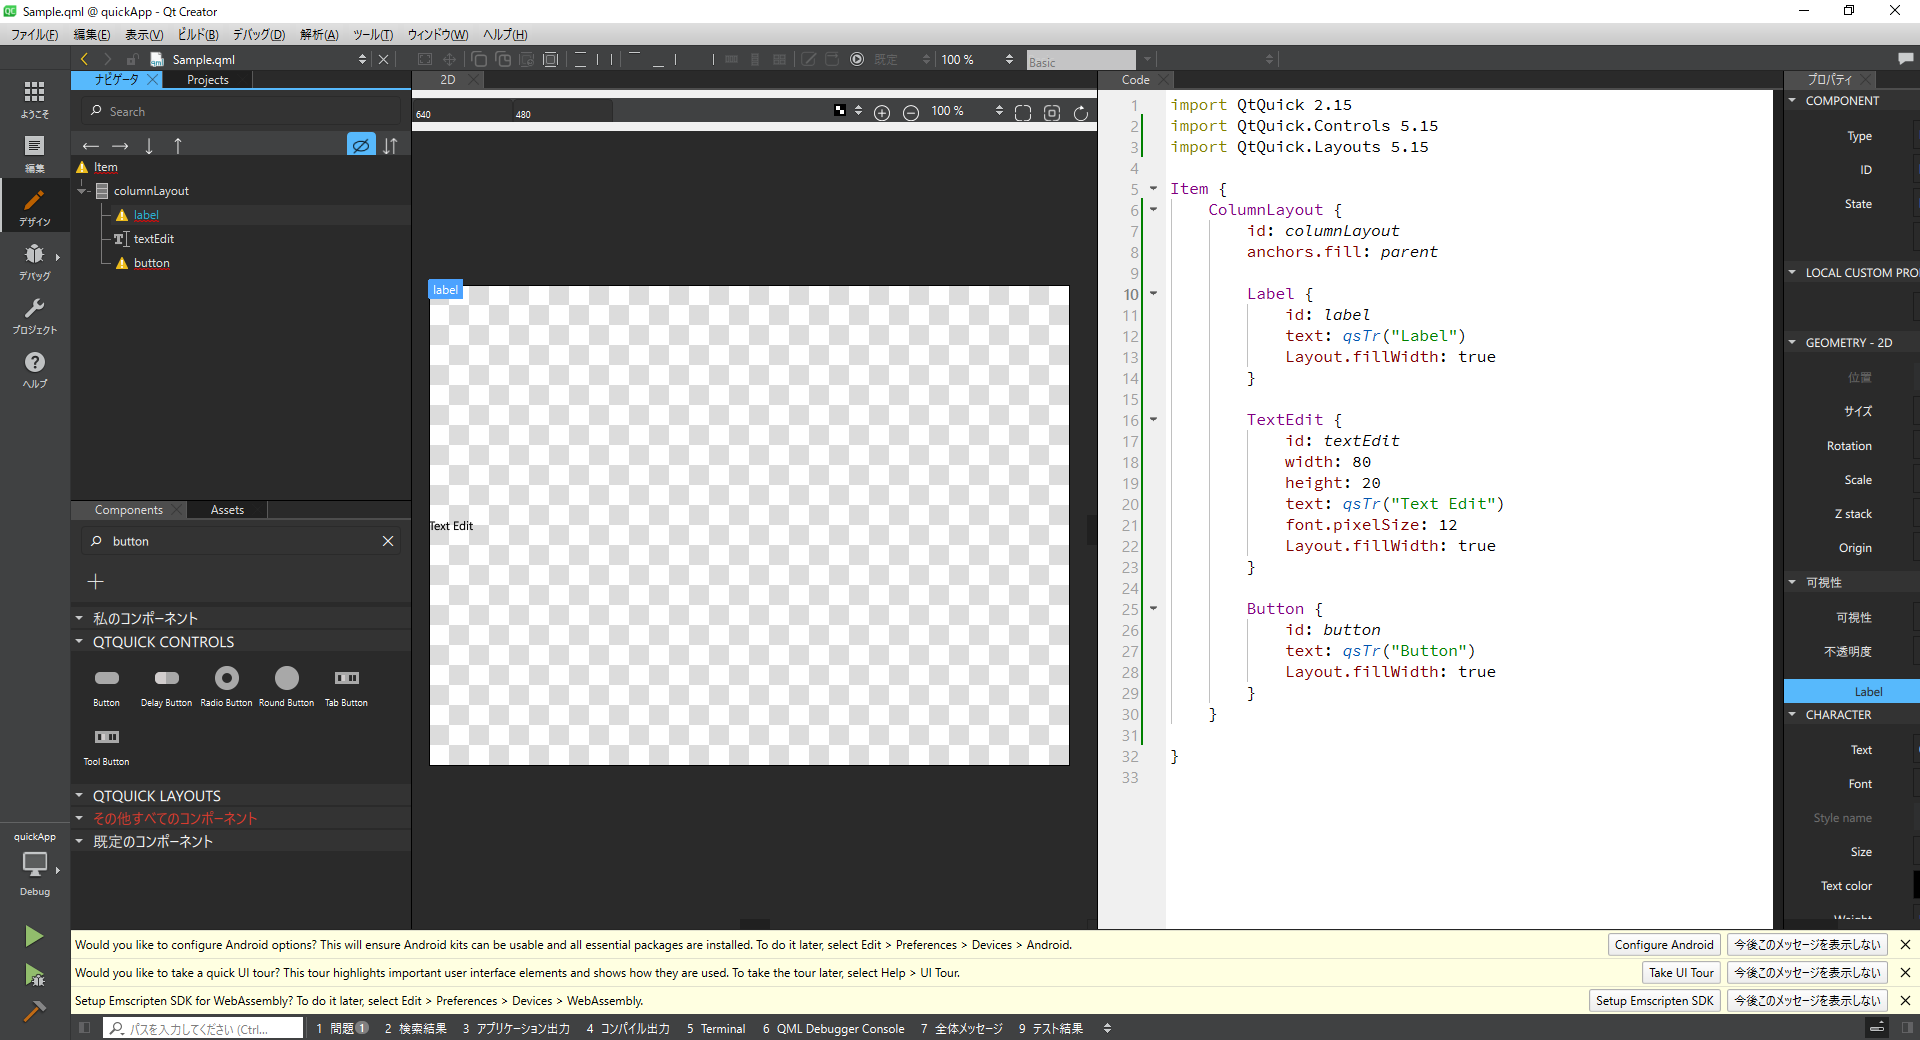
With QtQuick, you can also edit by drag and drop using the QtQuick Designer.
However, compared to the form designer of QtWidgets, the processing is slower, and the usability is not very good.
Creating and Maintaining Animations
#Comparing the code of applications created with each framework.
Introducing how to create animations.
QtWidgets
#In QtWidgets, you refer to widget elements declared in the ui file and describe animations in C++ code.
This code uses the signal-slot mechanism, a distinctive feature of Qt, to execute animations.
MainWindow.cpp
#include "mainwindow.h"
#include "ui_mainwindow.h"

MainWindow::MainWindow(QWidget *parent)
    : QMainWindow(parent)
    , ui(new Ui::MainWindow)
{
    ui->setupUi(this);

    setBaseSize(400, 200);

    animation = new QPropertyAnimation(ui->label, "geometry");
    animation->setDuration(2000);

    connect(ui->pushButton, &QPushButton::clicked, this, &MainWindow::startAnimation);
}

MainWindow::~MainWindow()
{
    delete ui;
}

void MainWindow::startAnimation()
{
    QString text = ui->lineEdit->text();
    ui->label->setText(text);

    int labelWidth = ui->label->fontMetrics().boundingRect(text).width();

    animation->setStartValue(QRect(0, 0, labelWidth, ui->label->height()));
    animation->setEndValue(QRect(400, 0, labelWidth, ui->label->height()));
    animation->start();
}
QtQuick
#In QtQuick, animations are also described within the QML file where types are declared.
In this code, the behavior upon clicking is described within the onClicked handler that receives the click signal of the Button type.
Main.qml
import QtQuick 2.15
import QtQuick.Controls 2.15
import QtQuick.Layouts 1.15

ApplicationWindow {
    visible: true
    width: 400
    height: 200
    title: "MainWindow"

    ColumnLayout {
        anchors.fill: parent

        Label {
            id: label
            text: "TextLabel"
            Layout.leftMargin: 10
            PropertyAnimation {
                id:animation
                duration: 2000
            }
        }

        TextField {
            id: textField
            text: "Mamezou"
            Layout.fillWidth: true
            Layout.leftMargin: 10
            Layout.rightMargin: 10
        }

        Button {
            text: "pushButton"
            Layout.fillWidth: true
            Layout.leftMargin: 10
            Layout.rightMargin: 10
            onClicked: { // Processing when the button is pressed
                label.text = textField.text;
                animation.target = label;
                animation.property = "x";
                animation.from = -label.x;
                animation.to = 400;
                animation.start();
            }
        }
    }
}
QtWidgets allows you to separate the UI and presentation logic.
Additionally, the placed widgets can be referenced in the form "ui->{variable name}" in C++ code without the need for instantiation processing, making it very simple.
In QtQuick, UI and presentation logic coexist, making it easy to reference within the code.
However, since it can become complex, careful code design is necessary.
Creating Custom Components and Extensibility
#Creating custom components with the same functionality for each.
This time, we added an input history feature to a text area.
QtWidgets
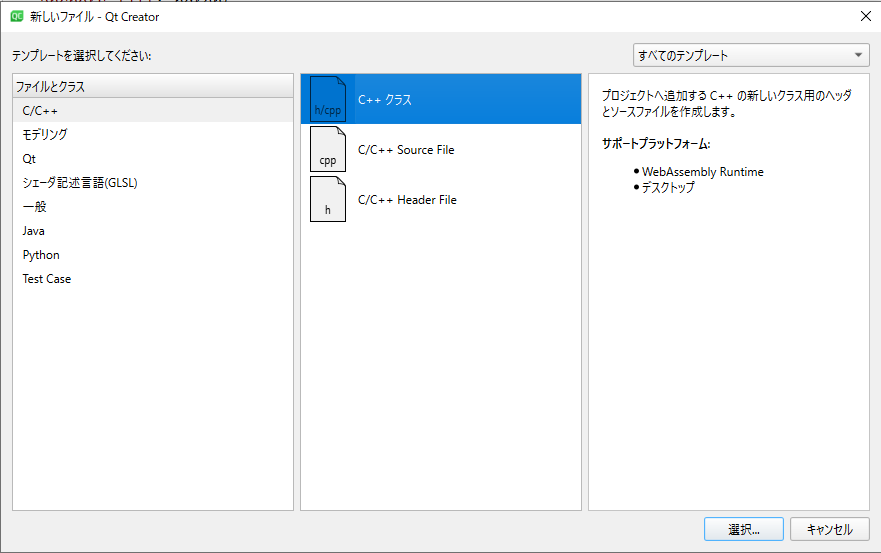
#First, select a C++ class from the wizard to add a new file.
Enter the name of the custom widget to be created and specify QWidget as the base class.
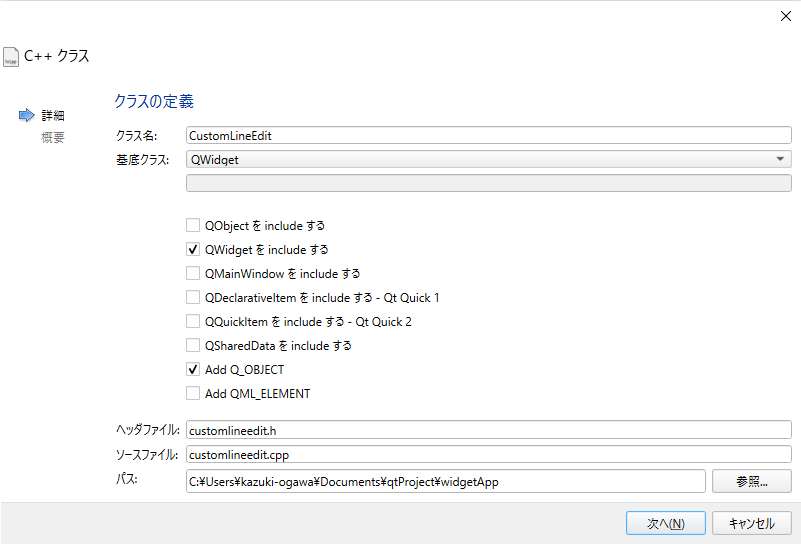
Implement CustomLineEdit with input history functionality inherited from QLineEdit.
CustomLineEdit.h
#ifndef CUSTOMLINEEDIT_H
#define CUSTOMLINEEDIT_H

#include <QLineEdit>
#include <QKeyEvent>
#include <QVector>

class CustomLineEdit : public QLineEdit
{
    Q_OBJECT

public:
    CustomLineEdit(QWidget *parent = nullptr);

protected:
    void keyPressEvent(QKeyEvent *event) override;

private:
    QVector<QString> inputHistory;
    int historyIndex;

    void updateHistory();
};

#endif // CUSTOMLINEEDIT_H
CustomLineEdit.cpp
#include "CustomLineEdit.h"

CustomLineEdit::CustomLineEdit(QWidget *parent)
    : QLineEdit(parent), historyIndex(-1)
{
    connect(this, &QLineEdit::returnPressed, this, &CustomLineEdit::updateHistory);
}

void CustomLineEdit::keyPressEvent(QKeyEvent *event)
{
    if (event->key() == Qt::Key_Up) {
        if (historyIndex >= 0 && historyIndex < inputHistory.size()) {
            setText(inputHistory[historyIndex]);
            historyIndex--;
        }
    } else if (event->key() == Qt::Key_Down) {
        if (historyIndex >= -1 && historyIndex < inputHistory.size() - 1) {
            historyIndex++;
            setText(inputHistory[historyIndex]);
        } else if (historyIndex == inputHistory.size() - 1) {
            historyIndex = -1;
            clear();
        }
    } else {
        QLineEdit::keyPressEvent(event);
    }
}

void CustomLineEdit::updateHistory()
{
    const QString currentText = text().trimmed();
    if (!currentText.isEmpty()) {
        if (inputHistory.isEmpty() || inputHistory.last() != currentText) {
            inputHistory.append(currentText);
        }
        historyIndex = inputHistory.size() - 1;
    }
}
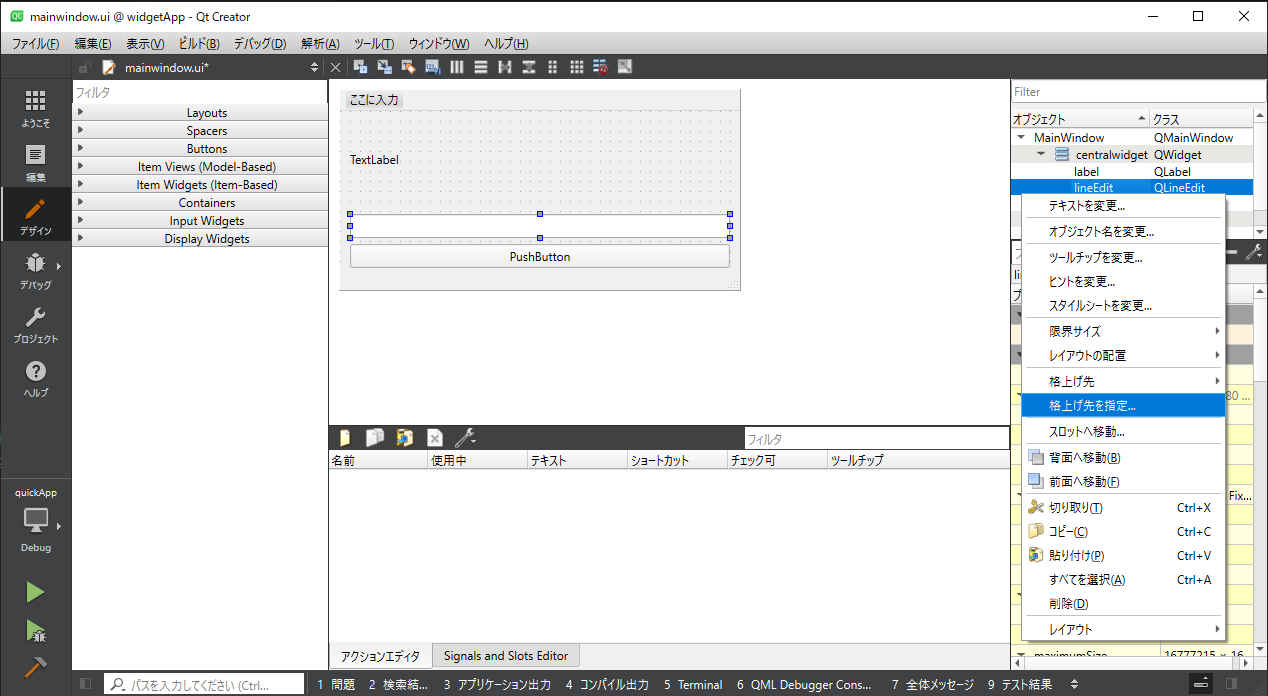
Return to the designer, right-click on lineEdit, and select "Promote to...".
Enter the file name of the created custom widget, add it, and promote it.
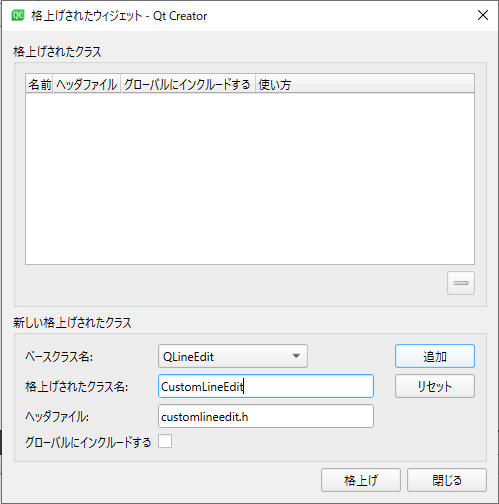
It can be seen that CustomLineEdit, which extends QLineEdit, is defined in the ui file.
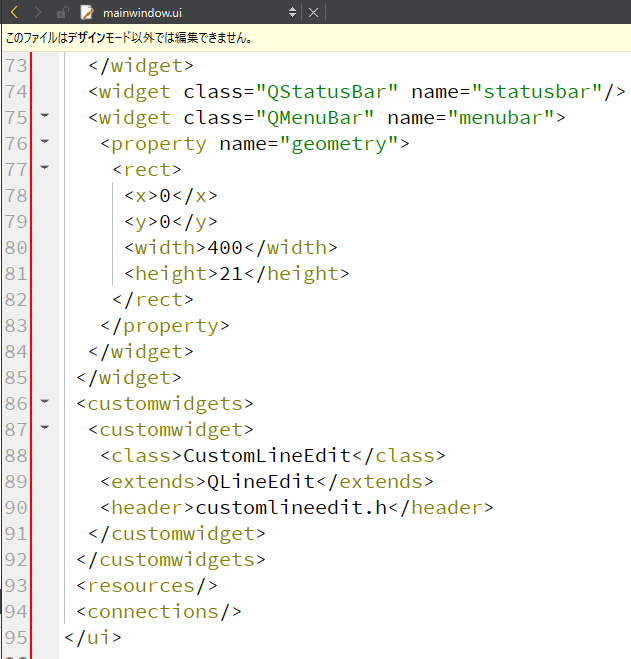
This time, we achieved a custom widget through promotion.
Additionally, by creating and implementing a custom widget project, custom widgets can be added to the dropdown list.
QtQuick
#First, select a qml file from the wizard to add a new file.
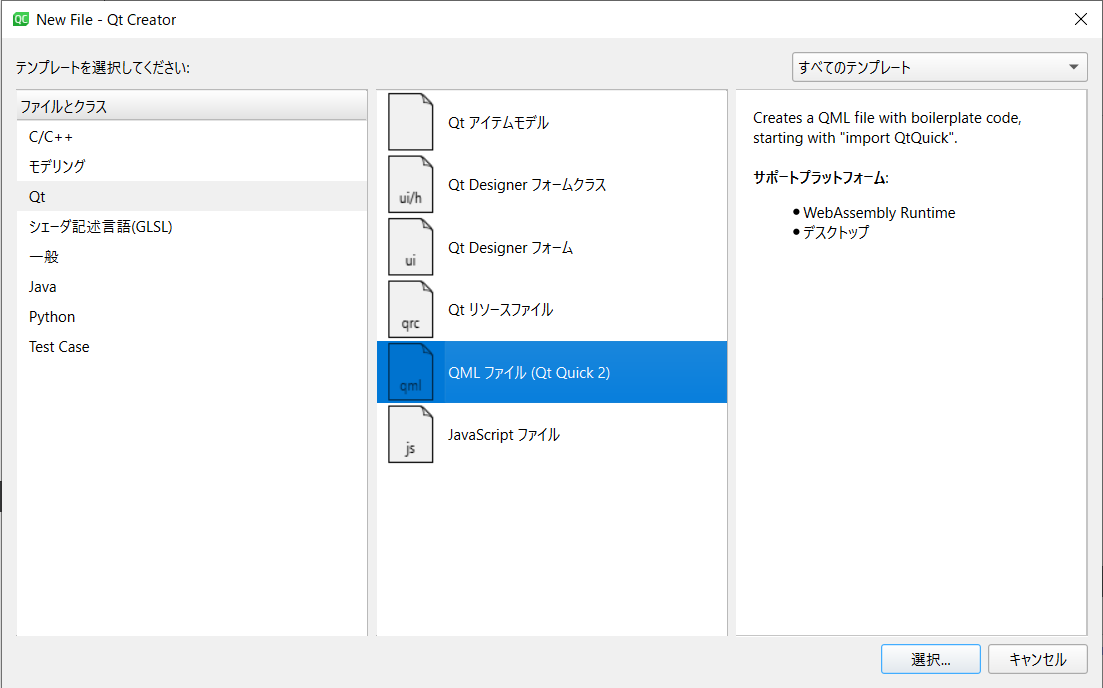
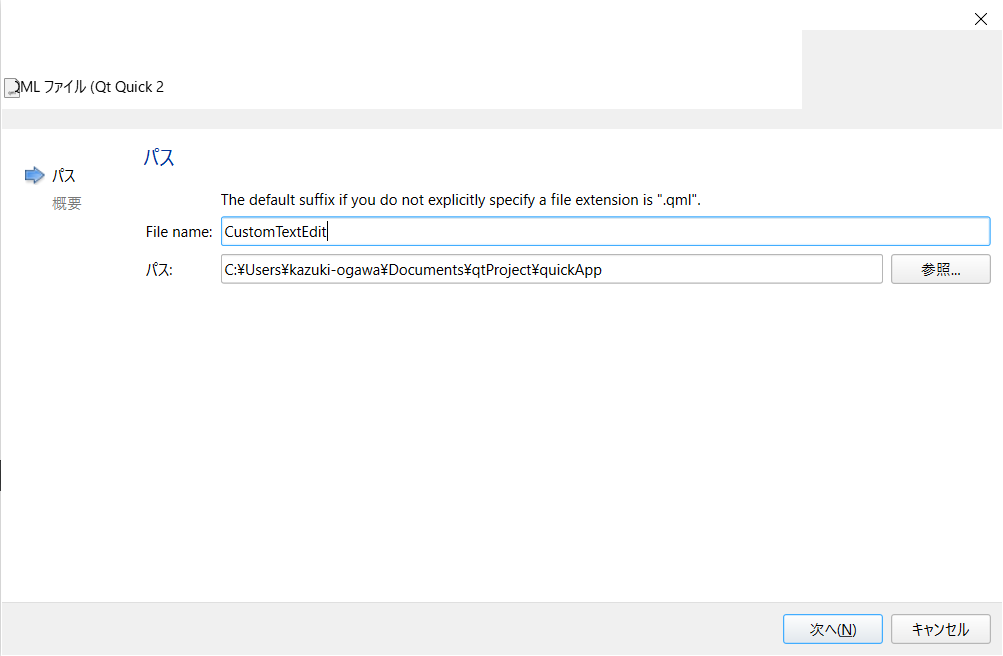
Enter the name of the custom QML type to be created and create it.
Extend TextField and implement the custom QML type.
CustomTextFiled.qml
import QtQuick 2.15
import QtQuick.Controls 2.15

TextField {
    property var inputHistory: []
    property int historyIndex: -1

    Keys.onReleased: {
        if (event.key === Qt.Key_Up) {
            if (historyIndex >= 0) {
                text = inputHistory[historyIndex];
                if (historyIndex > 0) historyIndex--;
            }
        } else if (event.key === Qt.Key_Down) {
            if (historyIndex < inputHistory.length - 1) {
                historyIndex++;
                text = inputHistory[historyIndex];
            } else if (historyIndex === inputHistory.length - 1) {
                historyIndex = -1;
                text = "";
            }
        } else if (event.key === Qt.Key_Return || event.key === Qt.Key_Enter) {
            if (text.trim() !== "") {
                if (inputHistory.length === 0 || inputHistory[inputHistory.length - 1] !== text) {
                    inputHistory.push(text);
                    historyIndex = inputHistory.length - 1;
                }
            }
        }
    }
}
Replace the TextField with the implemented custom component.
Main.qml
import QtQuick 2.15
import QtQuick.Controls 2.15
import QtQuick.Layouts 1.15

ApplicationWindow {
    visible: true
    width: 400
    height: 200
    title: "MainWindow"

    ColumnLayout {
        anchors.fill: parent

        Label {
            id: label
            text: "TextLabel"
            Layout.leftMargin: 10
            PropertyAnimation {
                id:animation
                duration: 2000
            }
        }

        CustomTextField {
            id: textField
            text: "12345"
            Layout.fillWidth: true
            Layout.leftMargin: 10
            Layout.rightMargin: 10
        }

        Button {
            text: "pushButton"
            Layout.fillWidth: true
            Layout.leftMargin: 10
            Layout.rightMargin: 10
            onClicked: {
                label.text = textField.text;
                animation.target = label;
                animation.property = "x";
                animation.from = -label.x;
                animation.to = 400;
                animation.start();
            }
        }
    }
}
Both can create reusable components, and the steps are simple.
There is no significant difference in terms of ease of extension.
We created a simple application and compared it through code and tools, but for those who handle C++ in embedded systems, QtWidgets might seem easier to use.
Also, although QML has a designer, its usability is not good, and handwriting can increase development costs.
Qt is a framework that allows applications to run cross-platform, so let's touch on that point as well.
In terms of rendering, QtWidgets uses the native API of each platform for rendering, so the Look & Feel differs for each platform.
On the other hand, QtQuick is rendered by the GPU, so it is basically the same Look & Feel if the same rendering engine is used, regardless of the platform.
Which One to Choose
#As expected from the features and advantages of each framework mentioned at the beginning, desktop applications and editing applications are QtWidgets.
Interactive UIs, 3D rendering main display applications, and GUI development on embedded systems with low CPU specs but equipped with GPUs are QtQuick.
While researching for this article, I discovered a Qt official video comparing QtWidgets and QtQuick, which was disheartening.
There are quite a few comparison articles and blogs when you search.
The conclusion (extreme) was already there from the beginning.
"Use QtWidgets for classic, QtQuick for modern, and choose according to the customer's needs."
Yes, it can't end here.
I apologize for the misleading title, but here is the main topic.
I aim to enhance the added value of this article by conveying the sense of a GUI developer involved in robot development.
Teaching is a Skilled Technique
#Teaching pendants are just one of the devices that make up a robot system.
Understanding the screen specifications alone won't make the robot work well.
It requires knowledge of robotics, coordinate systems, safety management, and more.
Also, robots have many functions, and reading the manual can take a whole day.
Therefore, it takes a lot of time and education for beginners to become capable of teaching.
As a result, user companies often outsource teaching.
I would like to introduce an article that left an impression on me from a project I was involved in, where teaching for an exhibition was challenging.
Is there a shortage of teaching men? What are the pitfalls after introducing robots?
Moving Away from Teaching Pendants
#The desire to make teaching easier has led to the realization of robot control using sensors and image processing, direct teaching, and more.
Furthermore, controlling robots through natural language and utilizing AI cannot be avoided.
PaLM-E: An Embodied Multimodal Language Model
However, where do you set up the sensors or objects to be recognized?
How do you move the few millimeters that can't be adjusted with direct teaching?
Does using AI eliminate the need for GUI?
The teaching pendant is still an indispensable interface connecting humans and robots.
Easy-to-Understand Screens
#The most common request for teaching pendants is "easy-to-understand screens."
Many companies that request robot development are dissatisfied with the current teaching pendants, and the demand for "easy-to-understand screens, even for beginners" never ceases.
The "difficult-to-understand screens" often refer to the old-fashioned UI that seems to be implemented with QtWidgets.
Even at robot exhibitions, you often see robot vendors developing smartphone-like UIs that embody such voices.
Will classic UIs be eliminated when digital natives and Generation Z become the central figures in companies?
The Limit of Understandability
#There is a problem that arises when pursuing understandability.
Before you know it, you are limiting the functions of the robot to achieve an easy-to-understand UI.
As mentioned in Teaching is a Skilled Technique, knowledge and understanding of functions are required to operate the robot.
The essence of making it easy for beginners to operate robots is often realized by limiting functions rather than the ease of understanding the UI.
An easy-to-understand UI reduces the amount of information in sight and incorporates more gestures and animations for intuitive understanding.
As a result, only visually easy-to-understand information that takes up space remains in the limited space of the teaching pendant by reducing functions.
UI that Grows with Users
#Comparing QtWidgets and QtQuick this time, realizing that the conclusion of "QtWidgets for classic, QtQuick for modern" is too arbitrary.
Currently, some robot vendors provide smartphone-like UIs while also offering the previous UI, preparing "beginner UI" and "expert UI" to cope with the limit of understandability.
The ideal UI for teaching pendants is one that prepares several intermediate stages between "beginner UI" and "expert UI" and grows with the user's proficiency.
Just like a bicycle gradually increasing gears to speed up, I think it would be interesting to realize a UI that grows with users.
Conclusion
#Technically, it is possible to coexist QtWidgets and QtQuick, but if I had to choose one, I would choose QtQuick.
This conclusion is limited to cases where a UI that grows with users is realized.
It should be selected according to the application requirements, and this does not recommend one framework over the other.
Thank you for your attention.