Starting SysMLv2 Modeling with the Free OSS Tool SysON (3) – Creating Part Definitions
Back to TopTo reach a broader audience, this article has been translated from Japanese.
You can find the original version here.
In the previous article, we created a new project and a Package element.
In this article, we will create the Part Definition, one of the key structure definitions.
At the time of writing, the latest stable version of SysON is v2025.12.0, but in this article, as in the previous one, we will use v2025.8.0. Please note that behavior in the latest release may differ in some respects.
The modeling example is borrowed from the SysMLv2 specification A Annex: Example Model. Let's create "Figure 59. Axle and its Subclass FrontA".

Creating a New Part Definition
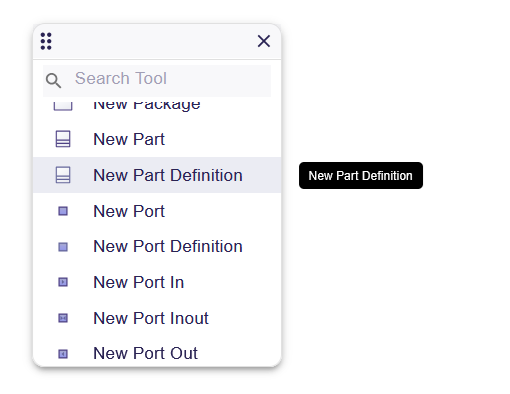
#As before, open the General View, then right-click to open the context menu and select "Structure" > "New Part Definition".
The new Part Definition is then displayed in the General View.
Changing the Name of the Part Definition
#Let's change the name of the created Part Definition to "Axle".
There are two ways to change the name. As will be discussed later, these two methods actually work differently under the hood.
Method 1
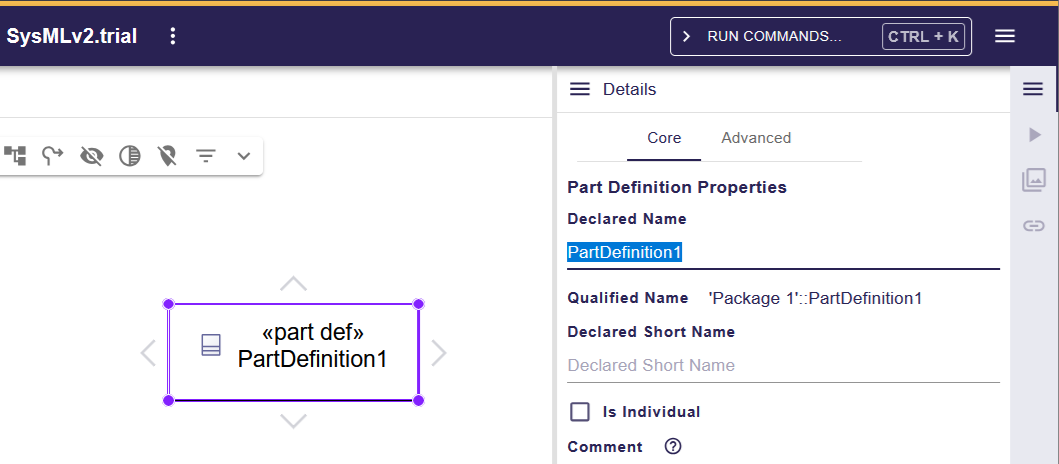
#The first is to change it via the right sidebar. When you select the target element (PartDefinition1), the Details appear in the right sidebar. You can directly edit the name shown in the Declared Name field.
Method 2
#The other is to change it via the element’s context menu or a function key. Open the context menu and click the leftmost pen icon among the icons at the top.
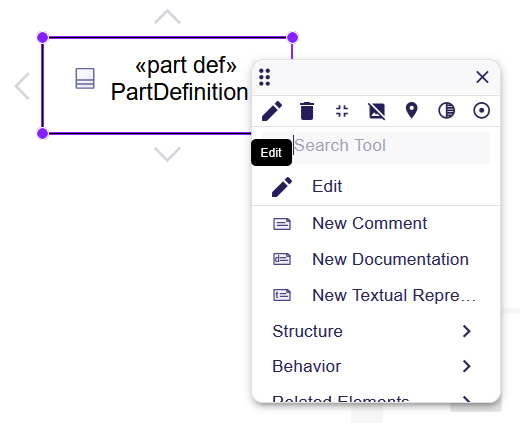
When you click the pen icon, the name displayed in the element becomes editable inline. Alternatively, you can select "Edit" > "Edit" from the context menu to likewise edit the name inline.
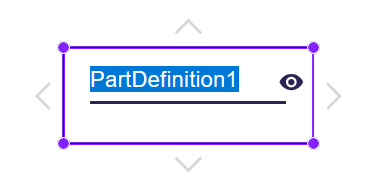
You can also press F2 after selecting the element to edit the name inline.
Adding an Attribute to the Part Definition
#Next, let's add the attribute "mass" to the attributes of "Axle".
Select "Axle", open the context menu, and choose "Structure" > "New Attribute". The attributes compartment appears in "Axle", and "attribute1" is added to that compartment.
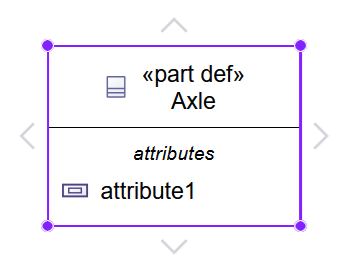
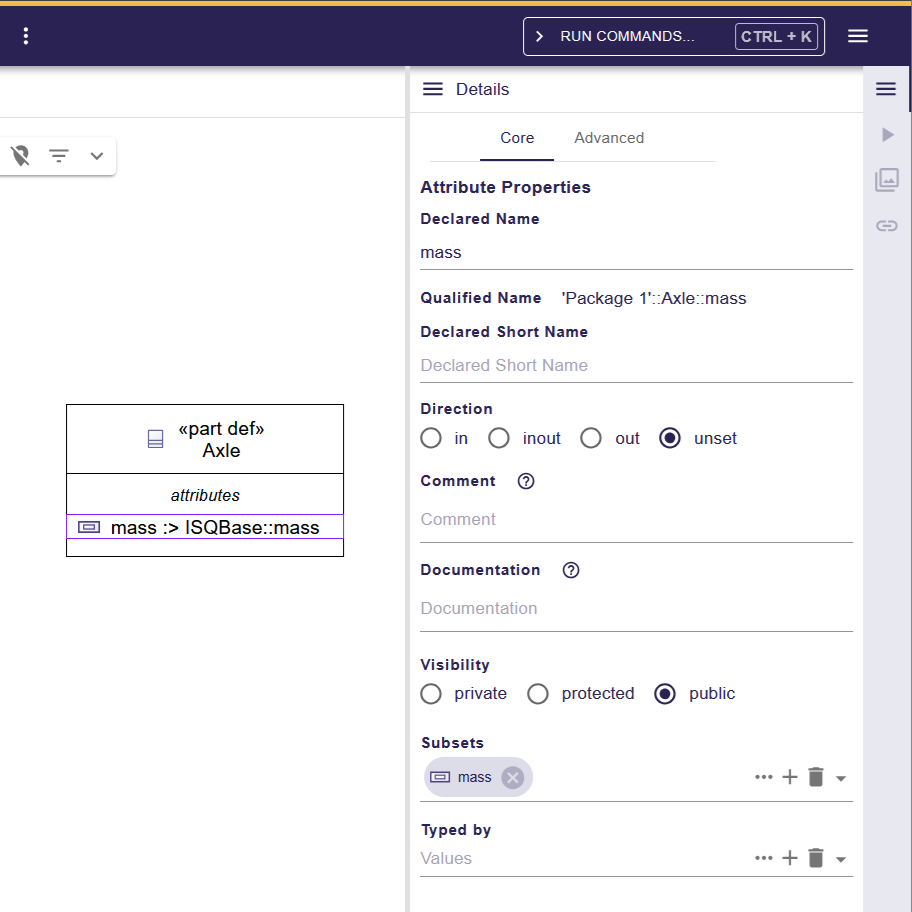
Select the added "attribute1" and change its name to "mass :> ISQBase::mass".
If you change it using the context menu or a function key, a Subsets field appears in the Details on the right sidebar, where mass is displayed.
If you change the name of "attribute1" via the Declared Name in the left sidebar’s Details, the diagram looks the same, but no Subsets field appears in the Details.
What is going on here?
In the former case (changing via the context menu, etc.), the subset symbol (:>) is interpreted, and mass becomes a subset of ISQBase::mass. In the latter case (changing via Declared Name), it simply changes the name to "mass :> ISQBase::mass".
Be aware that this difference is not apparent from the diagram alone.
Setting a Subclassification between Part Definitions
#Using the same procedure as for Axle, create another Part Definition and name it "FrontAxle".
When you select "FrontAxle," hovering your mouse over the triangles (>) that appear around the element (top, bottom, left, and right) changes the cursor to a cross (+). Drag and drop from here onto "Axle" to bring up a context menu for selecting a relationship.
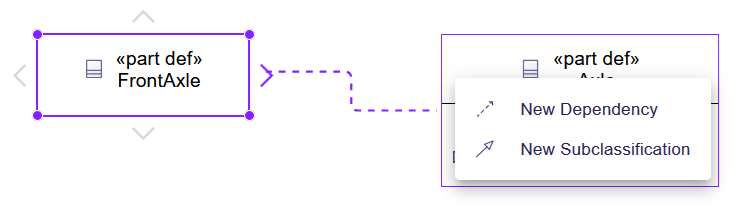
Here, if you choose "New Subclassification," a hollow arrow line representing the Subclassification appears, and the name of "FrontAxle" changes to "FrontAxle :> Axle".

There is another way to set the Subclassification: change "FrontAxle" to "FrontAxle :> Axle" via the context menu or a function key. When you do so, the display of "FrontAxle" changes, and a line representing the Subclassification appears between it and Axle.
Add an attribute "steering" to "FrontAxle".
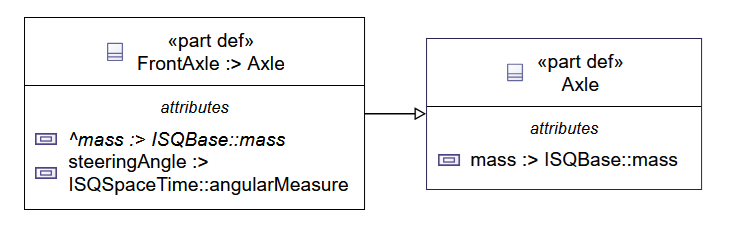
You now have a diagram equivalent to "Figure 59. Axle and its Subclass FrontA" from the SysMLv2 specification.
Adding Part Definitions Using Text Notation
#So far we have created the model by drawing, but just like with the Package, you can also create the model using text notation.
part def Axle {
	attribute mass:>ISQ::mass;
}
part def FrontAxle :> Axle {
	attribute steeringAngle :> ISQ::angularMeasure;
}
Drag and drop the created Axle and FrontAxle onto the General View.
To display the attributes compartment, first hover your mouse cursor to the right of the Part Definition’s name and click the eye icon that appears. In the displayed "Manage Visibility" context menu, check "attribute".

Preview of Next Time
#In this article, we created Part Definition elements and set up a Subclassification between elements.
Next time, we will create Part Usages and link them to Part Definitions.