Implementing Auth Features with Nuxt.js × Supabase
Back to TopTo reach a broader audience, this article has been translated from Japanese.
You can find the original version here.
Introduction
#Hello.
Recently, I have been developing web applications using Nuxt.js for personal projects. As I was considering what to use for the server side, I learned about Supabase, a full-stack backend service that's been generating buzz.
- Official site: https://supabase.com/
It seems to be gaining attention as an alternative to Firebase, providing all the features needed for modern application development in a comprehensive package.
Integrating Supabase into Nuxt.js and getting authentication up and running turned out to be surprisingly easy, so I thought I'd share my notes here.
In this article, I'll show you how to integrate Supabase into Nuxt.js and implement email-based authentication.
What is Supabase?
#Supabase is an open-source BaaS (Backend as a Service) platform based on PostgreSQL. It offers a variety of features including real-time databases, authentication, and storage.
With Supabase, you can introduce a database and user authentication right away without having to develop your own backend, letting you focus solely on frontend development.
Since it supports SQL, data management is straightforward, and its open-source nature offers great flexibility.
Most attractively, it’s available on a free tier (with some limits).
For more details on Supabase's features, check the official documentation or any of the numerous articles out there. Personally, I found it to be incredibly smooth to set up, and a highly user-friendly service for developers despite its extensive functionality.
How to Install Supabase
#Now, let's integrate Supabase into Nuxt.js. First, assume you've already done the following:
- Registered an account on the official site.
- Created a project with a database inside Supabase to use.
If you haven’t, a quick search for “Supabase” will lead you to plenty of guides, and you’ll find the registration surprisingly easy to complete.
Suppose your development environment before installing Supabase looks like this:
"dependencies": {
  "@nuxt/scripts": "0.12.1",
  "@nuxt/ui": "4.0.1",
  "@tailwindcss/vite": "^4.1.18",
  "nuxt": "^4.2.2",
  "tailwindcss": "^4.1.18",
  "vue": "^3.5.26",
  "vue-router": "^4.6.4"
},
"devDependencies": {
  "nuxt-icon": "1.0.0-beta.7",
  "typescript": "^5.9.3"
}
In this setup, run the following command to install Supabase:
(Note: I’m using pnpm as my package manager, but npm or yarn works just fine)
pnpm install @nuxtjs/supabase @supabase/supabase-js
Once installed, add @nuxtjs/supabase to your nuxt.config.ts:
import tailwindcss from "@tailwindcss/vite"

export default defineNuxtConfig({
  compatibilityDate: '2025-07-15',
  devtools: { enabled: true },
  css: ['./app/assets/css/main.css'],
  vite: {
    plugins: [tailwindcss()],
  },
  modules: [
    '@nuxtjs/supabase', // add this
    '@nuxt/ui',
    'nuxt-icon',
  ]
})
Next, retrieve the Project URL and API Key for the project you created in Supabase. Check “Project Settings > Data API” and “Project Settings > API Keys”.
- Project Settings > Data API
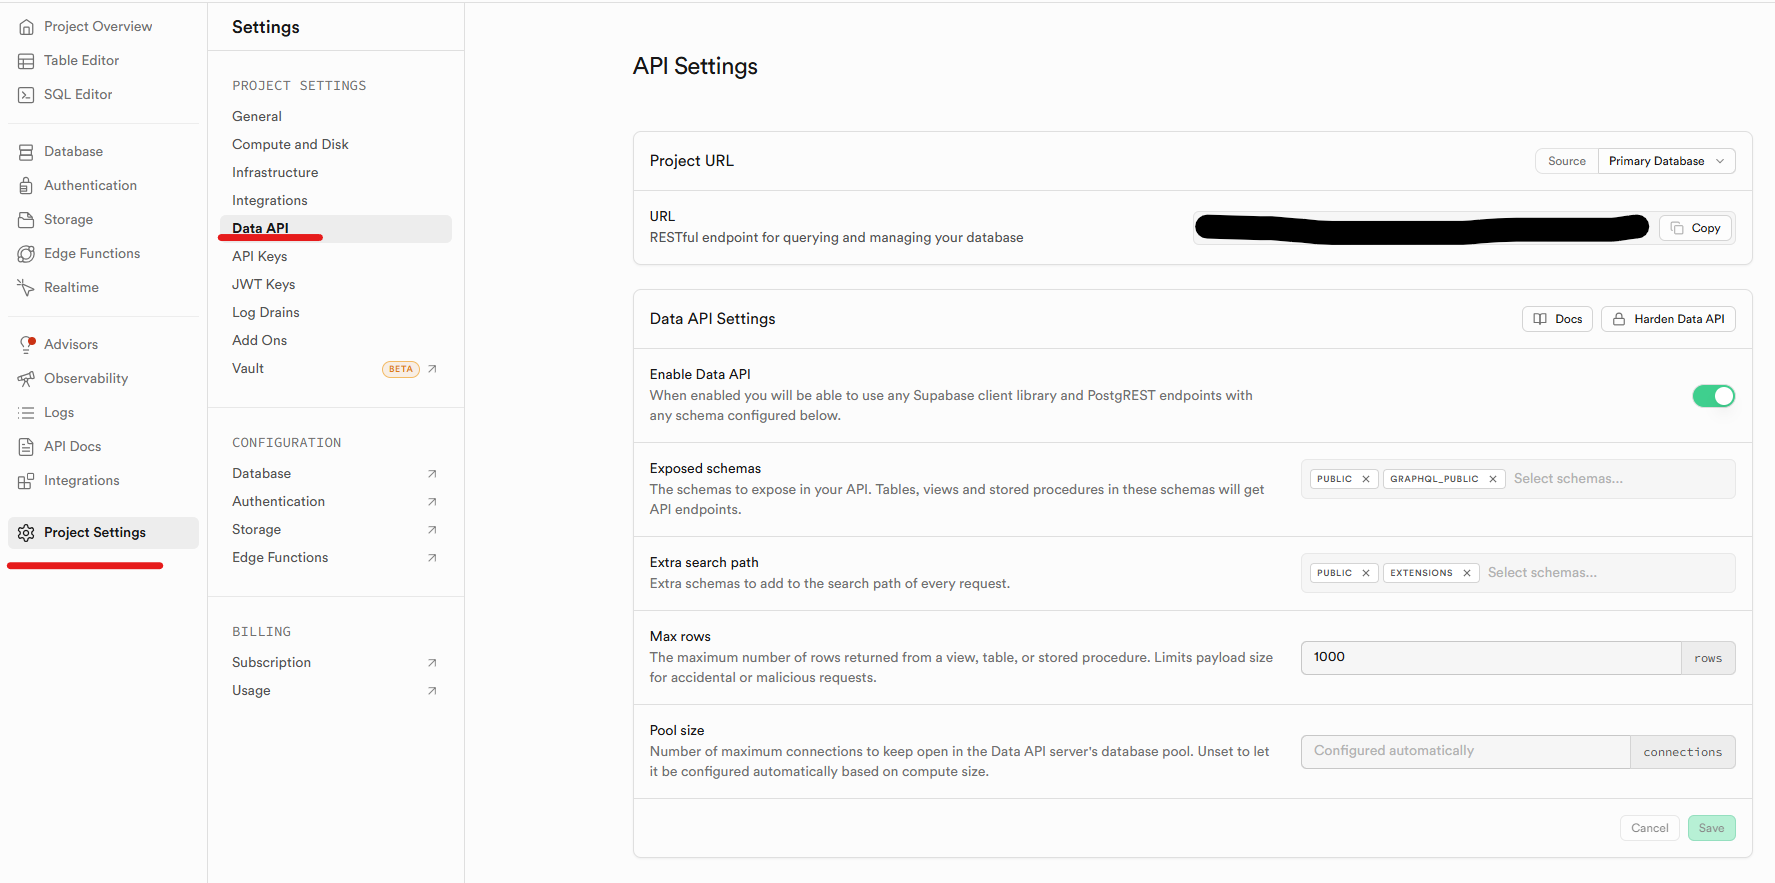
- Project Settings > API Keys
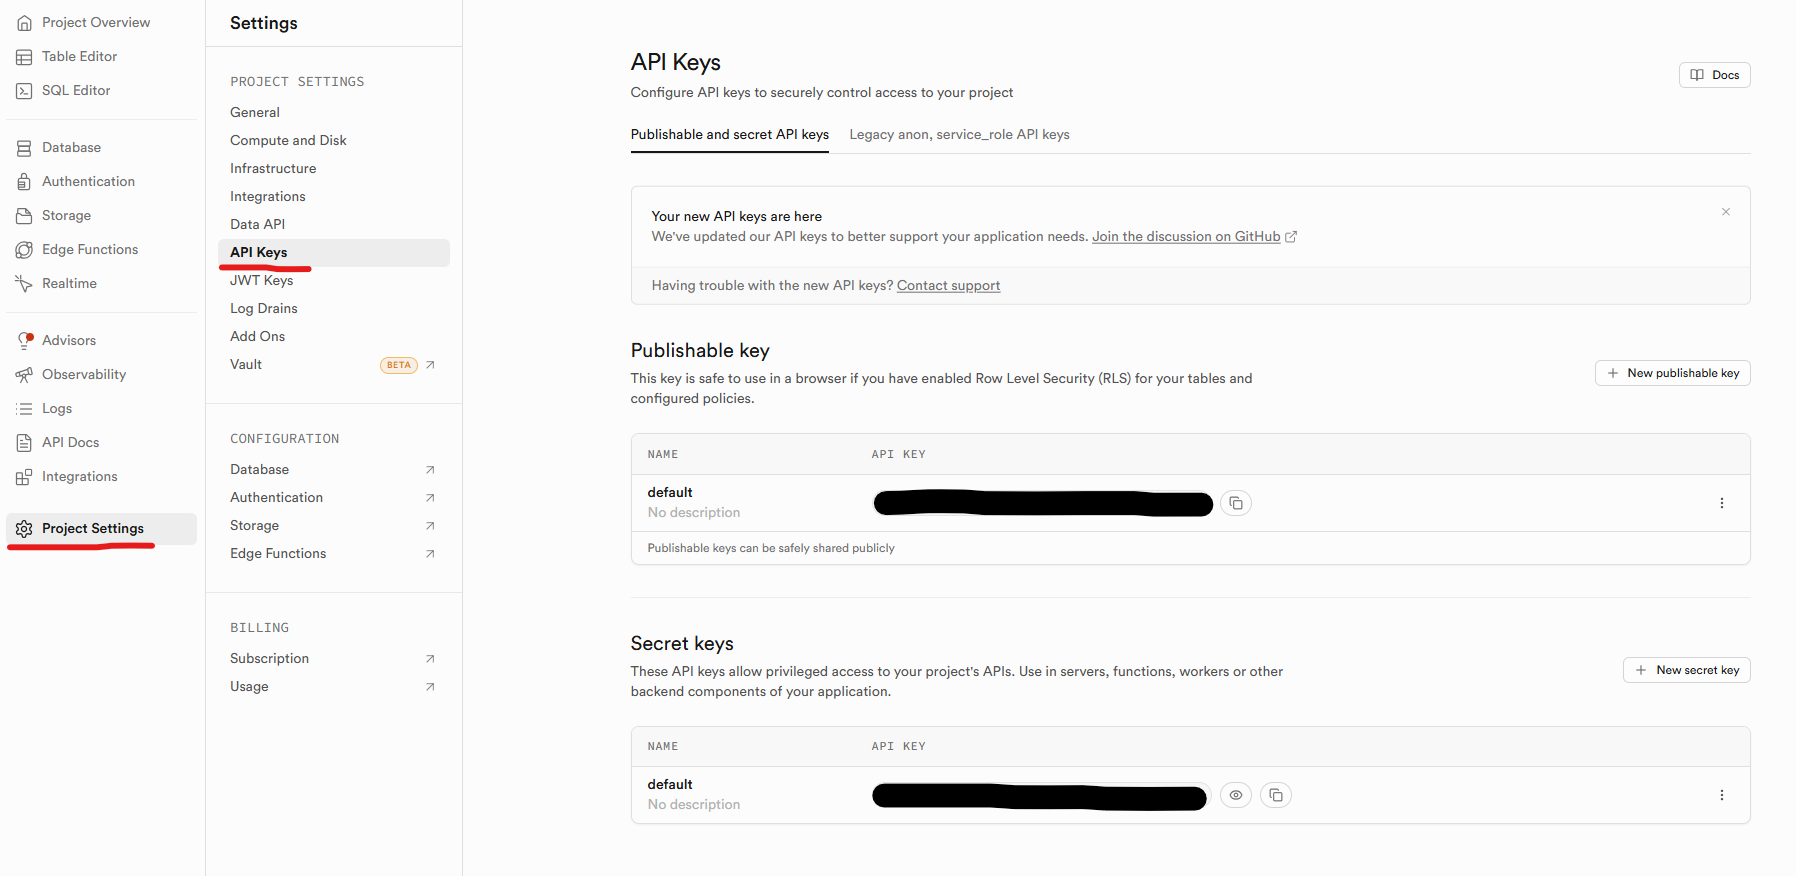
Create a new .env file and add the Project URL and API KEY you retrieved:
SUPABASE_URL=<Project URL>
SUPABASE_KEY=<Publishable key>
The property names used in env are the default names.
https://supabase.nuxtjs.org/getting-started/introduction#options
If you’d like to use different property names, configure Supabase options in nuxt.config.ts like this:
export default defineNuxtConfig({
  // ...
  supabase: {
    // Options
  }
})
With that, the Supabase setup is complete. Let’s move on to creating the login page in Nuxt.js.
Implementing Email-Based Authentication
#Now we’ll implement the authentication flow.
Supabase supports many authentication methods like Google or GitHub login, but for simplicity, we’ll use email authentication this time.
I found the source code from this demo very helpful: demo source code, so I’ll base this explanation on that.
In Nuxt.js × Supabase, unauthenticated users are redirected to /login by default. Therefore, you need to create the following in the pages directory:
| vue file | Description |
|---|---|
| login.vue | Page for login and new registration |
| index.vue | Page to navigate to after logging in |
We also need a logout feature, which we’ll add in an AppHeader component under the components directory:
| vue file | Description |
|---|---|
| AppHeader.vue | Header component with logout functionality |
app.vue
#Since we need to create files under pages, let’s first set up app.vue:
<template>
  <UApp>
    <NuxtLayout>
      <NuxtPage />
    </NuxtLayout>
  </UApp>
</template>
<template>
  <div>
    <AppHeader />

    <UMain>
      <slot />
    </UMain>
  </div>
</template>
<UApp> and <NuxtLayout> are UI components from the NuxtUI library.
Below, I will use NuxtUI components without additional notes.
Login Page
#Next, create the login page. Here’s the complete login.vue:
<script setup lang="ts">
import type { AuthError } from '@supabase/supabase-js';

/** Instance of the Supabase client */
const supabase = useSupabaseClient();
/** Logged-in user info */
const user = useSupabaseUser();
/** Toast notification */
const toast = useToast();
/** Toggle display mode (in: login, up: sign up) */
const sign = ref<'in' | 'up'>('in');

watchEffect(() => {
  // If the user is already authenticated, redirect to the home page
  if (user.value) {
    return navigateTo('/');
  }
});

// Define form fields
const fields = [
  {
    name: 'email',
    label: 'Email',
    type: 'text' as const,
    placeholder: 'Enter your email address',
    required: true,
  },
  {
    name: 'password',
    label: 'Password',
    type: 'password' as const,
    placeholder: 'Enter your password',
  },
];

/**
 * Sign in with email and password
 *
 * @param email User's email address
 * @param password User's password
 */
const signIn = async (email: string, password: string) => {
  const { error } = await supabase.auth.signInWithPassword({
    email,
    password,
  });
  if (error) {
    displayError(error);
  }
};

/**
 * Sign up a new user
 *
 * @param email User's email address
 * @param password User's password
 */
const signUp = async (email: string, password: string) => {
  const { error } = await supabase.auth.signUp({
    email,
    password,
  });
  if (error) {
    displayError(error);
  } else {
    toast.add({
      title: 'Sign up successful',
      icon: 'i-lucide-check-circle',
      color: 'success',
    });
    await signIn(email, password);
  }
};

/**
 * Display authentication errors as toast notifications
 *
 * @param error AuthError object returned by Supabase
 */
const displayError = (error: AuthError) => {
  toast.add({
    title: 'Error',
    description: error.message,
    icon: 'i-lucide-alert-circle',
    color: 'error',
  });
};

/**
 * Handler for form submission
 *
 * @param payload Input data from the form (email, password)
 */
async function onSubmit(payload: any) {
  const email = payload.data.email;
  const password = payload.data.password;

  if (sign.value === 'in') {
    // Login case
    await signIn(email, password);
  } else {
    // Sign-up case
    await signUp(email, password);
  }
}
</script>
<template>
  <UContainer
    class="h-[calc(100vh-var(--ui-header-height))] flex items-center justify-center px-4"
  >
    <UPageCard class="max-w-sm w-full">
      <UAuthForm
        :title="sign === 'in' ? 'Login' : 'Sign Up'"
        icon="i-lucide-user"
        :fields="fields"
        @submit="onSubmit"
      >
        <template #description>
          {{ sign === 'up' ? 'Already have an account?' : 'To sign up,' }}
          <UButton variant="link" class="p-0" @click="sign = sign === 'up' ? 'in' : 'up'">
            here
          </UButton>
        </template>
        <template #submit>
          <div class="flex items-center justify-center">
            <UButton type="submit" class="justify-center cursor-pointer w-80">
              {{ sign === 'up' ? 'Sign Up' : 'Login' }}
            </UButton>
          </div>
        </template>
      </UAuthForm>
    </UPageCard>
  </UContainer>
</template>
Let's walk through the code from top to bottom.
First, we prepare the Supabase client and set up a redirect based on the login state:
/** Instance of the Supabase client */
const supabase = useSupabaseClient();
/** Logged-in user info */
const user = useSupabaseUser();
/** Toast notification */
const toast = useToast();
/** Toggle display mode (in: login, up: sign up) */
const sign = ref<'in' | 'up'>('in');

watchEffect(() => {
  // If the user is already authenticated, redirect to the home page
  if (user.value) {
    return navigateTo('/');
  }
});
Next, we define the form fields to pass to the login form component (UAuthForm):
// Define form fields
const fields = [
  {
    name: 'email',
    label: 'Email',
    type: 'text' as const,
    placeholder: 'Enter your email address',
    required: true,
  },
  {
    name: 'password',
    label: 'Password',
    type: 'password' as const,
    placeholder: 'Enter your password',
  },
];
Then we implement the authentication logic using Supabase's auth library.
We use signInWithPassword for login and signUp for registration, passing in the email and password:
/**
 * Sign in with email and password
 *
 * @param email User's email address
 * @param password User's password
 */
const signIn = async (email: string, password: string) => {
  const { error } = await supabase.auth.signInWithPassword({
    email,
    password,
  });
  if (error) {
    displayError(error);
  }
};

/**
 * Sign up a new user
 *
 * @param email User's email address
 * @param password User's password
 */
const signUp = async (email: string, password: string) => {
  const { error } = await supabase.auth.signUp({
    email,
    password,
  });
  if (error) {
    displayError(error);
  } else {
    toast.add({
      title: 'Sign up successful',
      icon: 'i-lucide-check-circle',
      color: 'success',
    });
    await signIn(email, password);
  }
};
We also create a method to show errors as toast notifications:
/**
 * Display authentication errors as toast notifications
 *
 * @param error AuthError object returned by Supabase
 */
const displayError = (error: AuthError) => {
  toast.add({
    title: 'Error',
    description: error.message,
    icon: 'i-lucide-alert-circle',
    color: 'error',
  });
};
For the form submission handler, we call signIn or signUp based on the current mode:
/**
 * Handler for form submission
 *
 * @param payload Input data from the form (email, password)
 */
async function onSubmit(payload: any) {
  const email = payload.data.email;
  const password = payload.data.password;

  if (sign.value === 'in') {
    // Login case
    await signIn(email, password);
  } else {
    // Sign-up case
    await signUp(email, password);
  }
}
Finally, we build the login template using NuxtUI components, switching between login and sign-up based on the mode:
<template>
  <UContainer
    class="h-[calc(100vh-var(--ui-header-height))] flex items-center justify-center px-4"
  >
    <UPageCard class="max-w-sm w-full">
      <UAuthForm
        :title="sign === 'in' ? 'Login' : 'Sign Up'"
        icon="i-lucide-user"
        :fields="fields"
        @submit="onSubmit"
      >
        <template #description>
          {{ sign === 'up' ? 'Already have an account?' : 'To sign up,' }}
          <UButton variant="link" class="p-0" @click="sign = sign === 'up' ? 'in' : 'up'">
            here
          </UButton>
        </template>
        <template #submit>
          <div class="flex items-center justify-center">
            <UButton type="submit" class="justify-center cursor-pointer w-80">
              {{ sign === 'up' ? 'Sign Up' : 'Login' }}
            </UButton>
          </div>
        </template>
      </UAuthForm>
    </UPageCard>
  </UContainer>
</template>
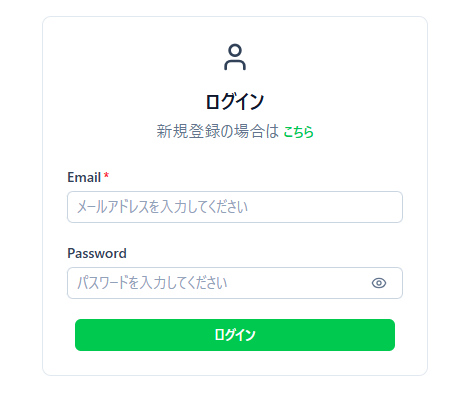
Here’s how the final login page looks:
Main Page
#Next, create the main page users see after logging in. As an example, we’ll display a list of blog articles the user has written:
<script setup lang="ts">
import type { Database } from '#build/types/supabase-database';
import type { TableColumn } from '@nuxt/ui';

/** Instance of the Supabase client */
const client = useSupabaseClient<Database>();
/** Logged-in user info */
const user = useSupabaseUser();

/**
 * Fetch list of articles
 */
const { data: articles } = await useAsyncData(
  'articles',
  async () => {
    const { data } = await client
      .from('article')
      .select('*')
      .eq('uuid', user.value!.sub)
      .order('regist_date');
    return data ?? [];
  },
  { default: () => [] }
);

/**
 * Table column definitions
 */
const columns: TableColumn<any, any>[] = [
  { accessorKey: 'id', header: 'ID' },
  { accessorKey: 'regist_date', header: 'Date' },
  { accessorKey: 'title', header: 'Title' },
  { accessorKey: 'abstract', header: 'Abstract' },
];
</script>
<template>
  <UContainer>
    <UPageSection title="Article List" description="Displays the latest articles" headline="Blog">
      <div class="flex justify-center items-center">
        <div v-if="articles.length > 0">
          <UCard variant="subtle">
            <UTable :data="articles" :columns="columns"></UTable>
          </UCard>
        </div>
      </div>
    </UPageSection>
  </UContainer>
</template>
Let’s go through the code step by step.
First, we set up the Supabase client just like on the login page:
/** Instance of the Supabase client */
const client = useSupabaseClient<Database>();
/** Logged-in user info */
const user = useSupabaseUser();
This time we use a generated type definition file for the database when creating the client (Database type), which enables autocomplete for table and column names, greatly improving development efficiency.
You can generate the type definition file using the Supabase CLI.
First, log in and initialize:
npx supabase login
npx supabase init
Then run:
npx supabase gen types typescript --project-id "<project_id>" --schema public > ./app/types/database.types.ts
Next, we implement fetching the article list. We get the user's UUID from user.value!.sub and fetch only the articles associated with that user. We also define the table columns to display the data in a table format.
/**
 * Fetch list of articles
 */
const { data: articles } = await useAsyncData(
  'articles',
  async () => {
    const { data } = await client
      .from('article')
      .select('*')
      .eq('uuid', user.value!.sub)
      .order('regist_date');
    return data ?? [];
  },
  { default: () => [] }
);

/**
 * Table column definitions
 */
const columns: TableColumn<any, any>[] = [
  { accessorKey: 'id', header: 'ID' },
  { accessorKey: 'regist_date', header: 'Date' },
  { accessorKey: 'title', header: 'Title' },
  { accessorKey: 'abstract', header: 'Abstract' },
];
Finally, we build the template:
<template>
  <UContainer>
    <UPageSection title="Article List" description="Displays the latest articles" headline="Blog">
      <div class="flex justify-center items-center">
        <div v-if="articles.length > 0">
          <UCard variant="subtle">
            <UTable :data="articles" :columns="columns"></UTable>
          </UCard>
        </div>
      </div>
    </UPageSection>
  </UContainer>
</template>
Header Component
#Lastly, let’s implement the logout feature in the header component (components/AppHeader.vue):
<script setup lang="ts">
/** Instance of the Supabase client */
const client = useSupabaseClient();
/** Logged-in user info */
const user = useSupabaseUser();

/**
 * Logout handler
 */
const logout = async () => {
  await client.auth.signOut();
  navigateTo('/login');
};
</script>
<template>
  <UHeader :toggle="false">
    <template #left>
      <span class="font-bold text-lg">Demo</span>
    </template>
    <template #right>
      <UButton v-if="user" variant="link" class="cursor-pointer" @click="logout">
        Logout
      </UButton>
      <UButton v-if="!user" variant="link" to="/login">
        Login
      </UButton>
    </template>
  </UHeader>
</template>
The logout logic is straightforward: call the signOut method on the Supabase client and then redirect to /login. By adding a logout button in the template, users can sign out easily.
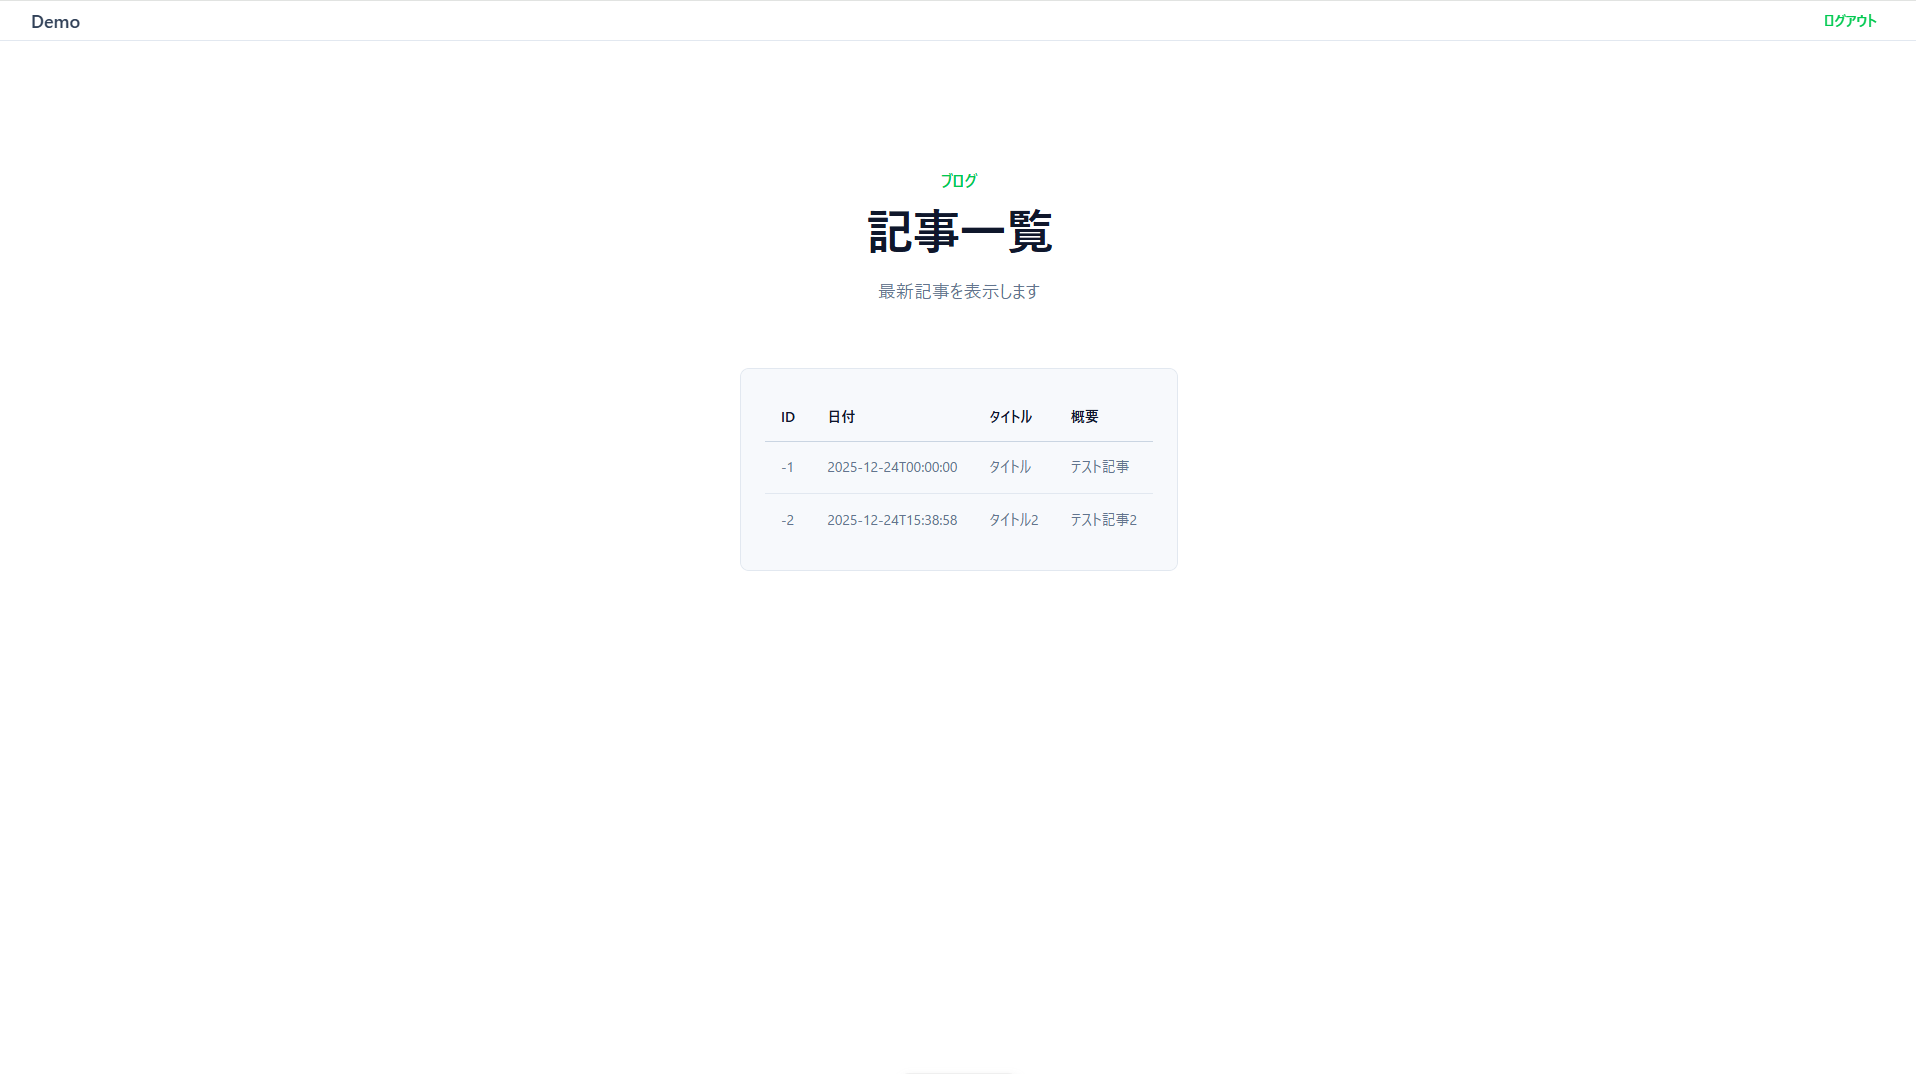
Here’s the main page alongside the header in action:
With this, we’ve implemented email-based authentication.
Verifying Email-Based Authentication
#Let’s test the flow by signing up on the login page. Enter an email and password, then click the sign-up button. You’ll receive a confirmation email.
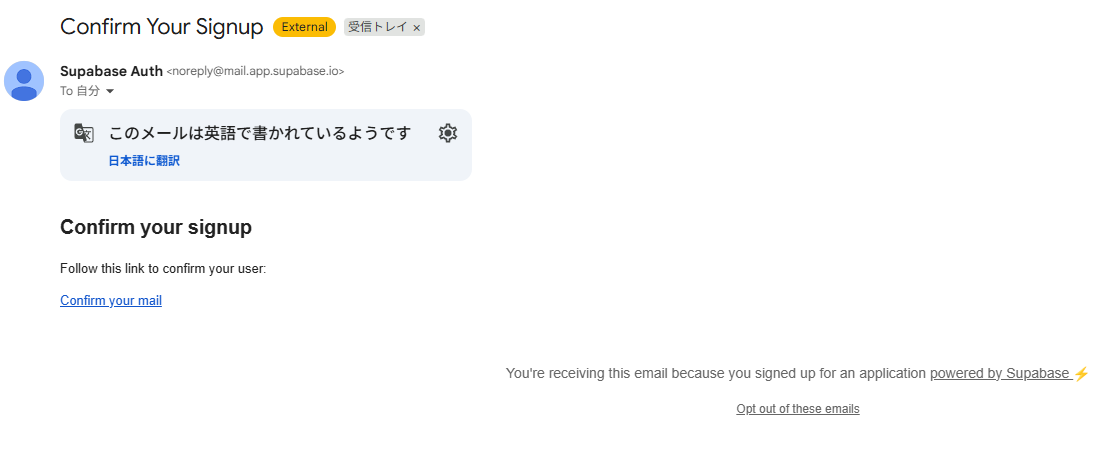
Clicking the “Confirm your mail” link completes the user registration and redirects you to the app’s main page.
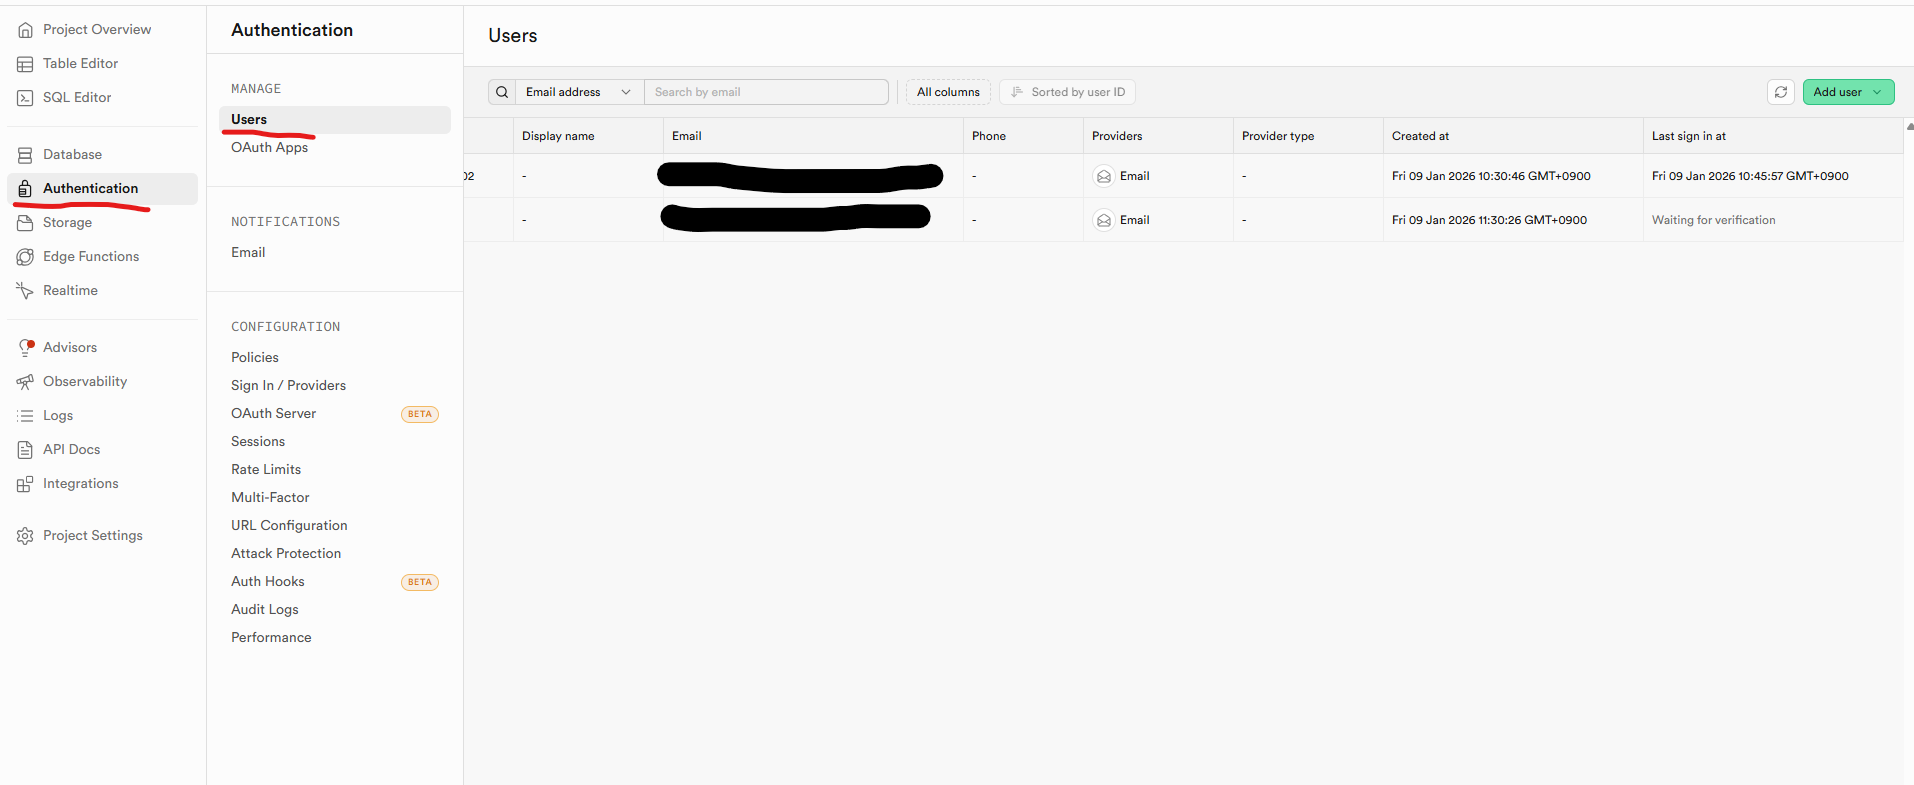
You can also check whether the user is registered in your Supabase project under “Authentication > Users.” If the data appears in the table, registration is complete. If email confirmation is pending, the Last Sign In column will show “Waiting for verification.”
Conclusion
#In this article, we covered how to implement authentication using Nuxt.js and Supabase. What surprised me most was how quickly and easily it came together without much effort.
Being able to minimize backend development work while implementing secure authentication so easily is very appealing.
While this guide focused on email-based authentication, you can also integrate providers like Google or GitHub just as easily.
Feel free to give those a try as well.
Bonus: Allowing Pages to Be Viewed Without Login
#By default, the method introduced here with Nuxt.js and Supabase redirects unauthenticated users to the login page. However, you might want to allow some pages to be viewed without logging in.
It’s actually very simple: just add the following to your nuxt.config.ts:
export default defineNuxtConfig({
  // ...omitted...
  supabase: {
    redirectOptions: {
      login: '/login',
      callback: '/confirm',
      include: [],
      exclude: ['/'], // Pages listed here can be viewed without login
      cookieRedirect: false,
    },
  },
  // ...omitted...
})
With this configuration, pages specified in exclude don't require login.
Give it a try!
References
#- Supabase Official Site
- Nuxt Supabase Integration Official Site
- The demo source code for building a login form on this site was very useful.
- Todo list example using Supabase and Nuxt 3
- I want to spread Supabase
- What is Supabase? An easy-to-understand guide for beginners
- Built a chat app with Supabase + Nuxt 3
- Implementing Google Login with Nuxt + Supabase
- Quickly built authentication with the buzzworthy Supabase!
- This was implemented with Next.js, but it was helpful.