No SSH Port Opening Required! Building a Secure CD Pipeline to Your Home Ubuntu Desktop with Cloudflare Tunnel!
Back to TopTo reach a broader audience, this article has been translated from Japanese.
You can find the original version here.
Introduction
#Recently, I purchased a notebook PC for Ubuntu Desktop because I wanted to try hosting a web application at home.
Right after buying it, I installed the Apache Web Server, edited /var/www/html/index.html directly, and accessed it from a browser. Seeing it display exactly as expected, I remember thinking, “This is fun!”
However, this setup has a problem. If you publish this page externally, any edits you make will instantly be reflected in production. In other words, unfinished code and test data might be visible to visitors.
“I want to separate my development environment from production…!”
So I created a separate development directory apart from Apache’s public directory and continued development there. At the same time, I introduced version control with Git/GitHub and adopted a common workflow of pull requests from dev to main, followed by merges.
However, a new issue arose. With this workflow, every time development was complete, I had to manually copy & paste from the development directory to the public directory. I merged the pull request on GitHub, updated my local main branch, and then manually copied files from the development directory to the public directory. Needless to say, this was tedious.
“I want the updates to automatically reflect in the Apache public directory when I merge a pull request…!”
To automate this tedious manual work, I decided to build a CD pipeline using GitHub Actions.
In this article, I will explain my experience building a continuous deployment (CD) pipeline from GitHub Actions to an Ubuntu Desktop on my home LAN, including the specific configuration steps.
Pipeline to Build
#The CD pipeline we will build in this article operates as follows.
Realized Operation Flow
#graph TD
A[Code Editing] --> B[Commit to dev branch]
B --> C[Create PR on GitHub]
C --> D[Merge PR into main]
D --> E[GitHub Actions Auto-trigger]
E --> F[Auto Deploy to Home Server]
F --> G[Deployment to Production Complete]
style A fill:#e1f5fe
style D fill:#fff3e0
style G fill:#c8e6c9The manual “copy & paste from the development directory to the public directory” is now fully automated, triggered by the merging of a pull request.
System Architecture
#graph TD
A[GitHub Actions Runner] --> B[Cloudflare Edge]
B --> C[Cloudflare Tunnel]
C --> D[Home Ubuntu Desktop]
D --> E[Apache Web Server]
style A fill:#e1f5fe
style B fill:#fff3e0
style C fill:#fff3e0
style D fill:#c8e6c9
style E fill:#c8e6c9| Component | Role |
|---|---|
| GitHub Actions | Executes the deployment workflow triggered by a merge |
| Cloudflare Tunnel | Provides a secure communication channel without exposing the home IP |
| Cloudflare Access | Implements automatic authentication via Service Token |
| SSH + rsync | Efficiently synchronizes only the changed files |
What You Can Do After Completion
#- ✅ Automatic deployment to production just by merging a pull request
- ✅ Operate securely without exposing your home public IP address
- ✅ Deployment history automatically recorded in GitHub Actions logs
- ✅ Complete freedom from manual deployment tasks
Prerequisites for This Article
#This article is intended for those who have the following knowledge and environment.
Required Knowledge
#- Basic GitHub Actions: How to write workflow files and use basic actions
- Basic Linux operations: Command-line operations, file permissions, SSH connection concepts
- Basic Apache Web Server: The concept of DocumentRoot and basic configuration
- Basic Git: Concepts of branches, pull requests, and merges
Required Environment
#- GitHub repository: Can be private or public
- Ubuntu Desktop environment: This article assumes Ubuntu 24.04.3 LTS
- Apache Web Server: Installed and configured
- Cloudflare account: Using Cloudflare Zero Trust
- Custom domain: A domain whose name servers are set to Cloudflare
Necessary Technical Concepts and Knowledge
#Before building the pipeline, let's organize the related technical concepts.
GitHub Actions Workflows
#GitHub Actions is a platform for running CI/CD pipelines within a GitHub repository.
Important Concepts
- Workflow: The process that runs one or more jobs defined in a YAML file in
.github/workflows/ - Event: A specific activity in the repository (e.g., merging a pull request) that triggers a workflow
- Job: A series of steps executed on the same runner within a workflow
- Action: A component that performs a specific task within a workflow (provided by GitHub Actions or custom)
- Runner: The virtual environment that runs workflows. Each runner can run one job at a time. (We will use
ubuntu-latest)
SSH Connectivity and Security
#Basics of SSH (Secure Shell)
SSH is a protocol that uses an encrypted channel to securely connect to a remote server.
Host Authentication
On the SSH client side, verify that the destination is a genuine SSH server.
Host Authentication Mechanism
An SSH server has a unique secret/public key pair called a host key configured. On the SSH client side, this public key is stored in the ~/.ssh/known_hosts file.
On the first connection, add the SSH server's host key (public key) to the SSH client's ~/.ssh/known_hosts file. On subsequent connections, SSH compares the host key (public key) registered in this file with the server’s host key (private key) to verify the server’s authenticity.
User Authentication
On the SSH server side, verify that the connecting SSH client user is genuine.
User Authentication Mechanism
Use public key authentication. A rough overview is as follows:
- The SSH server keeps the public keys of authorized SSH clients in the
~/.ssh/authorized_keysfile. - The SSH client uses its private key to generate a signature.
- The SSH server uses the SSH client's public key to verify the signature.
- If the signature is verified, the SSH server grants the connection as the SSH client user.
Components in SSH Connection This Time
- SSH client: The GitHub Actions runner environment (
ubuntu-latest) - SSH server: Your home Ubuntu Desktop
Why this arrangement?
GitHub Actions workflows run in GitHub’s cloud environment. Therefore, to deploy files from the cloud environment to an external server (your home Ubuntu Desktop), the GitHub Actions runner must initiate an SSH connection to the home server. In other words, the connection direction is “cloud → home,” where the GitHub Actions runner is the initiator (client) and the home Ubuntu Desktop is the receiver (server).
Cloudflare Tunnel
#What is Cloudflare Tunnel
Cloudflare Tunnel is a service that allows you to safely expose a local server to the internet without publishing a public IP address.
Difference from Traditional Home Server Exposure Methods
Traditional Method (Port Forwarding):
Internet → Router (port 22 open) → Home Ubuntu Desktop
                    ↑ Security risk
- ❌️ Requires opening the SSH port (22) on the router
- ❌ Public IP address is directly exposed
- ❌ More vulnerable to DDoS and brute-force attacks
- ❌ Potential for your home IP address to be identified
Using Cloudflare Tunnel:
GitHub Actions → Cloudflare Edge → Cloudflare Tunnel → Home Ubuntu Desktop
                                       ↑
                               Encrypted tunnel
- ✅️ No need to open ports on the router
- ✅️ Hides your public IP address
- ✅️ Leverages Cloudflare’s security features
- ✅️ Traffic is filtered through Cloudflare’s edge
Role in This Architecture
graph TD
    A[GitHub Actions Runner] --> B[Cloudflare Edge]
    B --> C[Cloudflare Tunnel]
    C --> D[Home Ubuntu Desktop]

    style A fill:#e1f5fe
    style D fill:#c8e6c9
style C fill:#fff3e0- On the Home Ubuntu Desktop side: The
cloudflareddaemon maintains a connection to Cloudflare - On the GitHub Actions side: Connects via proxy using the
cloudflared access sshcommand - Cloudflare: Provides a secure tunnel between both ends
Security Benefits
- IP Concealment: Your home public IP address is not exposed
- DDoS Protection: Utilizes Cloudflare’s security infrastructure
- Access Control: Fine-grained control via Cloudflare Access
Cloudflare Access
#What is Cloudflare Access
Cloudflare Access is Cloudflare’s security service that enables Zero Trust Network Access (ZTNA). It provides application-level authentication and authorization as an alternative to traditional VPNs.
Concept of Zero Trust Network Access (ZTNA)
Traditional Perimeter Security Model:
External (untrusted) | Firewall | Internal (trusted)
- A perimeter is established between the corporate network and the internet, blocking external threats with a firewall
- Assumes that the internal network is trustworthy
- If breached, lateral movement risk exists
Zero Trust Approach:
Verify all access → Authenticate → Authorize → Grant access
- “Never trust, always verify”
- Authenticate and authorize every connection regardless of network location
Role of Cloudflare Access in This Architecture
sequenceDiagram
    participant GA as GitHub Actions
    participant CF as Cloudflare Access
    participant CT as Cloudflare Tunnel
    participant UD as Ubuntu Desktop

    GA->>CF: 1. SSH connection request + credentials
    CF->>CF: 2. Verify Access Policy
    CF->>GA: 3. Authentication successful
    GA->>CT: 4. SSH connection via cloudflared proxy
    CT->>UD: 5. SSH connection through secure tunnel
    UD->>GA: 6. SSH connection established
Security Benefits
- Fine-grained access control: Detailed permissions per resource and user
- Audit logs: All access attempts are recorded
- MFA support: Multi-factor authentication enforcement (for human users)
- Real-time control: Policy changes take effect immediately
- Session management: Detailed management and monitoring of connection sessions
Differences from Traditional VPN
| Category | Traditional VPN | Cloudflare Access |
|---|---|---|
| Scope of connection | Entire network | Application-level |
| Authentication | At connection time only | Verified per access |
| Configuration complexity | Complex | Relatively simple |
| Scalability | Limited | High |
| Audit logs | Limited | Detailed |
Automated Authentication via Service Token
What is a Service Token
A Service Token is an authentication mechanism for automated systems and machine-to-machine communication. Unlike interactive authentication for human users (OAuth, SAML, etc.), it enables fully programmatic access.
Difference from traditional user authentication:
| Item | User Authentication (OAuth/SAML) | Service Token |
|---|---|---|
| Target | Human users | Automation systems/applications |
| Authentication flow | Browser-based and interactive | API-based and programmatic |
| Credentials | Username, password, MFA | Client ID, Client Secret |
| Validity | Session-based (a few hours) | Long-lived |
Role in GitHub Actions
1. Enabling Automated SSH Connections
In GitHub Actions workflows, Service Tokens are indispensable because human-interactive authentication is not possible.
GitHub Actions Runner → Service Token authentication → Cloudflare Access → SSH connection
2. Why It’s Ideal for CD Pipelines
- Unattended execution: Can run 24/7 without human intervention
- Scalability: Can be used concurrently by multiple workflows
- Reliability: No concerns about session expiration or timeouts
- Security: Securely managed in GitHub Secrets
3. Security Benefits in Automated Workflows
- Principle of least privilege: Access restricted to specific applications
- Auditability: All access is logged
- Centralized management: Centralized management in the Cloudflare dashboard
Concept of the Authentication Flow
Service Token authentication process:
sequenceDiagram
    participant GA as GitHub Actions
    participant CF as Cloudflare Access
    participant App as Protected Application

    GA->>CF: 1. Service Token (Client ID + Secret)
    CF->>CF: 2. Verify token validity
    CF->>CF: 3. Evaluate Access Policy
    CF->>GA: 4. Authentication successful (Access Token)
    GA->>App: 5. Application access (Access Token)
    App->>GA: 6. Response
Verification process by Cloudflare Access:
- Token validity check: Verify the provided Client ID and Secret
- Policy evaluation: Check the conditions of the relevant Access Policy
- Access approval decision: Grant access only if all conditions are met
- Audit log recording: Detailed logs of authentication attempts and outcomes
This Service Token authentication mechanism enables a fully automated CD pipeline without compromising security.
Overview of the Completed Pipeline
#First, let's look at the overall architecture of the final CD pipeline.
Full Content of deploy.yml File
#name: Deploy to Server
on:
pull_request:
types: [closed]
branches:
- main
jobs:
deploy:
runs-on: ubuntu-latest
if: github.event.pull_request.merged == true
env:
REMOTE_HOST: ssh.your-domain.com
REMOTE_USER: deploy-user
REMOTE_DIR: /var/www/html
SSH_PROXY_COMMAND: /tmp/cloudflared/cloudflared access ssh --id ${{ secrets.CLOUDFLARED_SSH_ID }} --secret ${{ secrets.CLOUDFLARED_SSH_SECRET }} --hostname %h
steps:
- name: Install cloudflared
run: |
latest_version=$(curl -s $GITHUB_API_URL/repos/cloudflare/cloudflared/releases/latest | jq -r '.tag_name')
mkdir -p /tmp/cloudflared
curl -sL -o /tmp/cloudflared/cloudflared $GITHUB_SERVER_URL/cloudflare/cloudflared/releases/download/$latest_version/cloudflared-linux-amd64
chmod +x /tmp/cloudflared/cloudflared
/tmp/cloudflared/cloudflared --version
- name: Prepare .ssh/known_hosts from secrets
run: |
mkdir -p $HOME/.ssh
chmod 700 $HOME/.ssh
echo "${{ secrets.SSH_KNOWN_HOSTS }}" > $HOME/.ssh/known_hosts
chmod 644 $HOME/.ssh/known_hosts
- name: Set up SSH key
run: |
SSH_KEY_PATH=$HOME/.ssh/id_ed25519_github_actions
echo "${{ secrets.SSH_PRIVATE_KEY }}" > "$SSH_KEY_PATH"
chmod 600 "$SSH_KEY_PATH"
- name: Checkout repository
uses: actions/checkout@v4
- name: Deploy application via rsync
run: |
SSH_KEY_PATH=$HOME/.ssh/id_ed25519_github_actions
rsync -rvz --no-group --no-perms --omit-dir-times \
-e "ssh -i \"$SSH_KEY_PATH\" -o StrictHostKeyChecking=yes -o ProxyCommand='$SSH_PROXY_COMMAND'" \
--include='public/***' \
--include='src/***' \
--include='views/***' \
--include='composer.json' \
--include='composer.lock' \
--exclude='*' \
./ \
$REMOTE_USER@$REMOTE_HOST:$REMOTE_DIR/
- name: Run composer install on remote
run: |
echo "Installing composer dependencies..."
SSH_KEY_PATH=$HOME/.ssh/id_ed25519_github_actions
ssh -i "$SSH_KEY_PATH" \
-o StrictHostKeyChecking=yes \
-o ProxyCommand="$SSH_PROXY_COMMAND" \
$REMOTE_USER@$REMOTE_HOST "
set -euo pipefail
cd \"$REMOTE_DIR\"
if command -v composer >/dev/null 2>&1; then
COMPOSER_NO_INTERACTION=1 \
composer install \
--no-dev \
--prefer-dist \
--no-interaction \
--no-progress \
--optimize-autoloader
if sudo -n true 2>/dev/null; then
sudo chown -R www-data:www-data vendor
sudo chmod -R 755 vendor
else
echo '⚠️ Skipped changing ownership/permissions of vendor due to lack of sudo privileges'
fi
echo '✅ Composer install completed.'
else
echo '❌ composer not found on remote host.'
exit 1
fi
"
Pipeline Operation Flow
#graph TD
A[Pull request merged into main branch] --> B[GitHub Actions triggered]
B --> C[Checkout repository code]
C --> D[Install cloudflared]
D --> E[SSH setup and host key registration]
E --> F[File synchronization via rsync]
F --> G[Deployment complete]
F -.-> H[Install dependencies with Composer<br/>*PHP environment only*]
H -.-> G
style A fill:#e1f5fe
style G fill:#c8e6c9
style H fill:#fff2ccDetails of Each Step
#1. Trigger Conditions
on:
  pull_request:
    types: [closed]
    branches: [main]
- Executes when a pull request to the main branch is closed
- Processes only when
github.event.pull_request.merged == true(i.e., when merged)
2. Installing cloudflared
latest_version=$(curl -s $GITHUB_API_URL/repos/cloudflare/cloudflared/releases/latest | jq -r '.tag_name')
mkdir -p /tmp/cloudflared
curl -sL -o /tmp/cloudflared/cloudflared $GITHUB_SERVER_URL/cloudflare/cloudflared/releases/download/$latest_version/cloudflared-linux-amd64
chmod +x /tmp/cloudflared/cloudflared
/tmp/cloudflared/cloudflared --version
- Dynamically retrieve the latest version from the GitHub API
3. Pre-registering the Host Key for SSH Connections
mkdir -p $HOME/.ssh
chmod 700 $HOME/.ssh
echo "${{ secrets.SSH_KNOWN_HOSTS }}" > $HOME/.ssh/known_hosts
chmod 644 $HOME/.ssh/known_hosts
- Establish a secure SSH connection using the pre-registered host key
Security-focused Design Decision
When performing SSH connections in an automated system, you can simplify configuration by using the StrictHostKeyChecking=no option to skip host verification on the first connection.
# Simple but insecure approach
ssh -o StrictHostKeyChecking=no user@hostname "command"
However, this approach carries the following security risks:
- ❌️ Risk of man-in-the-middle (MITM) attacks: A malicious server can impersonate the legitimate server
- ❌️ Cannot verify the authenticity of the destination: No guarantee you're connecting to the intended correct server
- ❌️ Compromised security policy: Disables fundamental security checks for automation
Benefits of pre-registering the host key:
# Secure approach
echo "${{ secrets.SSH_KNOWN_HOSTS }}" > ~/.ssh/known_hosts
ssh -o StrictHostKeyChecking=yes user@hostname "command"  # default behavior
- ✅️ Verify the destination: Ensure the destination by matching against the pre-registered legitimate host key
- ✅️ Prevent MITM attacks: Automatically reject connections to unauthorized servers
- ✅️ Combine automation and security: Achieve secure connections without human intervention
- ✅️ Audit compliance: Build an automated system that meets security standards
In this pipeline, we prioritize security over the convenience of automation, knowingly taking on the overhead of acquiring and managing host keys in advance to adopt a more secure approach.
4. Checkout Source Code
- name: Checkout repository
  uses: actions/checkout@v4
- actions/checkout@v4: Use GitHub Actions' official action to retrieve the repository source code
- Preparing files for deployment: Place the latest merged code in the runner environment before rsync transfer
5. File Synchronization
SSH_KEY_PATH=$HOME/.ssh/id_ed25519_github_actions
rsync -rvz --no-group --no-perms --omit-dir-times \
  -e "ssh -i \"$SSH_KEY_PATH\" -o StrictHostKeyChecking=yes -o ProxyCommand='$SSH_PROXY_COMMAND'" \
  --include='public/***' \
  --include='src/***' \
  --include='views/***' \
  --include='composer.json' \
  --include='composer.lock' \
  --exclude='*' \
  ./ \
  $REMOTE_USER@$REMOTE_HOST:$REMOTE_DIR/
Detailed Explanation of the rsync Command
- SSH_KEY_PATH variable: Makes the path to the SSH private key a variable to improve readability and maintainability
- ed25519 key type: Uses a faster and more secure elliptic-curve encryption compared to RSA
- Dedicated GitHub Actions key: A clear key name dedicated to deployment
Explanation of rsync Options
rsync -rvz --no-group --no-perms --omit-dir-times
| Option | Description | Reason |
|---|---|---|
-r |
Recursive copy | Transfers all files while preserving directory structure |
-v |
Verbose output | Allows checking transfer status in logs |
-z |
Compression | Efficiently uses network bandwidth |
--no-group |
Skip group changes | Avoid permission errors |
--no-perms |
Skip permission changes | Preserve existing server permissions |
--omit-dir-times |
Omit directory times | Prevent timestamp-related errors |
SSH Connection Settings
-e "ssh -i \"$SSH_KEY_PATH\" -o StrictHostKeyChecking=yes -o ProxyCommand='$SSH_PROXY_COMMAND'"
-eflag: Explicitly specifies the SSH command that rsync uses-i "$SSH_KEY_PATH": Use the specified private key file for user authenticationStrictHostKeyChecking=yes: Enforce host key verification (ensures security)ProxyCommand='$SSH_PROXY_COMMAND': Establish SSH connection via Cloudflare Access
Details of SSH_PROXY_COMMAND
SSH_PROXY_COMMAND: /tmp/cloudflared/cloudflared access ssh --id ${{ secrets.CLOUDFLARED_SSH_ID }} --secret ${{ secrets.CLOUDFLARED_SSH_SECRET }} --hostname %h
| Parameter | Description | Role |
|---|---|---|
/tmp/cloudflared/cloudflared |
Path to the cloudflared binary | Executable for cloudflared installed earlier |
access ssh |
SSH access mode | Specifies SSH connection via Cloudflare Access |
--id ${{ secrets.CLOUDFLARED_SSH_ID }} |
Service Token ID | Client ID used for authentication in Cloudflare Access |
--secret ${{ secrets.CLOUDFLARED_SSH_SECRET }} |
Service Token Secret | Client secret for the Service Token (managed in GitHub Secrets) |
--hostname %h |
Dynamic hostname | Dynamically retrieves the hostname for SSH connection (%h is an SSH placeholder) |
Why is this command necessary?
The GitHub Actions runner (SSH client) cannot interactively log in via a browser to enter ID/password or MFA like a human. To pass through the Cloudflare Access gateway, a programmatic authentication mechanism is required.
Role of this command:
This command functions as a ProxyCommand that automatically performs Cloudflare Access authentication before the SSH connection, providing the necessary credentials. Specifically, it uses a Service Token to pass Cloudflare Access authentication and establishes an SSH connection to the home server via Cloudflare Tunnel.
Workflow of the SSH ProxyCommand
sequenceDiagram
    participant SSH as SSH Client
    participant CF as cloudflared
    participant CA as Cloudflare Access
    participant CT as Cloudflare Tunnel
    participant Server as Ubuntu Server

    SSH->>CF: Execute ProxyCommand
    CF->>CA: Authenticate with Service Token
    CA->>CF: Authentication successful
    CF->>CT: Tunnel connection request
    CT->>Server: Forward SSH connection
    Server->>SSH: SSH session established
This ProxyCommand enables the GitHub Actions runner (SSH client) to authenticate via Cloudflare Access and connect securely to the home server (SSH server) through the tunnel.
File Selection Logic
Include patterns:
--include='public/***'      # Public web files
--include='src/***'         # Application source code
--include='views/***'       # Template files
--include='composer.json'   # PHP dependency definition
--include='composer.lock'   # Dependency lock file
Exclude patterns:
--exclude='*' # Exclude everything by default
Advantages of selective synchronization:
- Security: Prevent transfer of sensitive files (e.g.,
.env,.git, etc.) - Efficiency: Exclude unnecessary files (e.g.,
node_modules,vendor) for faster transfer - Safety: Control files that could affect the production environment
Source and Destination Specification
./ $REMOTE_USER@$REMOTE_HOST:$REMOTE_DIR/
./: Current directory (root of the checked-out repository)$REMOTE_USER: Remote server username (e.g.,deploy-user)$REMOTE_HOST: Destination hostname (e.g.,ssh.your-domain.com)$REMOTE_DIR: Deployment directory (e.g.,/var/www/html)
This configuration achieves secure, efficient, and controlled file synchronization from GitHub Actions to your home server via Cloudflare Access.
With these four basic steps, you can achieve secure file synchronization from GitHub Actions to your home server via Cloudflare Access.
Detailed Setup Steps
#Here are the detailed steps to actually build the same environment.
1. Cloudflare Configuration
#References
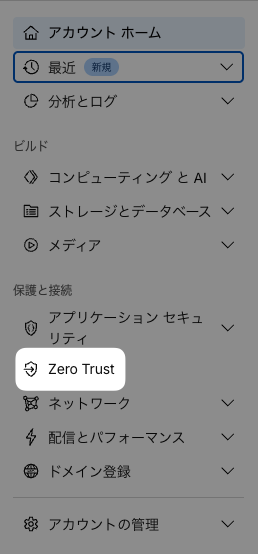
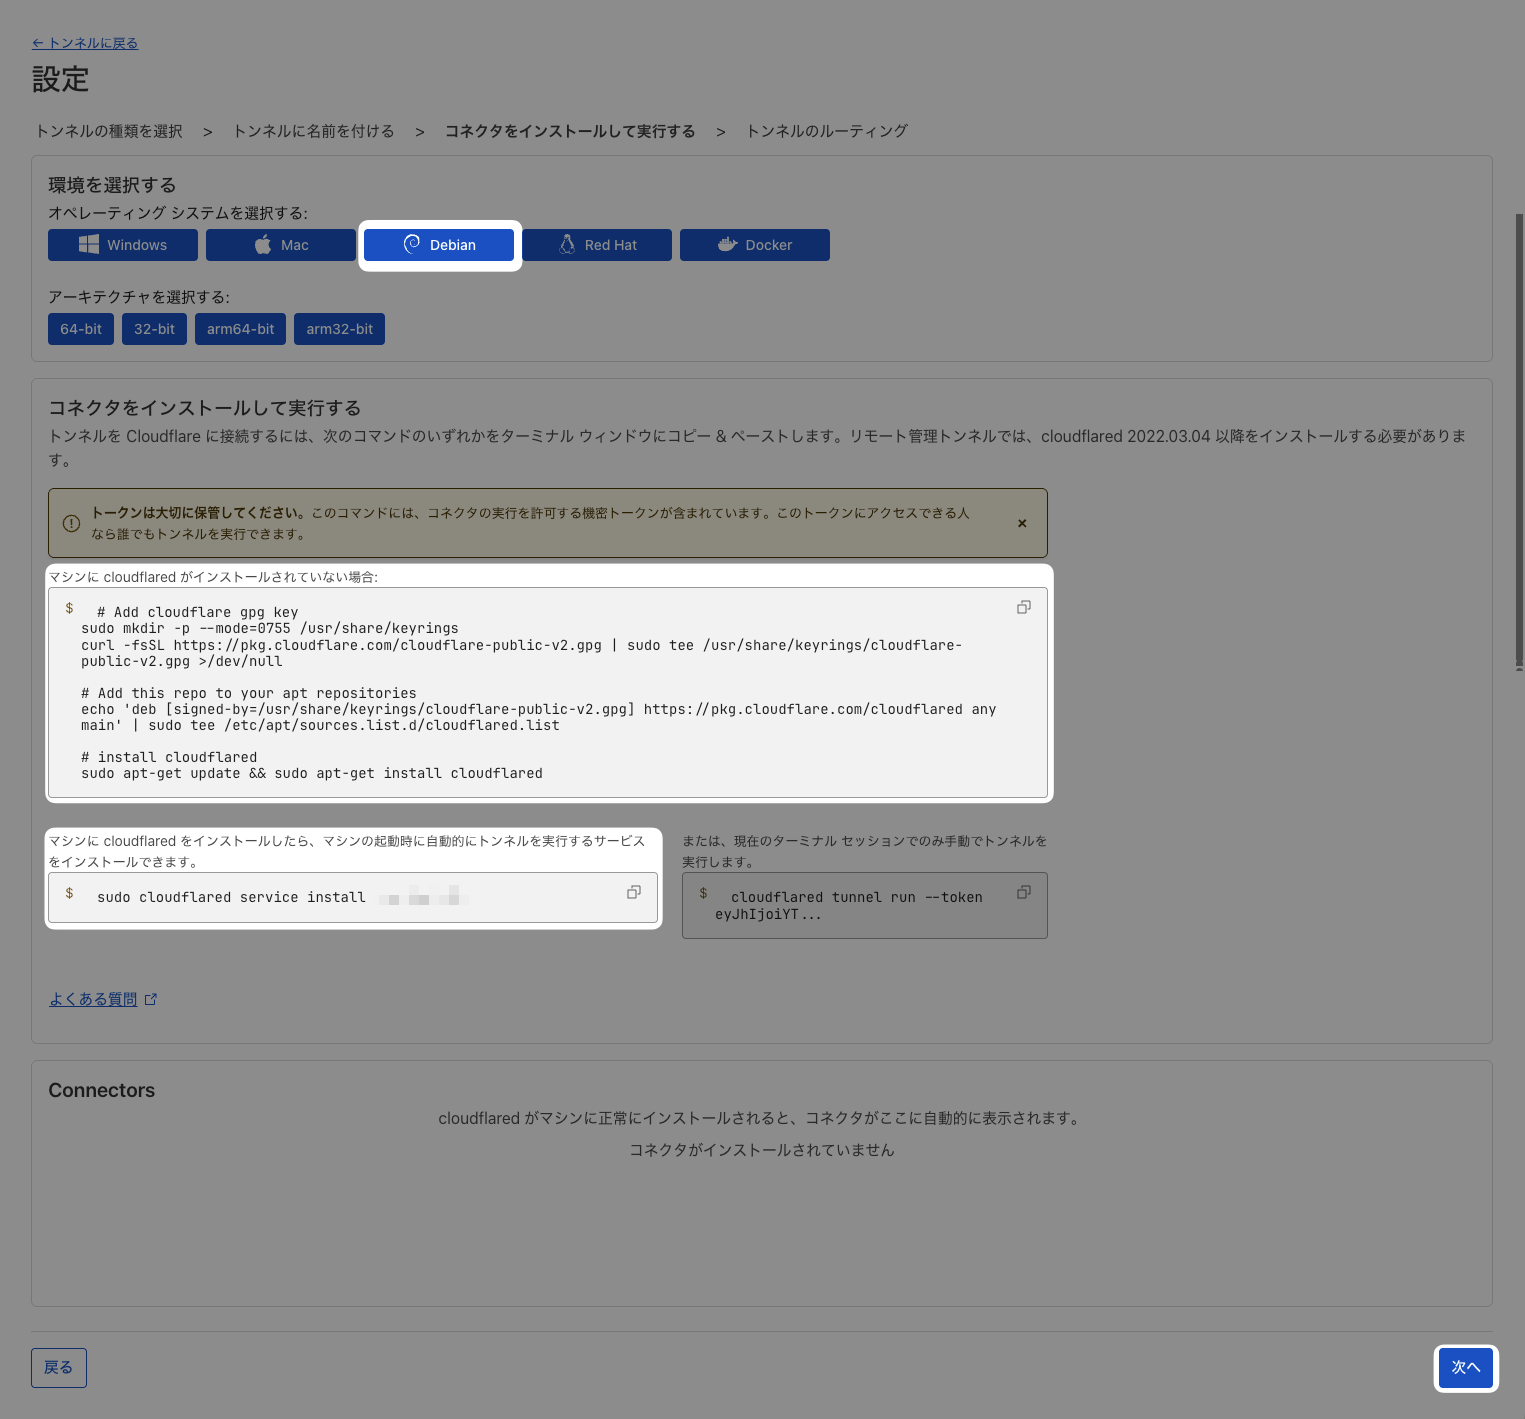
1.1 Creating a Cloudflare Tunnel
- Navigate to
Zero Trust>Network>Tunnels - Click
Create a tunnel
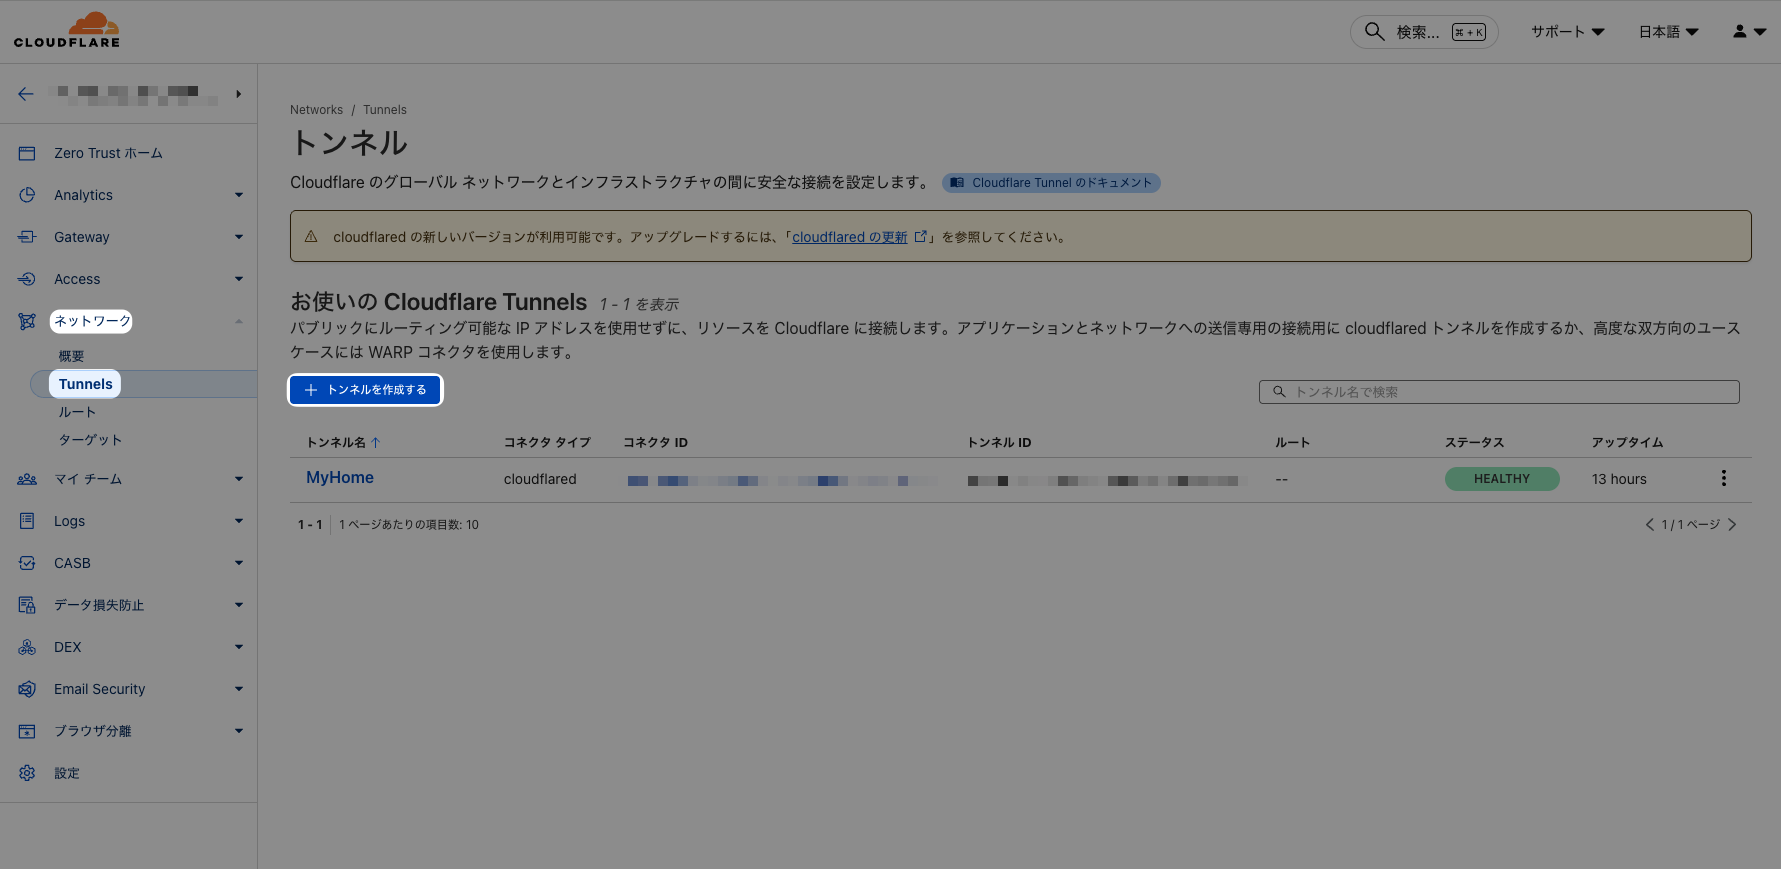
- Click
Cloudflared - Enter a tunnel name
- Click
Save tunnel

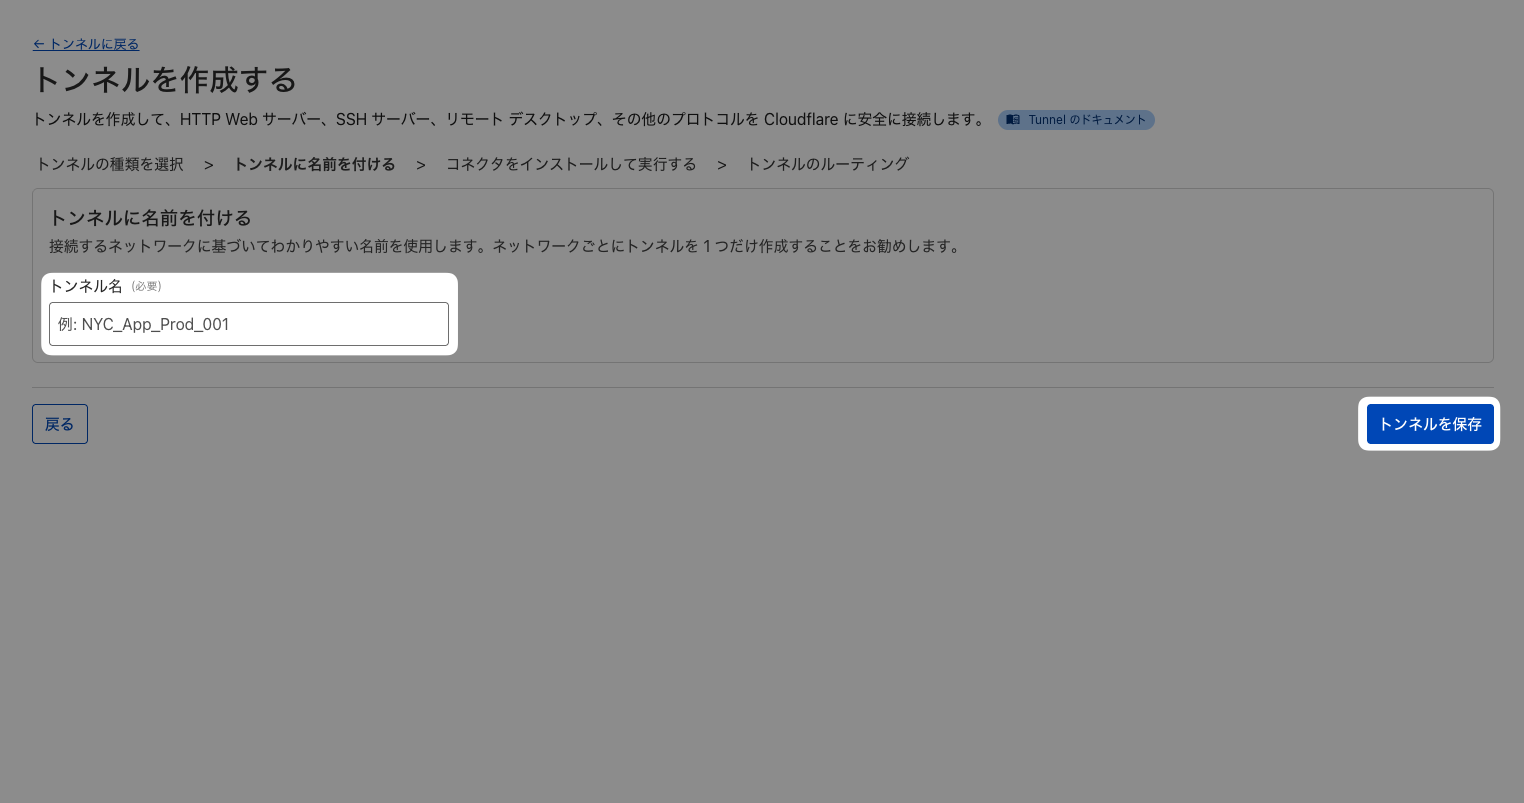
- Copy the displayed installation command
- Fill in the following items and click
Complete setup
| Field | Description |
|---|---|
Subdomain |
(Optional) ssh |
Domain |
Your registered custom domain |
Type |
SSH |
URL |
localhost:22 |

1.3 Configuring Cloudflare Access
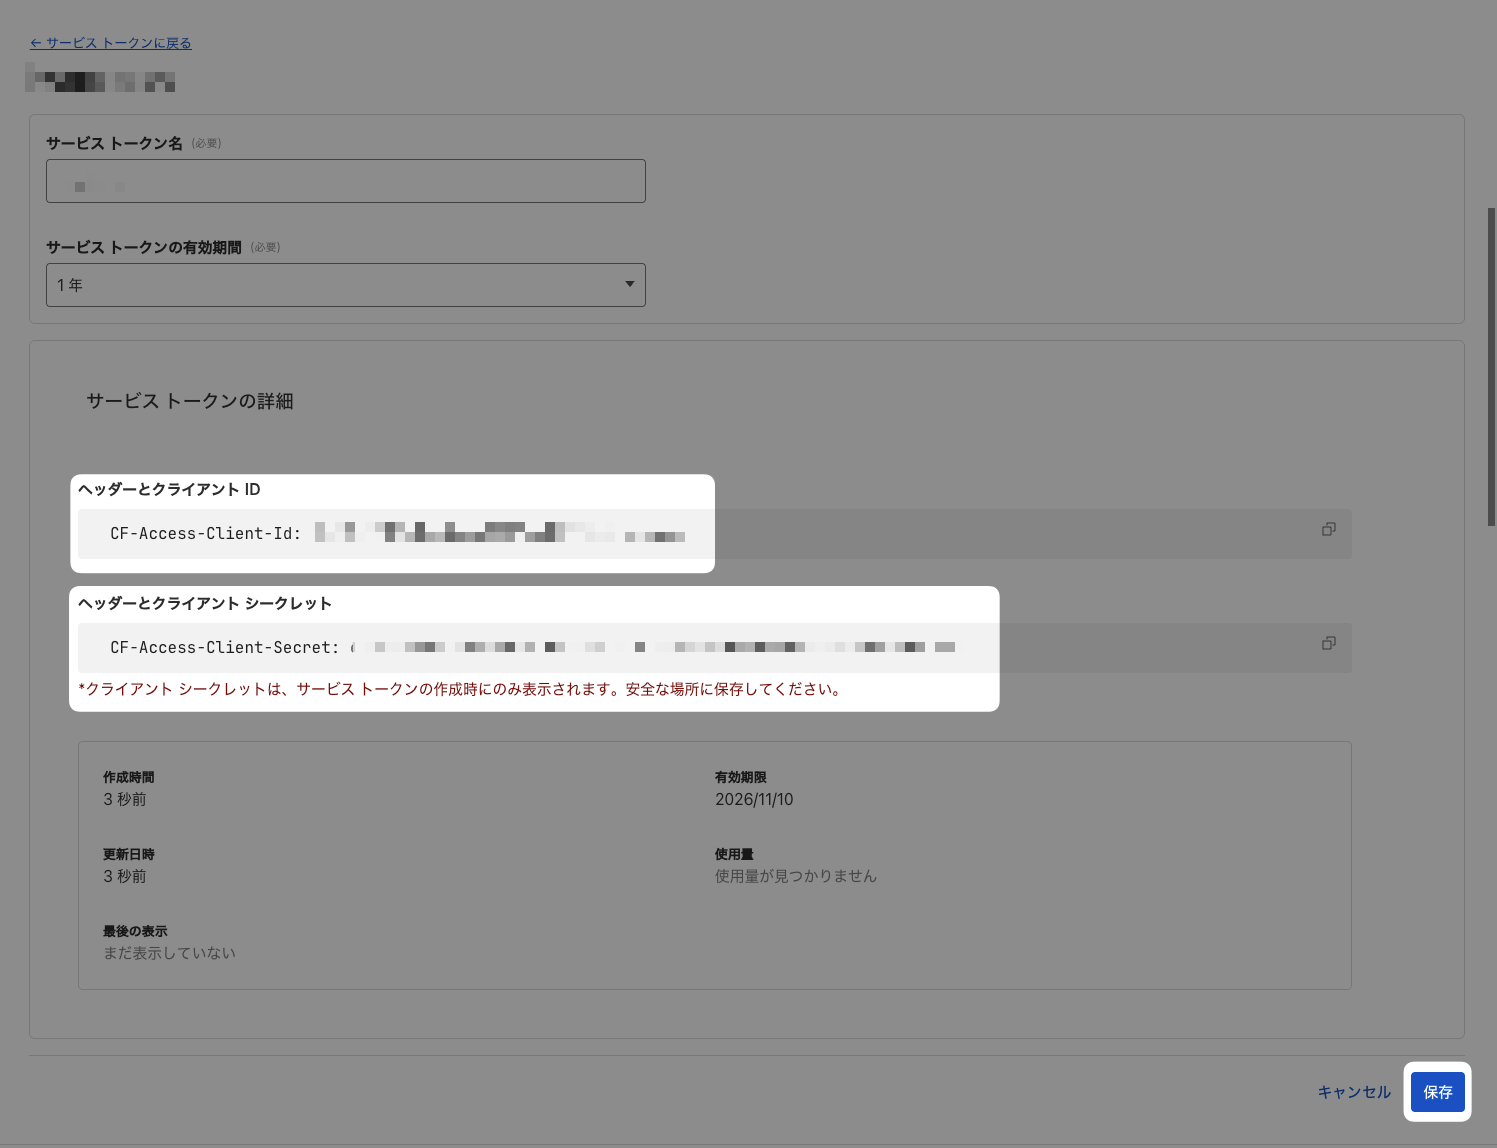
1.3.1 Creating a Service Token
- Navigate to
Zero Trust>Access>Service Authentication - Click
Create a service token

- Enter the following items and click
Create token
| Field | Description |
|---|---|
Service Token Name |
Name of the service token |
Token Validity Period |
Choose as desired |
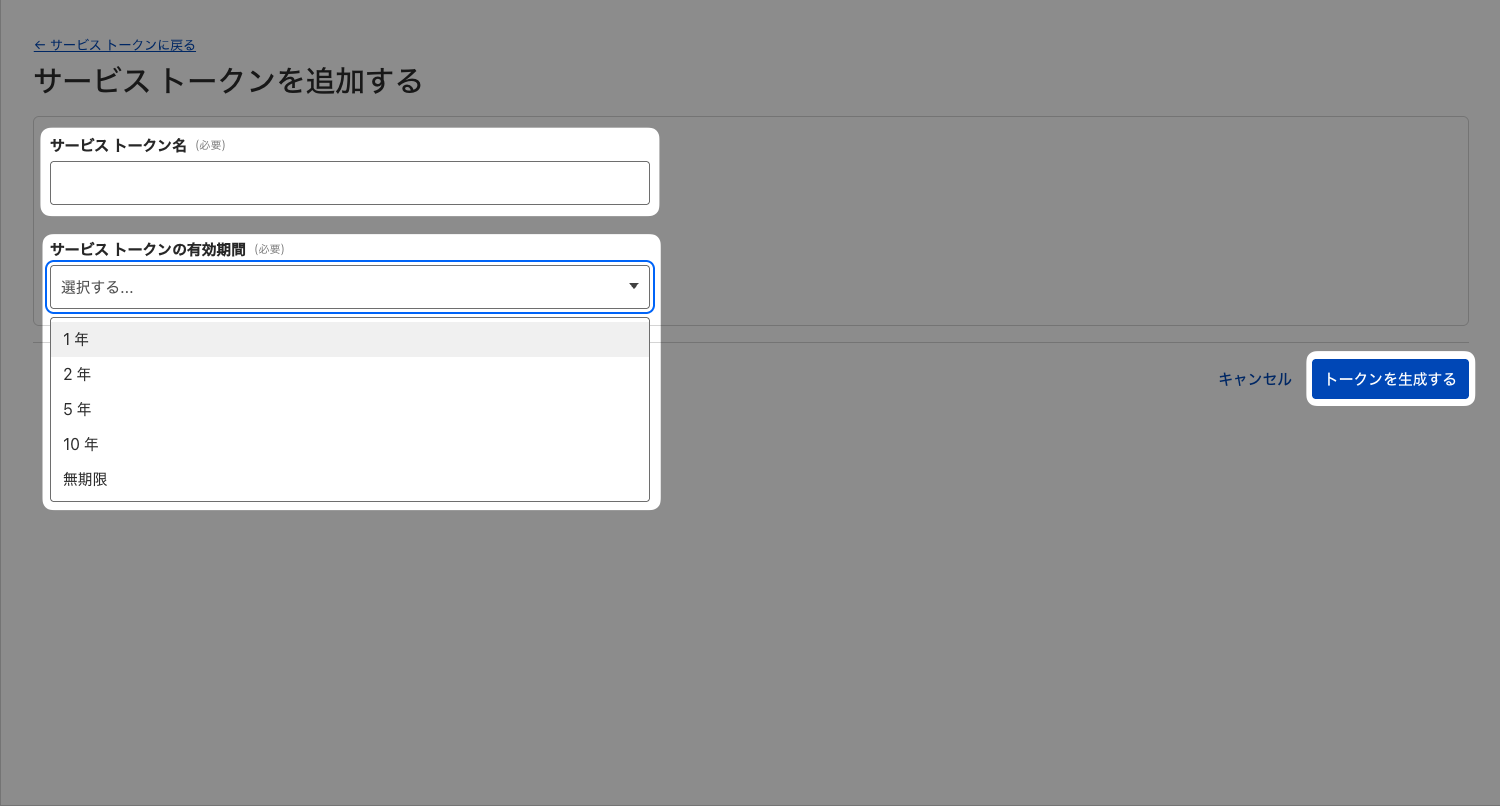
- Copy the
Client IDandClient Secretof the created service token (to be set in GitHub Secrets later) - Click
Save
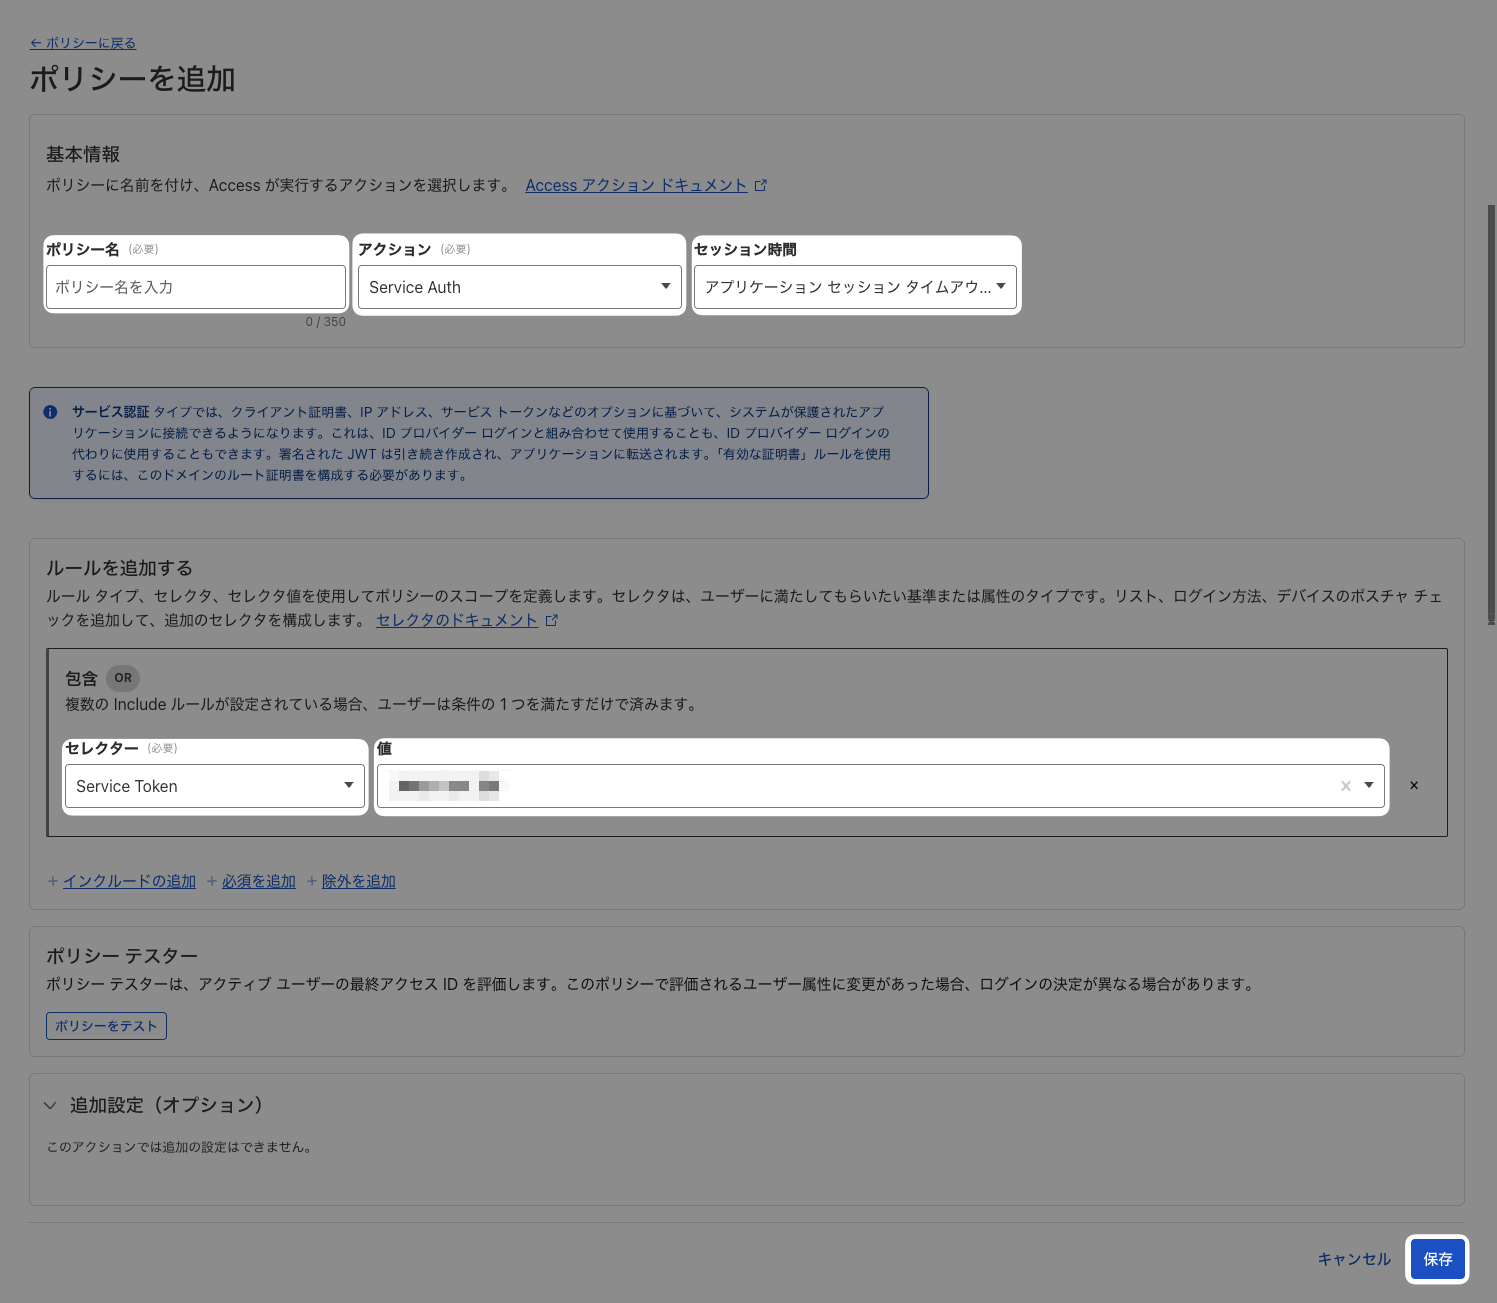
1.3.2 Creating a Policy
- Navigate to
Zero Trust>Access>Policies - Click
Add a policy

- Enter the following items and click
Save
| Field | Description |
|---|---|
Policy Name |
Any name |
Action |
Service Auth |
Session Duration |
Choose as desired |
Selector |
Service Auth |
Value |
The service token created in [1.3.1 Creating a Service Token] |
1.3.3 Creating an Application
- Navigate to
Zero Trust>Access>Applications - Click
Add an application - Click
Self-hosted - Enter the following items:
| Field | Description |
|---|---|
Application Name |
Any name |
Session Duration |
Choose as desired |
Subdomain |
(Optional) ssh |
Domain |
Your registered custom domain |
The
Public Hostnameinput field appears after clickingAdd public hostname.
- Click
Select existing policyand choose the policy created in [1.3.2 Creating a Policy] - Click
Next - Leave the Experience Settings and Advanced Settings at their defaults, adjust as needed for your environment, then click
Next/Save
2. Configuration on the Ubuntu Desktop
#2.1 Installing and Configuring the SSH Server
# Install OpenSSH Server
sudo apt update
sudo apt install openssh-server

# Edit SSH configuration
sudo nano /etc/ssh/sshd_config
Configuration items:
# Disable password authentication
PasswordAuthentication no

# Enable public key authentication
PubkeyAuthentication yes

# Disable root login
PermitRootLogin no

# Prohibit login for accounts with empty passwords
PermitEmptyPasswords no

# Maximum authentication attempts
MaxAuthTries 6

# Specify host keys
HostKey /etc/ssh/ssh_host_rsa_key
HostKey /etc/ssh/ssh_host_ecdsa_key
HostKey /etc/ssh/ssh_host_ed25519_key
Restart after configuration:
sudo systemctl restart ssh.socket
sudo systemctl enable ssh.socket
2.2 Firewall Configuration
# Enable firewall
sudo ufw enable
# Deny incoming by default
sudo ufw default deny incoming
# Allow outgoing by default
sudo ufw default allow outgoing
# Allow SSH port
sudo ufw allow ssh
# Prevent SSH brute-force attacks
sudo ufw limit ssh
# Check firewall status
sudo ufw status
Guide to Secure SSH Server Setup and Operation (Ubuntu)
2.3 Creating a Deployment User
# Create a user dedicated for deployment
sudo adduser deploy-user

# Create directory for storing public keys for the deploy user
sudo mkdir -p /home/deploy-user/.ssh
# Create authorized_keys file (empty for now)
sudo touch /home/deploy-user/.ssh/authorized_keys
# Set directory permissions
sudo chmod 700 /home/deploy-user/.ssh
# Set public key file permissions
sudo chmod 600 /home/deploy-user/.ssh/authorized_keys
# Set the directory owner
sudo chown -R deploy-user:deploy-user /home/deploy-user/.ssh
2.4 Configuring the Apache Web Server
# Install Apache
sudo apt install apache2

# Set permissions for DocumentRoot
find /var/www/html -type d -exec chmod 750 {} \;
find /var/www/html -type f -exec chmod 640 {} \;
sudo chown -R www-data:www-data /var/www/html

# Make deploy-user writable by www-data group
sudo usermod -aG www-data deploy-user
2.5 Installing a Package Manager
About this step
Installation of a package manager is a separate topic from the main subject (building a CD pipeline), so the details are omitted.
This time, since it's a PHP environment, Composer is installed, but choose an appropriate package manager according to your development language.
- PHP: Composer
- Node.js: npm / yarn / pnpm
- Python: pip / poetry / pipenv
- Ruby: gem / bundler
- Go: go mod
- Rust: cargo
- Java: Maven / Gradle
2.6 Installing and Configuring cloudflared
Run the installation command copied in [1.1 Creating a Cloudflare Tunnel].
# Install cloudflared
# Add cloudflare gpg key
sudo mkdir -p --mode=0755 /usr/share/keyrings
curl -fsSL https://pkg.cloudflare.com/cloudflare-public-v2.gpg | sudo tee /usr/share/keyrings/cloudflare-public-v2.gpg >/dev/null

# Add this repo to your apt repositories
echo 'deb [signed-by=/usr/share/keyrings/cloudflare-public-v2.gpg] https://pkg.cloudflare.com/cloudflared any main' | sudo tee /etc/apt/sources.list.d/cloudflared.list

# install cloudflared
sudo apt-get update && sudo apt-get install cloudflared
Service setup:
sudo cloudflared service install [TOKEN]
sudo systemctl start cloudflared
sudo systemctl enable cloudflared
3. Configuring GitHub Secrets
#3.1 Generating the SSH Key Pair
About this step
Generating the SSH key and placing the public key is done in the home directory of the user created in [2.3 Creating a Deployment User].
# Confirm username
$ whoami
deploy-user

# Check current directory
$ pwd
/home/deploy-user

# Generate SSH key for GitHub Actions
ssh-keygen -t ed25519 -f ~/.ssh/id_ed25519_github_actions -C "GitHub Actions"

# Place the public key on the server
cat ~/.ssh/id_ed25519_github_actions.pub >> ~/.ssh/authorized_keys
3.2 Retrieving the Host Key
Connect to the SSH server on the Ubuntu Desktop and retrieve the host key. Copy the output of the following command:
ssh-keyscan localhost 2>/dev/null | sed 's/localhost/ssh.your-domain.com/'
Replace
localhostin the host key retrieved byssh-keyscanwith the Cloudflare Tunnel hostname; adjustyour-domain.comin thesedcommand to match your environment.
3.3 Setting in GitHub Repository Settings
In Settings → Secrets and variables → Actions, click New repository secret and set the following:
| Name | Value |
|---|---|
SSH_PRIVATE_KEY |
Content of ~/.ssh/id_ed25519_github_actions |
SSH_KNOWN_HOSTS |
Host key content copied in [3.2 Retrieving the Host Key] |
CLOUDFLARED_SSH_ID |
The Client ID of the service token created in [1.3.1 Creating a Service Token] (paste it without the header) |
CLOUDFLARED_SSH_SECRET |
The Client Secret of the service token created in [1.3.1 Creating a Service Token] (paste it without the header) |
4. Placing the Workflow File
#Create .github/workflows/deploy.yml in your repository and place the final YAML introduced above.
5. Verification
#5.1 Testing with a Pull Request
- Create a feature branch
- Commit some changes
- Create a pull request against main
- Merge the pull request
- Check the execution logs in GitHub Actions
Conclusion
#In this article, we explained how to build a continuous deployment (CD) pipeline to your home Ubuntu Desktop using GitHub Actions.
Achievements
#- Complete automation of manual deployment tasks: Automate file synchronization from the development directory to the public directory triggered by pull request merges
- Secure connection: Achieved safe SSH connections without exposing your home public IP by leveraging Cloudflare Tunnel and Cloudflare Access
- Implementation of Zero Trust architecture: Built automation that maintains security through authentication and access control via Service Token
Key Points
#- Utilize Cloudflare Tunnel: Expose your home server securely without opening router ports
- Service Token authentication: Enable secure automated access from GitHub Actions without human intervention
- Pre-register host keys: Avoid the easy but insecure use of
StrictHostKeyChecking=noand prioritize security in your design
Advantages of This Approach
#- Improved development efficiency: Deployment is automated, allowing you to focus on development
- Ensured security: Operate your home server safely with multiple security layers
- Scalability: Apply the same mechanism to multiple projects or servers
- Auditability: All deployments are recorded in GitHub Actions and Cloudflare logs
Future Enhancements
#- Automatic testing before deployment
- Support for multiple environments (staging/production)
- Automatic rollback on deployment failure
- Slack/Discord notification integration
I found that hosting web applications on a home server is an ideal environment for learning and experimentation. It was really fun 😊