Revise Your AWS Costs! Visualize Resources Collectively with myApplications
Back to TopTo reach a broader audience, this article has been translated from Japanese.
You can find the original version here.
This is the Day 11 article for the Mamezou Developer Site Advent Calendar 2024.
Introduction
#I am Tsukano from the Business Solutions Division. I recently started using AWS personally, and with the recent depreciation of the yen, I've become increasingly concerned about my monthly costs.
Although I was checking my expenses each month, the pricing structures differ for each service, and for some services, you can't determine the optimal pricing plan without actual metrics, so reviewing costs requires a fair amount of effort.
Thinking of it as a year-end cleanup, I decided to review my costs. After some research, I found that a feature called "myApplications," available from the AWS Management Console, seemed promising, so I'd like to introduce it.
About Those Cost Allocation Tags...
#This time, I decided to review my costs, so I first looked into best practices for cost optimization.
Among the whitepapers published by AWS, there is the AWS Well-Architected Framework, which provides best practices for AWS architectural design.
This framework is supported by six pillars, one of which is the Cost Optimization Pillar.
The Cost Optimization Pillar presents five best practices, one of which is "Implement Cloud Financial Management."
Since cost management methods differ between cloud and on-premises environments, cloud solutions require appropriate methods for cost management, optimization, and planning.
AWS has published the Cloud Financial Management (CFM) Framework, which states that to practice CFM, first "visibility into cloud usage costs" is necessary.
To visualize usage of AWS services, generally one would use something like the Cost Explorer shown below.
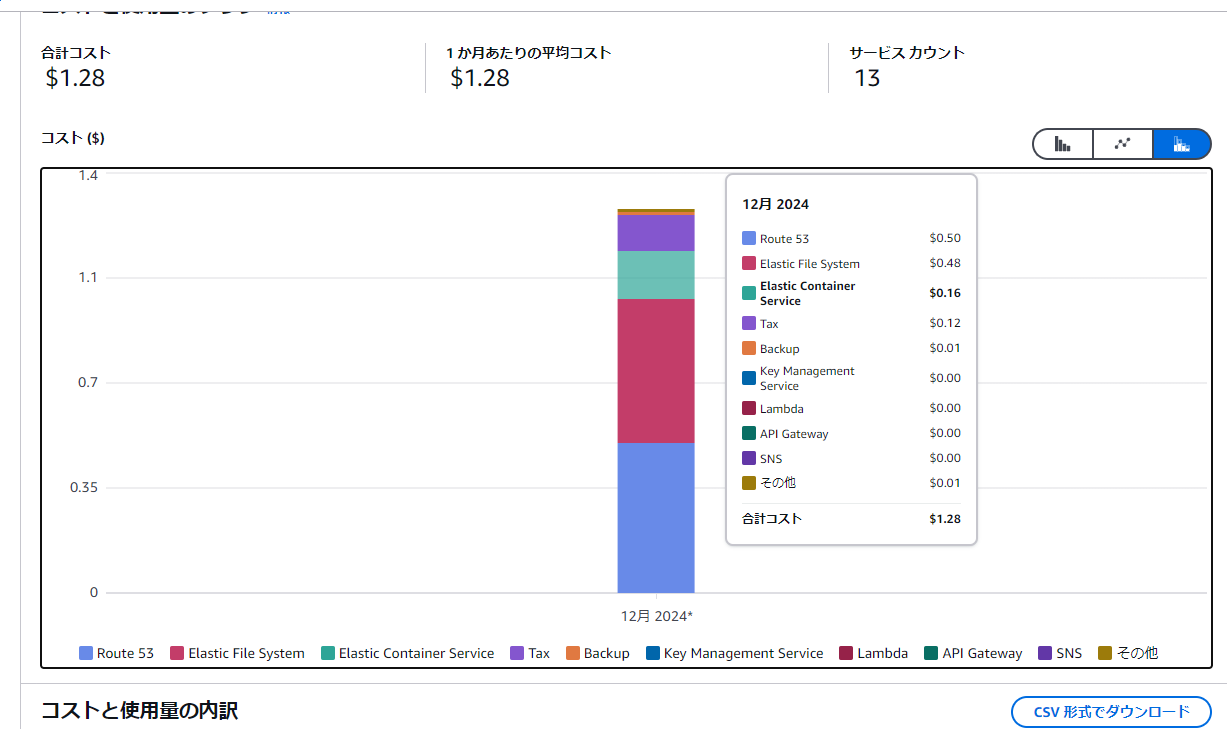
However, since all resources within the same account are displayed at once, if you want to show costs divided by application—for example, how much EC2 costs for App A and how much for App B—you needed to use a feature called cost allocation tags.
These cost allocation tags leverage the resource tagging feature, so you needed to create and assign cost allocation tags to each resource you wanted to use them with.
Moreover, simply assigning a tag wasn't sufficient; you had to activate it from the Cost Allocation Tags menu for it to function.
This might not be such a big deal if you're using Infrastructure as Code (IaC) tools like Terraform, but tagging resources from the Management Console is quite tedious, and as the number of resources increases, it's easy to miss tagging some of them.
To replace these somewhat troublesome cost allocation tags, there's a feature called myApplications in the Management Console that can be used for cost visualization.
Let's Try Using myApplications!
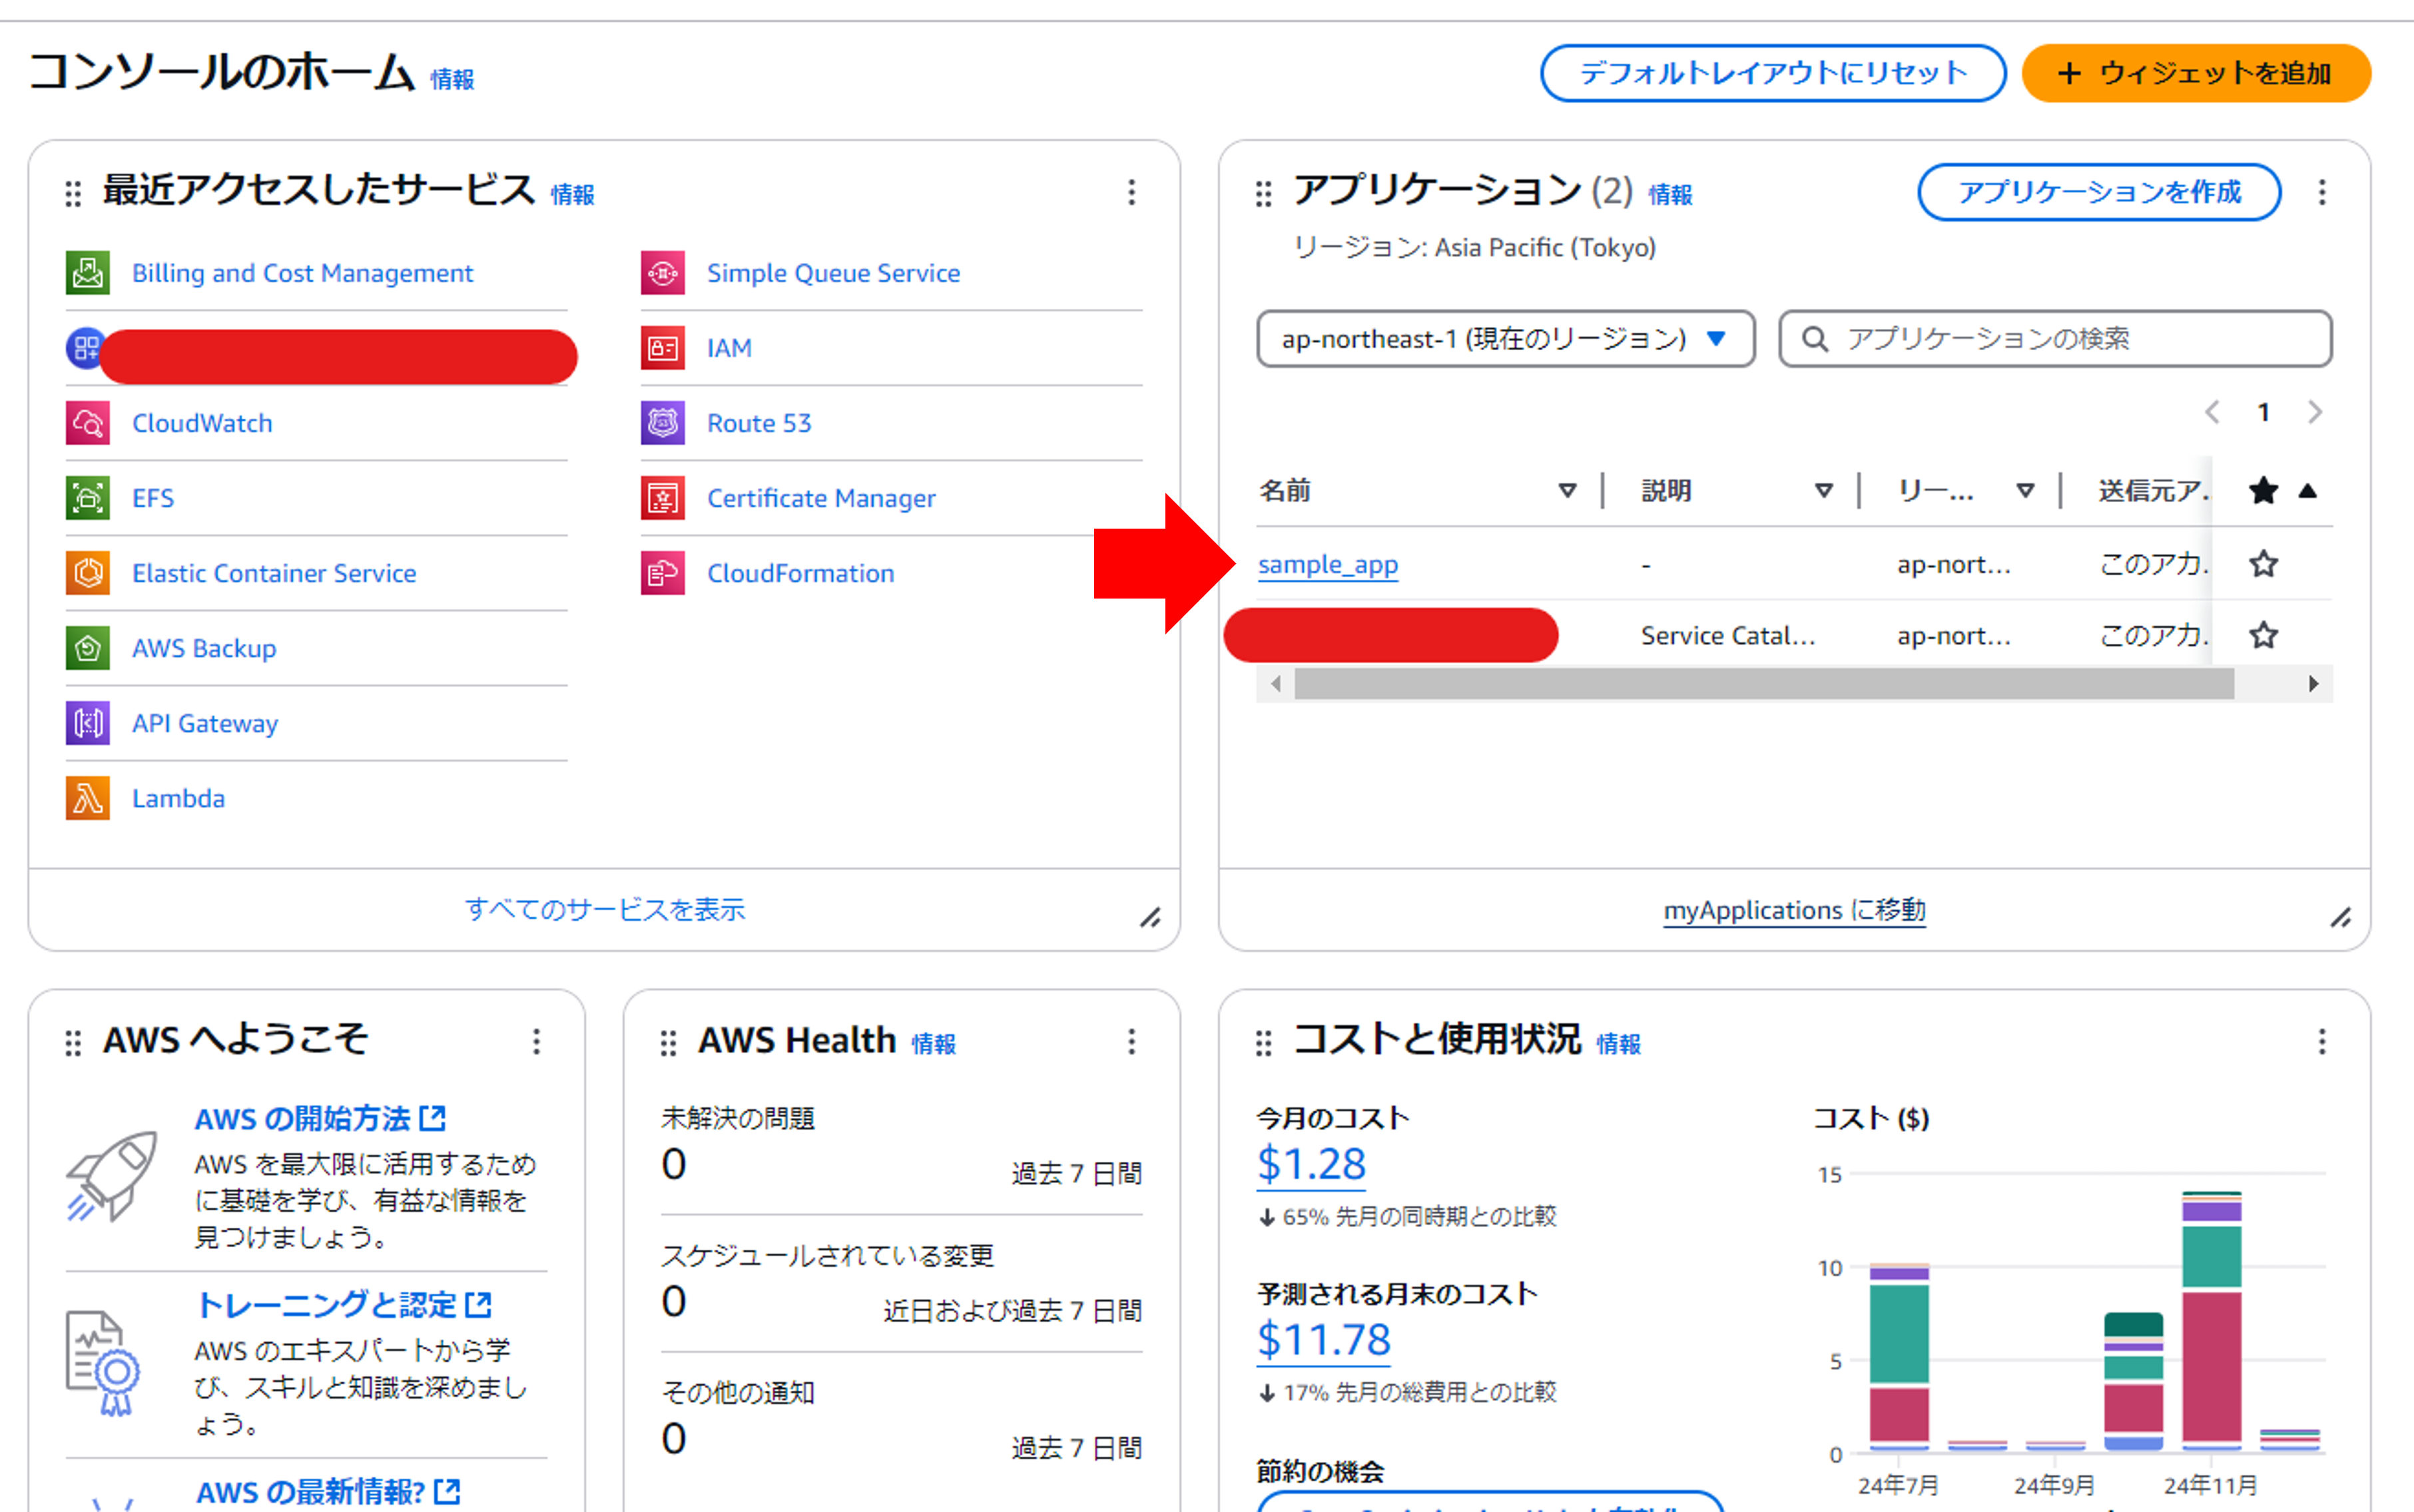
#myApplications is a feature announced at re:Invent 2023. A widget like the one below was suddenly added to the most prominent place in the Management Console, and you can set it up from here.
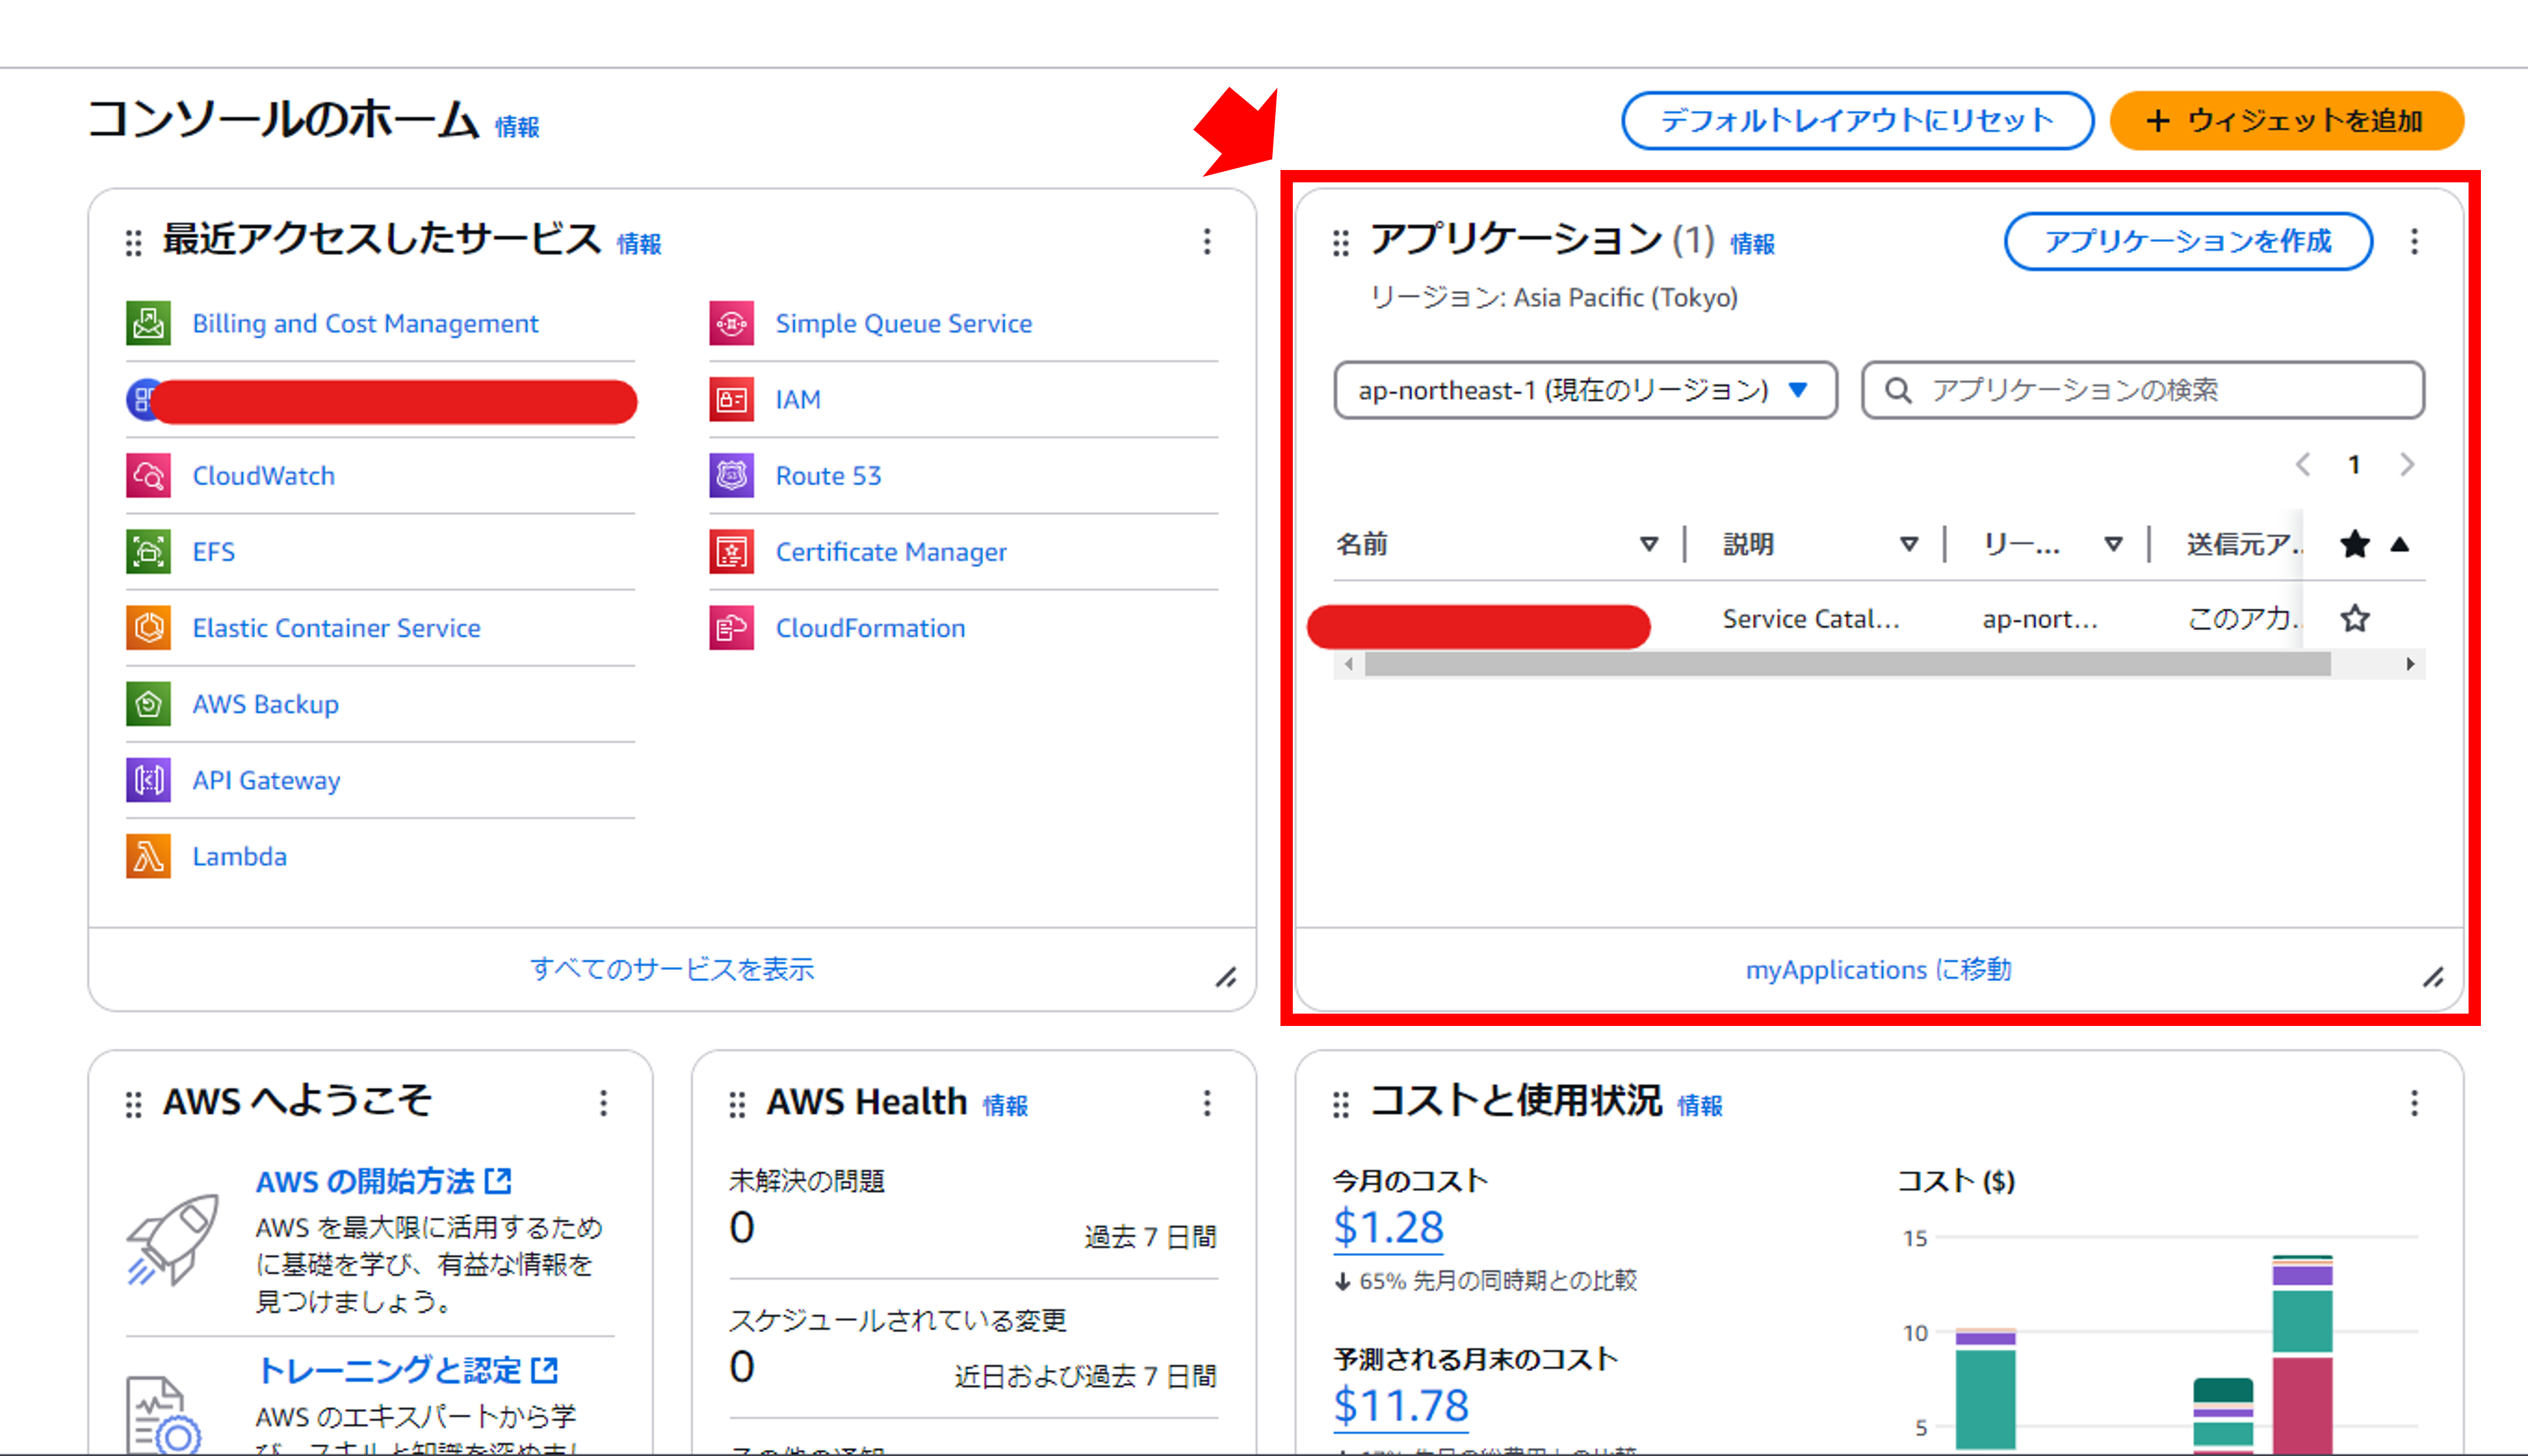
By grouping resources as an "application," you can calculate costs for each group of resources. This eliminates the need to tag each resource individually.
Let's immediately try creating an application. Proceed by selecting "Create Application."
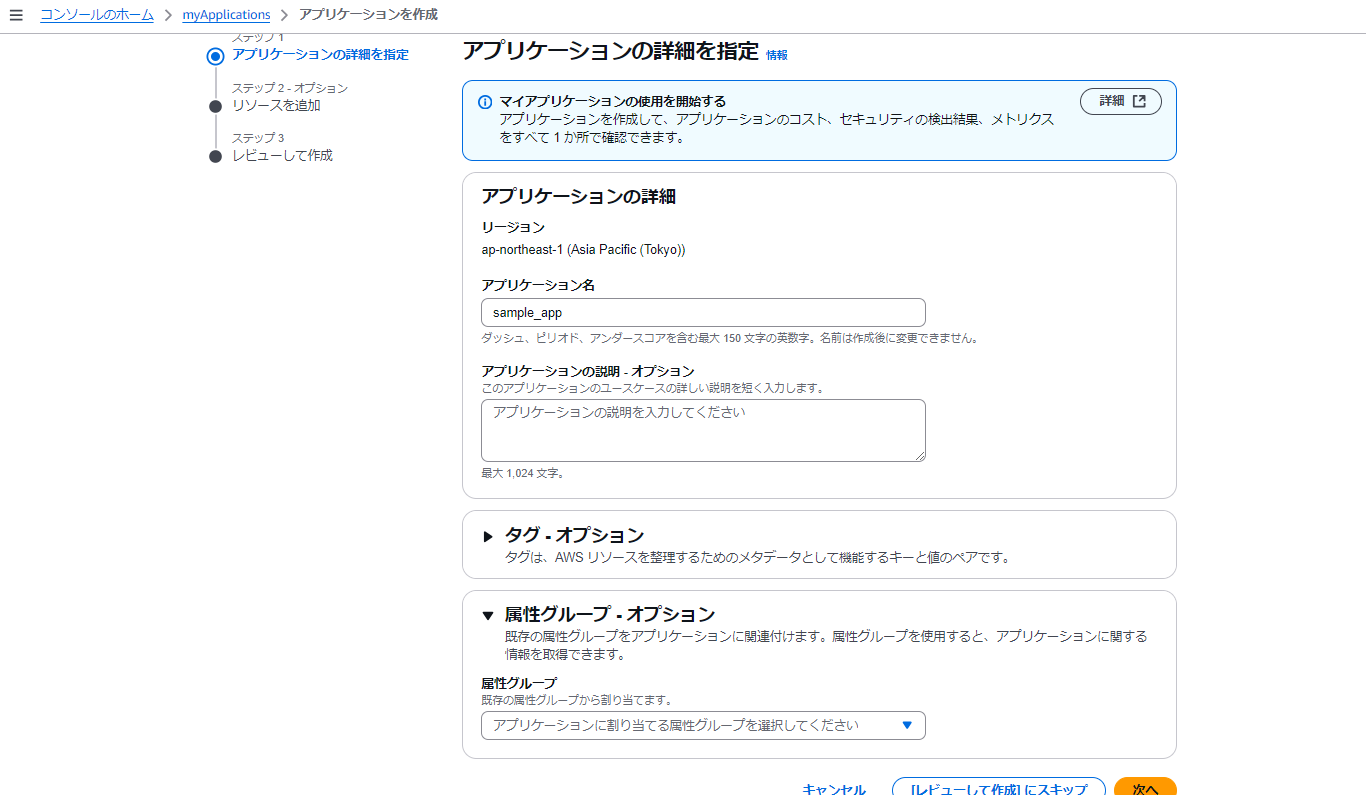
First, give your application a name. This time, I named it "sample_app."
You can also use existing tags or attribute groups from the Service Catalog to group your application.
In that case, specify it in the options at the bottom of this screen.
Proceed to the next step.
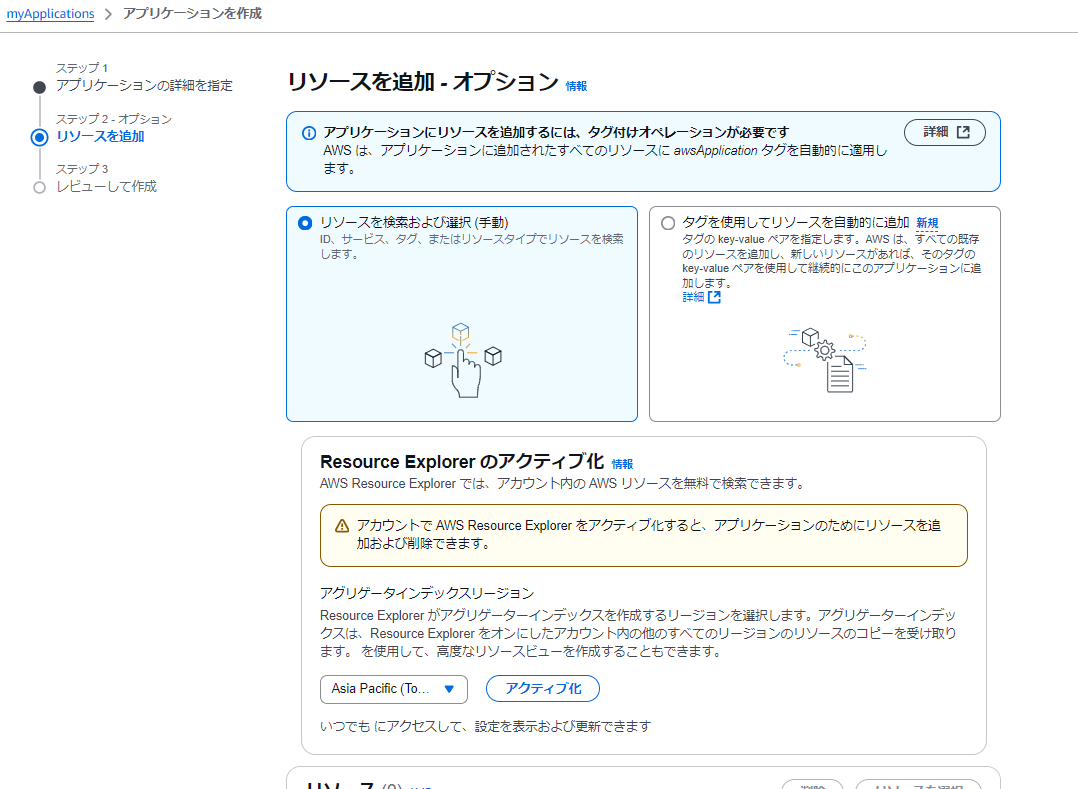
This brings up the resource addition screen. Here, if you haven't activated Resource Explorer, make sure to enable it.
Resource Explorer is a service that allows you to search for resources across regions, and it's free to use.[1]
There are two ways to add resources: manually or by using existing tags[2], but if you add them manually, you'll use Resource Explorer.
Note that Resource Explorer cannot search all AWS resources. For example, in API Gateway, only REST APIs are supported. Please refer to this list for the services that can be searched.
To activate Resource Explorer, you need to specify an Aggregator Index Region. This is the region where resource information will be aggregated.
This time, I specified the Tokyo region. Incidentally, you can only create one Aggregator Index per account.
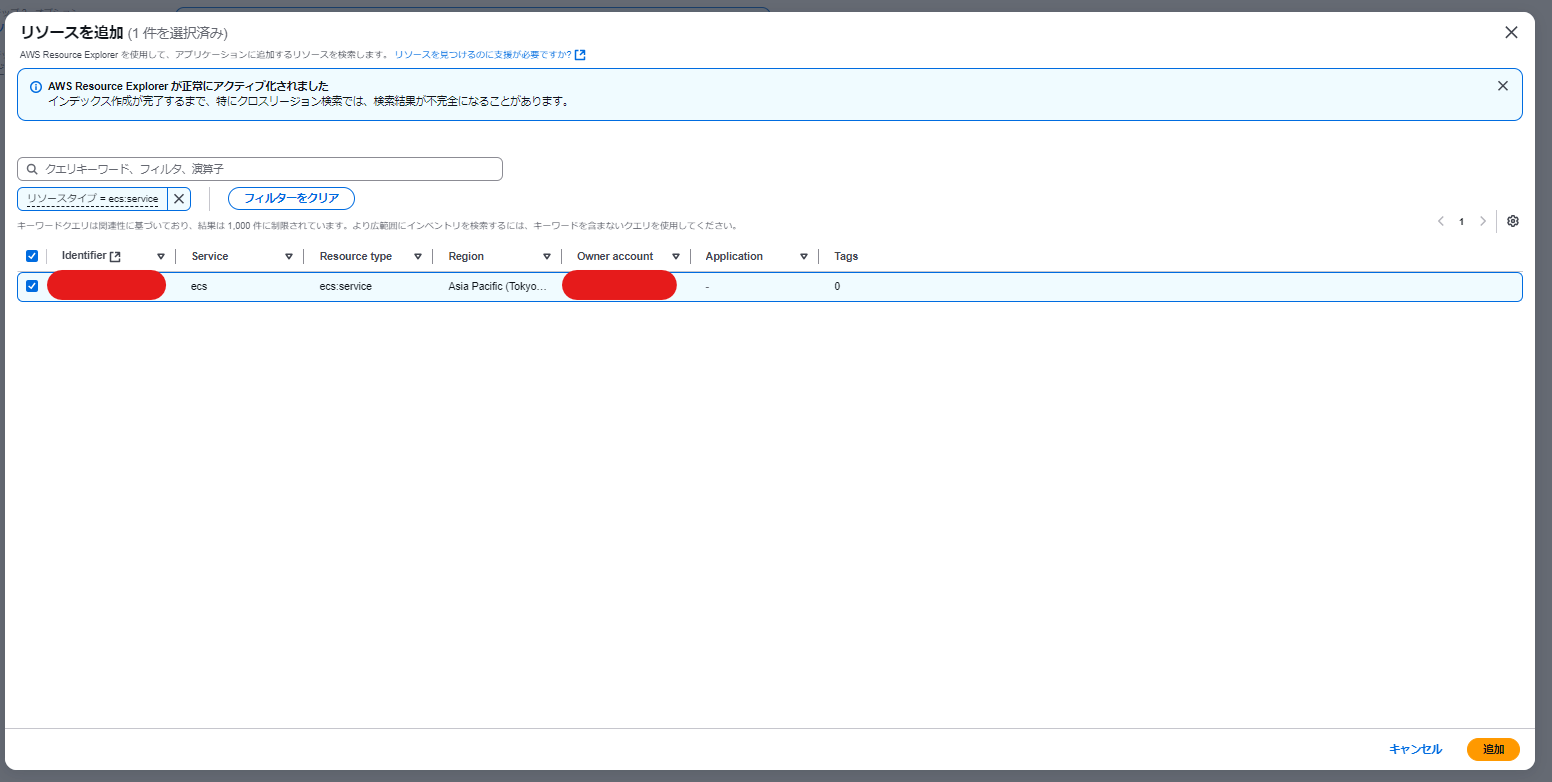
From "Select Resources," add the resources to include in the application. Search for resources using query keywords like resource type = ecs:service and add them.
Since you can't search for multiple resources at once using an OR condition, add resources one by one through "Add" → "Select Resources."
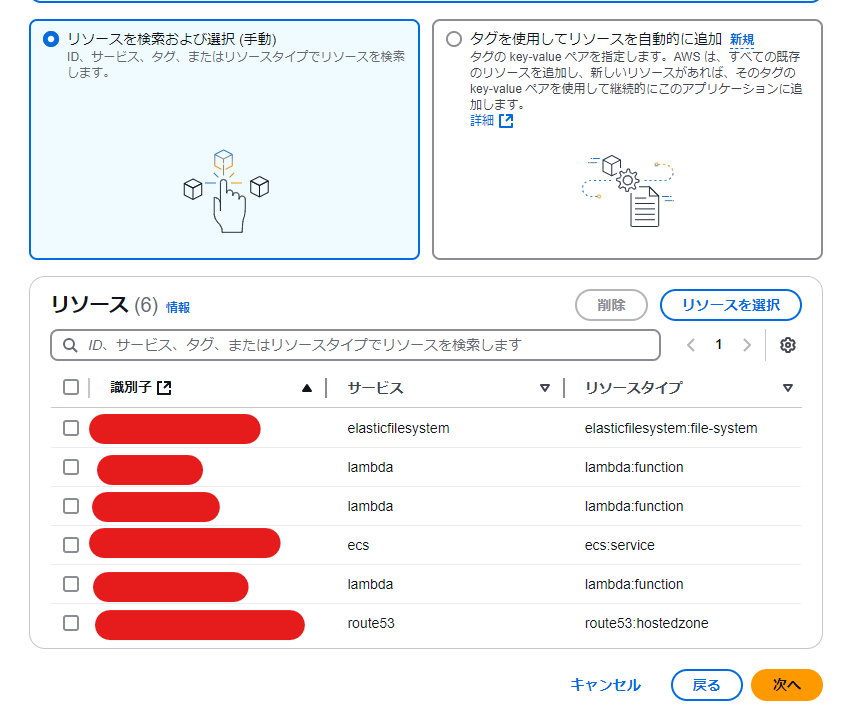
After adding resources, check them on the review screen and then "Create Application."
Once the resources have been successfully added, the created application will be added to the Management Console.
In this resource addition, the awsApplication tag is automatically assigned. The value of this tag is the application's ARN. To be precise, as we'll explain later, it's the ARN of a Resource Groups resource.
When I tried creating an application, there were resources where the automatic tagging failed. In that case, if you directly assign the awsApplication tag to the resource, it will be added to the resource list.
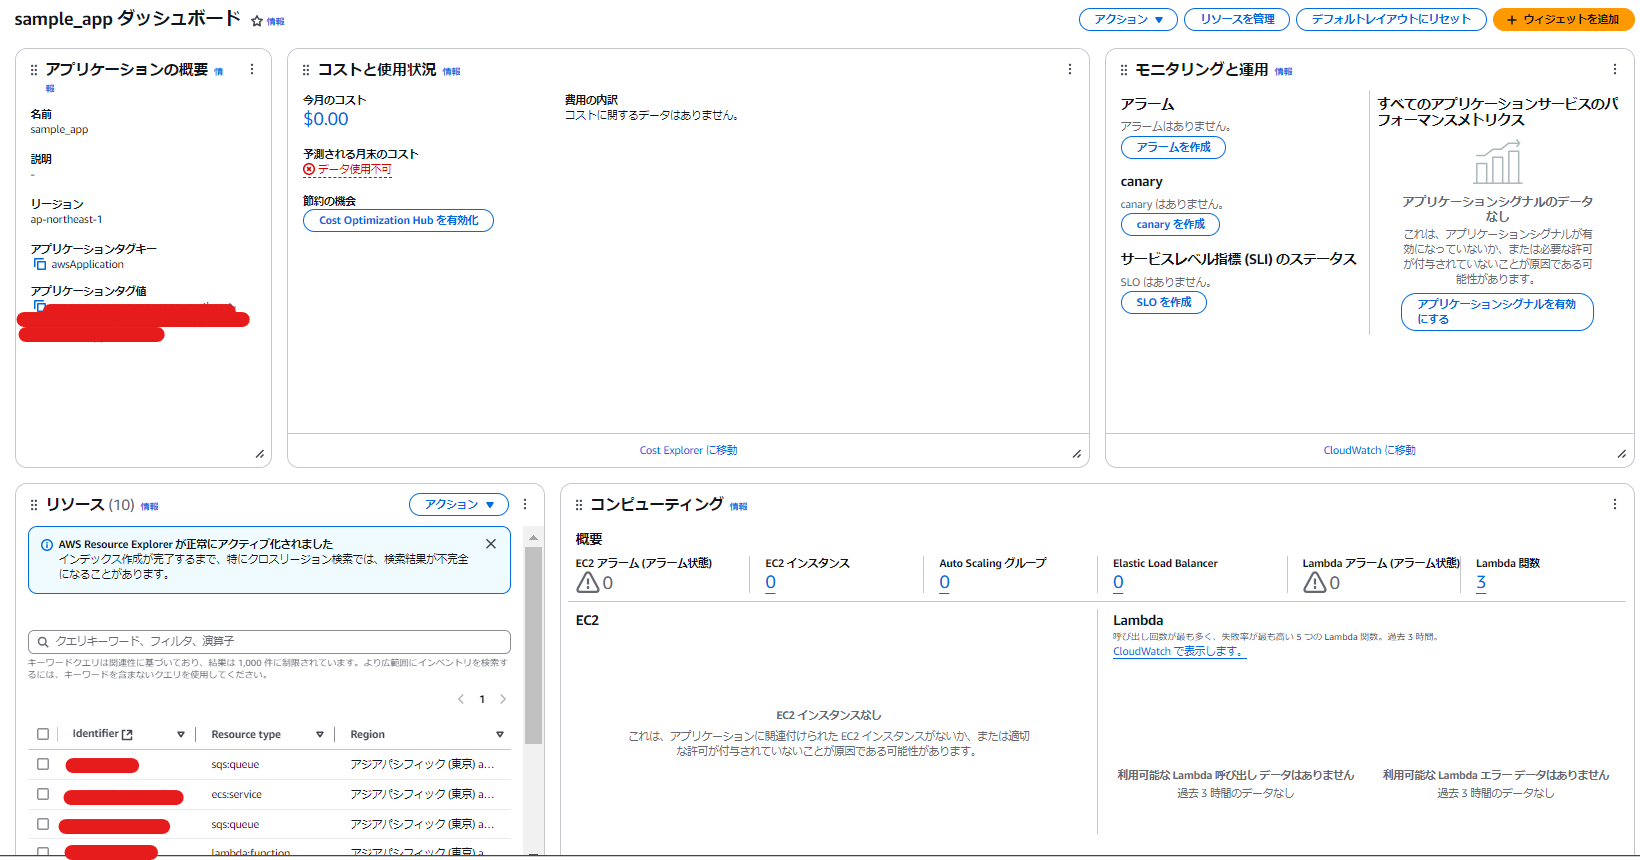
In the myApplications widget, you can also display alarms and metrics in addition to the application's cost.
By the way, to display metrics, you use a service called Amazon CloudWatch Application Signals, which was also introduced at re:Invent 2023[3]. The cost is 0.35 USD/GB for the first 10TB per month, so if you don't mind, you might want to turn it on.
It seems that myApplications does not have a feature to retrieve past costs after tagging, so the current month's cost is displayed as 0 USD, and estimated costs are not shown.
In this regard, cost allocation tags can now retrieve up to 12 months of usage data retrospectively after tagging, thanks to a recent update. Let's wait for an update that allows backfill requests in myApplications as well.
If you want to display the cost of the created application in Cost Explorer, you can navigate from the myApplications widget, or in Cost Explorer, select the application's awsApplication tag from the "Tags" filter on the right side of the screen.
What Exactly is the Application Created by myApplications?
#Here, what is of concern is: What exactly is the "application" created by myApplications? As mentioned earlier, the value of the awsApplication tag specifies the application's ARN, which is the ARN of a Resource Groups resource.
Resource Groups are, literally, resources for grouping and managing multiple resources. myApplications creates these Resource Groups with the help of the Service Catalog.
The resources created when you create an application with the myApplications widget are the following three:
- Service Catalog App Registry Application
- Resource Groups (AppTags)
- Resource Groups (Application) ← This is the resource specified by the ARN in the
awsApplicationtag's value
Simply put, the application created by myApplications is a Service Catalog App Registry Application. In fact, the applications created with myApplications are displayed in the Service Catalog App Registry, and you can also create applications from this screen.
The Service Catalog App Registry Application creates Resource Groups resources to group resources. This results in two Resource Groups being created, named AppTags and Application, respectively. The grouped resources are linked to the AppTags, while the Application only holds a reference to the AppTags.
The ARN resource specified in the awsApplication tag's value is the Application's Resource Groups resource. This avoids directly linking and depending on the AppTags Resource Groups that group the resources.
The above content is explained in detail in this article. Please take a look if you're interested.
Conclusion
#I introduced myApplications, which allows you to easily create dashboards for each application. It's a bit unfortunate that you can't display costs immediately after creating an application, but since you can create various widgets besides cost visualization, why not give it a try?
Although I wasn't able to achieve my original goal of reviewing costs this time, I learned about cost reduction methods. In particular, I thought I'd study the principles of cost optimization called The Frugal Architect, which was also announced at re:Invent 2023, just like myApplications.
Resource Explorer is explained in detail in this article. ([New Feature] AWS Resource Explorer that Allows Cross-Region and Cross-Service Resource Search is Now Available - DevelopersIO) ↩︎
The method for adding resources using tags is explained here. When new resources with the specified tags are created, they will automatically be registered as application resources. ([Update] Now You Can Add Resources Using Custom Tags in myApplication, and Use Tag Sync Feature for Automatic Resource Addition - DevelopersIO) ↩︎
About Amazon CloudWatch Application Signals, see here. (All About Amazon CloudWatch Application Signals - Qiita) ↩︎
