Deploying Kafka in KRaft Mode in a Container Environment
Back to TopTo reach a broader audience, this article has been translated from Japanese.
You can find the original version here.
Introduction
#Earlier this year, I wrote an article titled "ZooKeeper-less Kafka Cluster Configuration with KRaft Mode" about how to run Kafka in KRaft mode in a local environment.
At that time, support for container environments like Docker and Kubernetes was lagging, requiring a lot of manual configuration. Now, it's much easier to set up.
I tested this on macOS Sonoma / OrbStack 1.6.2.
For more about OrbStack, see the following articles:
Using Docker
#Documentation is available on Bitnami's Docker site.
https://hub.docker.com/r/bitnami/kafka
Here is an example of starting a minimal single-node configuration that serves as both KRaft controller and Kafka broker using docker compose. I created compose.yml under a directory named kafka-kraft.
services:
  kafka:
    image: 'bitnami/kafka:latest'
    environment:
      - KAFKA_CFG_NODE_ID=0
      - KAFKA_CFG_CONTROLLER_BROKER_ID=0 #1
      - KAFKA_CFG_PROCESS_ROLES=controller, broker #2
      - KAFKA_CFG_LISTENERS=PLAINTEXT://:9092, CONTROLLER://:9093 #3
      - KAFKA_CFG_LISTENERS_SECURITY_PROTOCOL_MAP=CONTROLLER:PLAINTEXT,PLAINTEXT:PLAINTEXT #4
      - KAFKA_CFG_CONTROLLER_QUORUM_VOTERS=0@kafka:9093 #5
      - KAFKA_CFG_CONTROLLER_LISTENER_NAMES=CONTROLLER #6
KRaft settings are required in the environment.
- Specify the ID of the broker that will be the controller. (Since it's a single node, specify
0likeKAFKA_CFG_NODE_ID) - Assign both controller and broker roles to the node.
- Define listeners for the broker and controller. Assign ports 9092 and 9093 respectively.
- Specify the security protocol map for listeners. Set to PLAINTEXT.
- Specify
0@kafka:9093as Quorum voters. Use the format{id}@{host}:{port}. - Specify the listener name for the controller.
In this example, PLAINTEXT is specified for the protocol, but use authentication mechanisms and protocols like SASL in production environments.
Run docker compose in the directory containing compose.yml (here, kafka-kraft).
docker compose up -d
Verify that the Kafka container is running.
$ docker compose ps
NAME                  IMAGE                  COMMAND                   SERVICE   CREATED          STATUS          PORTS
kafka-kraft-kafka-1   bitnami/kafka:latest   "/opt/bitnami/script…"   kafka     10 minutes ago   Up 10 minutes   9092/tcp
Enter the running container kafka-kraft-kafka-1 and display the list of topics using kafka-topics.sh.
docker exec -it kafka-kraft-kafka-1 kafka-topics.sh --list --bootstrap-server kafka:9092
Since there are no topics yet, if the command completes without error, the connection is successful.
To make it convenient for development, let's enable connections from the host machine and also use kafka-ui.
services:
  kafka:
    image: 'bitnami/kafka:latest'
    ports:
      - '9094:9094' #1
    environment:
      - KAFKA_CFG_NODE_ID=0
      - KAFKA_CFG_CONTROLLER_BROKER_ID=0
      - KAFKA_CFG_PROCESS_ROLES=controller,broker
      - KAFKA_CFG_LISTENERS=PLAINTEXT://:9092,CONTROLLER://:9093,EXTERNAL://:9094 #2
      - KAFKA_CFG_ADVERTISED_LISTENERS=PLAINTEXT://kafka:9092,EXTERNAL://localhost:9094 #3
      - KAFKA_CFG_LISTENER_SECURITY_PROTOCOL_MAP=CONTROLLER:PLAINTEXT,EXTERNAL:PLAINTEXT,PLAINTEXT:PLAINTEXT #4
      - KAFKA_CFG_CONTROLLER_QUORUM_VOTERS=0@kafka:9093
      - KAFKA_CFG_CONTROLLER_LISTENER_NAMES=CONTROLLER

  kafka-ui:
    image: 'provectuslabs/kafka-ui:latest'
    ports:
      - '8080:8080'
    depends_on:
      - kafka
    environment:
      - KAFKA_CLUSTERS_0_NAME=local #5
      - KAFKA_CLUSTERS_0_BOOTSTRAPSERVERS=kafka:9092 #6
- Enable connection to Kafka Broker from outside the container on port 9094.
- Add a port (9094) for external connections (EXTERNAL).
- Add the hostname for EXTERNAL.
- Specify the protocol for EXTERNAL.
- Name the cluster managed by kafka-ui.
- Specify the hostname and port of the bootstrap-server for the cluster managed by kafka-ui.
For more about kafka-ui, see the following article:
Install kafka on the host machine via Homebrew or similar, so you can use kafka management commands. Run kafka-topics.sh on the host machine to display the list of topics.
kafka-topics --bootstrap-server localhost:9094 --list
If the command completes without error, the connection is successful.
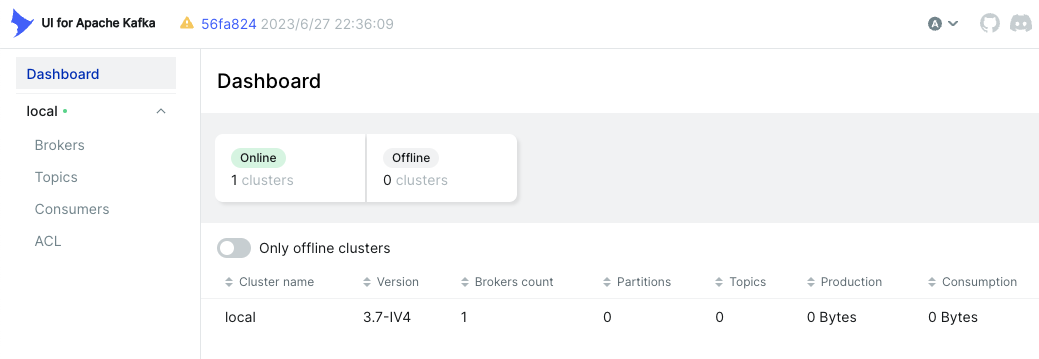
Access localhost:8080 from the host machine's browser to display the kafka-ui dashboard.
For a more robust configuration that separates the controller and broker into multiple services, see the sample in the README of Bitnami's GitHub repository.
containers/bitnami/kafka/README.md at main · bitnami/containers
If you prefer to use Confluent's image instead of Bitnami's, see the sample in the following repository.
Using Kubernetes
#Documentation is available on the Bitnami Helm chart page on Artifact Hub.
kafka 29.3.4 · bitnami/bitnami
In Bitnami's Helm chart, KRaft mode is enabled by default, and ZooKeeper is disabled.
kraft:
  ## @param kraft.enabled Switch to enable or disable the KRaft mode for Kafka
  ##
  enabled: true

zookeeper:
  ## @param zookeeper.enabled Switch to enable or disable the ZooKeeper helm chart. Must be false if you use KRaft mode.
  ##
  enabled: false
Therefore, running helm install without any options will create a Kafka cluster in KRaft mode. To easily verify the connection from a Kafka client Pod, I prepared a configuration file specifying PLAINTEXT for listeners.client.protocol.
listeners:
  client:
    protocol: PLAINTEXT
Create the kafka namespace and run helm install with this configuration file.
kubectl create ns kafka
helm install my-kafka oci://registry-1.docker.io/bitnamicharts/kafka -n kafka -f values.yaml
Let's look at the created objects.
$ kubectl get po,svc,sts -n kafka
NAME                        READY   STATUS    RESTARTS   AGE
pod/my-kafka-controller-1   1/1     Running   0          14m
pod/my-kafka-controller-2   1/1     Running   0          14m
pod/my-kafka-controller-0   1/1     Running   0          14m

NAME                                   TYPE        CLUSTER-IP        EXTERNAL-IP   PORT(S)                      AGE
service/my-kafka-controller-headless   ClusterIP   None              <none>        9094/TCP,9092/TCP,9093/TCP   14m
service/my-kafka                       ClusterIP   192.168.194.159   <none>        9092/TCP                     14m

NAME                                   READY   AGE
statefulset.apps/my-kafka-controller   3/3     14m
Three Pods (my-kafka-controller-*) serving as both controllers and brokers are running[1]. Of course, no ZooKeeper Pods are running. A Service with ClusterIP to specify as the bootstrap-server and a Headless Service to return individual IPs for broker/controller have been created.
Let's verify the connection. Start a Kafka client Pod.
kubectl -n kafka run kafka-client --restart='Never' --image docker.io/bitnami/kafka --command -- sleep infinity
Specify my-kafka:9092 as the bootstrap-server and run kafka-topics to list topics. If nothing is displayed and the command completes, the connection is successful.
kubectl -n kafka exec -i kafka-client -- bash << 'EOS'
  kafka-topics.sh --bootstrap-server my-kafka:9092 --list
EOS
Extra (Connecting from the Host Machine)
#As an extra, let's configure the connection from the host machine so you don't have to enter the Pod to connect to Kafka. First, delete the Kafka cluster created above.
helm uninstall my-kafka -n kafka
Add externalAccess settings to the configuration file. While you can also use LoadBalancer or Ingress, here we use NodePort (for both controller and broker).
externalAccess:
  enabled: true
  controller:
    service:
      type: NodePort
  broker:
    service:
      type: NodePort
  autoDiscovery:
    enabled: true

rbac:
  create: true

controller:
  automountServiceAccountToken: true

broker:
  automountServiceAccountToken: true

listeners:
  client:
    protocol: PLAINTEXT
  external:
    protocol: PLAINTEXT
Set autoDiscovery.enabled to true to use random ports. This option uses the Kubernetes API to allocate ports, so set rbac.create to true and also set controller.automountServiceAccountToken and broker.automountServiceAccountToken to true.
For simplicity, set the protocol for listeners.client and listeners.external to PLAINTEXT.
Run helm install with this configuration file.
helm install my-kafka oci://registry-1.docker.io/bitnamicharts/kafka -n kafka -f values.yml
When you display the Service, NodePorts corresponding to the three Pods are created.
$ kubectl get svc -n kafka
NAME                             TYPE        CLUSTER-IP        EXTERNAL-IP   PORT(S)                      AGE
my-kafka-controller-headless     ClusterIP   None              <none>        9094/TCP,9092/TCP,9093/TCP   2m6s
my-kafka                         ClusterIP   192.168.194.201   <none>        9092/TCP,9095/TCP            2m6s
my-kafka-controller-1-external   NodePort    192.168.194.185   <none>        9094:31512/TCP               2m6s
my-kafka-controller-2-external   NodePort    192.168.194.217   <none>        9094:32077/TCP               2m6s
my-kafka-controller-0-external   NodePort    192.168.194.230   <none>        9094:31943/TCP               2m6s
From the host machine, you can connect by specifying any of the NodePorts [31512, 32077, 31943] as the bootstrap-server.
kafka-topics --bootstrap-server localhost:31512 --list
Conclusion
#That's an introduction to using Kafka in KRaft mode in a container environment. It's now easier to use Docker or Kubernetes locally, making development environment setup more convenient.
ZooKeeper is scheduled to be removed in Kafka 4.0, so migration to production environments will be necessary. The Kafka documentation already includes migration procedures.
https://kafka.apache.org/documentation/#kraft_zk_migration
The default value for
controller.replicaCountis 3. ↩︎