AWS Device Farmでスマートフォンのクロスブラウザテスト環境を構築する
Back to Topはじめに
#「AppiumとAndroidエミュレータでスマートフォンのクロスブラウザテスト環境を構築する」 はローカル環境での実行方法の説明でした。
今回はAWS Device Farm での実行方法を説明させていただきます。
AWS Device Farm は、広範なデスクトップブラウザと実際のモバイルデバイスでテストすることにより、ウェブアプリとモバイルアプリの品質を向上させるアプリケーションテストサービスです。 テストインフラストラクチャをプロビジョニングおよび管理する必要はありません。
AWS Device Farmで利用するモジュールの準備
#テストコード
#実行するコードは前回 とほぼ同じで、Node.jsとWebdriverIOを利用して、Seleniumのテスト用サイトのweb-form.html をオープンして操作するコードです。
前回との変更点は以下の3点となります。
- optsのcapabilitiesを空オブジェクト化
- AWS Device Farmでは、capabilityでw3cをfalseに設定できないのでgetValueで落ちるのでコメントアウト
- スクリーンショットの取得処理追加
node-sampleディレクトリ 直下のandroid-sample.jsは以下のようになります。
const wdio = require("webdriverio");
const assert = require("assert");

const opts = {
    path: '/wd/hub',
    port: 4723,
    //AWS Device Farmで動作させるときにはcapabilitiesは空オブジェクトを指定
    capabilities: {
    }
};

async function main () {
    //WebdriverIOのクライアントの生成
    const client = await wdio.remote(opts);

    //seleniumのテスト用サイトのweb-form.htmlをオープン
    await client.url("https://www.selenium.dev/selenium/web/web-form.html");

    //待ち合わせは不要ですが、ウエイトのサンプル実装
    await client.pause(3 * 1000);

    // Text input
    // id=my-text-idの要素を取得
    const textInput = await client.$('#my-text-id');
    // id=my-text-idの要素が表示されるまでウエイト(タイムアウト:5秒)
    await textInput.waitForDisplayed({timeout: 5 * 1000});

    //スクリーンショット
    await client.saveScreenshot(process.env.DEVICEFARM_SCREENSHOT_PATH+'/test1.png')


    // id=my-text-idの要素に値を入力 'w3c': falseでないとうまく動作しないので、AWS Device Farmでは検証不可能
    await textInput.setValue("textInputValue");

    const passwordInput = await client.$('input[name="my-password"]');
    await passwordInput.setValue("passwordInputValue");

    // AWS Device Farmではcapabilityでw3をfalseに設定できないので検証できない
    // capabilityでw3をfalseに設定して、WebDriverのレガシーモードを有効にしないとgetAttributeは動作しないため、getValueが動作しません。
    // id=my-text-idの要素のvalueを検証
    //assert.equal(await textInput.getValue(),  "textInputValue");

    //ワンライナーでもOK
    //assert.equal(await (await client.$('#my-text-id')).getValue(), "textInputValue" );


    // assert.equal(await passwordInput.getValue(), "passwordInputValue")

    // Dropdown (select)
    const mySelect = await client.$('select[name="my-select"]');
    await mySelect.selectByAttribute('value', '1');
    await client.pause(3 * 1000);
    //assert.equal("1", await mySelect.getValue())

    // check box selected
    const myCheck1 = await client.$('#my-check-1');
    assert.equal(await myCheck1.isSelected(), true );

    // check box not selected
    const myCheck2 = await client.$('#my-check-2');
    assert.equal(await myCheck2.isSelected(),false );

    // myCheck2に対してwaitForClickableでクリック可能になるまでウエイト
    await myCheck2.waitForClickable({timeout: 5 * 1000});

    // click myCheck2
    await myCheck2.click();
    // assert.equal(await myCheck2.isSelected(),true );

    const myRadio1 = await client.$('#my-radio-1');
    const myRadio2 = await client.$('#my-radio-2');

    // radio
    assert.equal(await myRadio1.isSelected(), true);
    assert.equal(await myRadio2.isSelected(), false);

    //スクリーンショット
    await client.saveScreenshot(process.env.DEVICEFARM_SCREENSHOT_PATH+'/test2.png')

    await client.deleteSession();
}

main();
AWS Device Farmにアップロードするモジュールの作成
#node-sampleディレクトリをtarで固め、gzip圧縮し、さらにzip圧縮したファイルを作成します。
Appium と AWS Device Farm での作業では、npm-bundleを利用して圧縮されたテストパッケージファイルの作成する手順となっていますが、現在サポートされているNode.js(記事執筆時点では、16.20.1、18.17.1、20.5.1)では意図した構成のパッケージが作成できないので、他の方法で圧縮する必要があります。
以下のコマンドで圧縮してください。
cd node-samplenが含まれるパス
tar czf node-sample.tgz node-sample
zip node-sample.zip node-sample.tgz
Windows環境で上記コマンドが利用できない場合は、7zipなどのツールでnode-sample.tgzを作成し、node-sample.tgzをWindowsのzip圧縮で圧縮しnode-sample.zipを作成します。
AWS Device Farmでの実行
#Device Farmのプロジェクト作成と実行
#Device Farmで新規のプロジェクトを作成します。
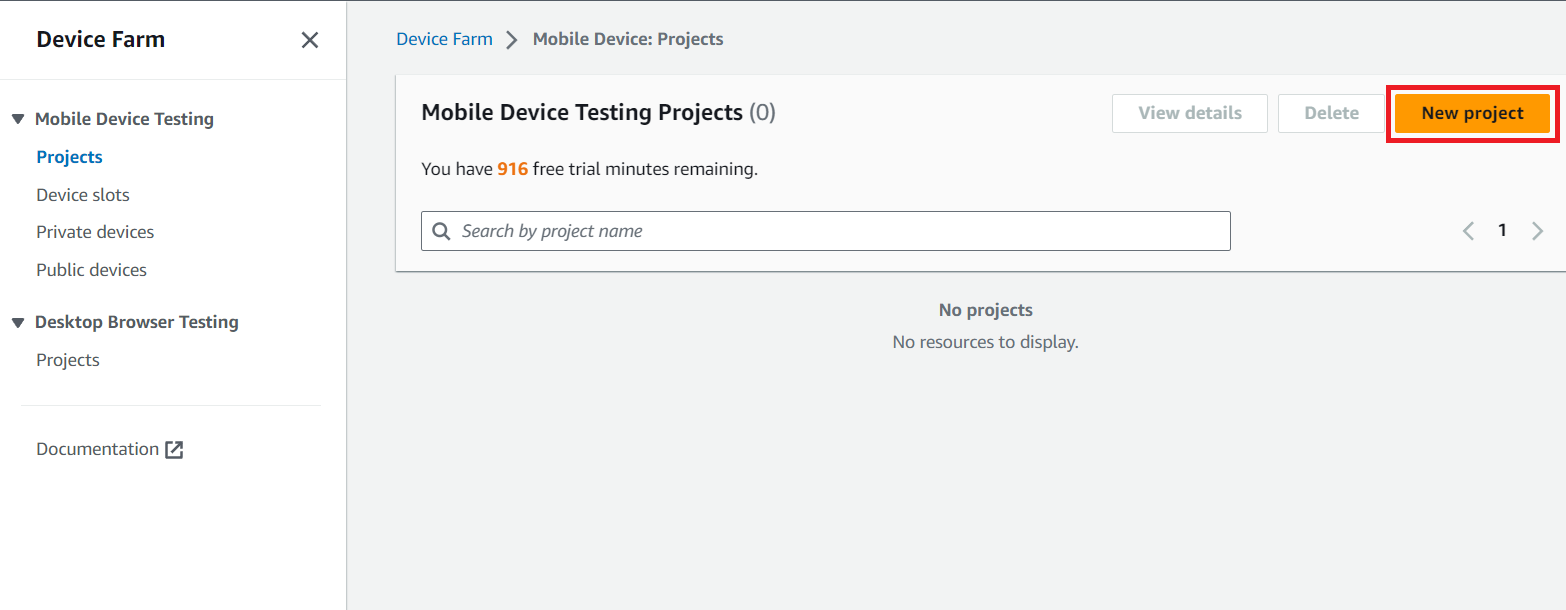
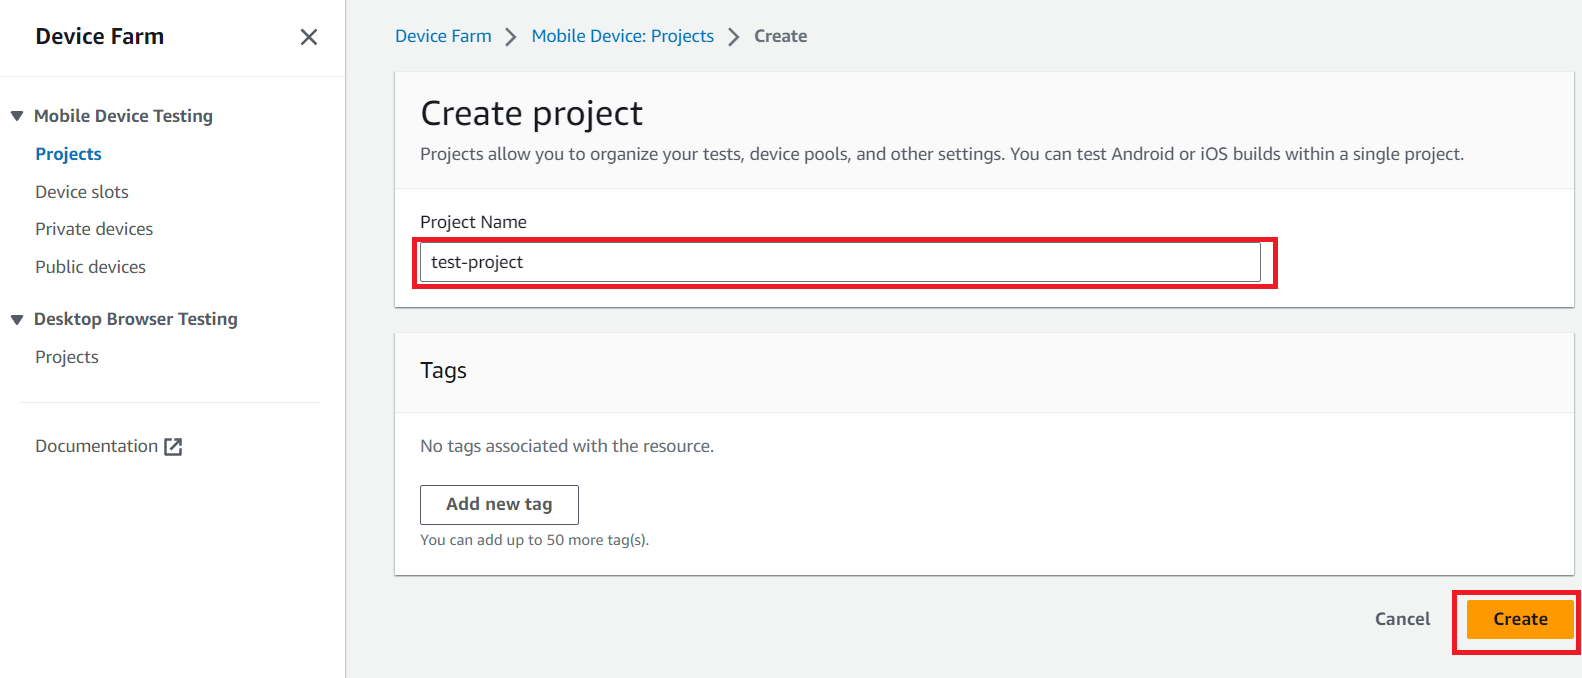
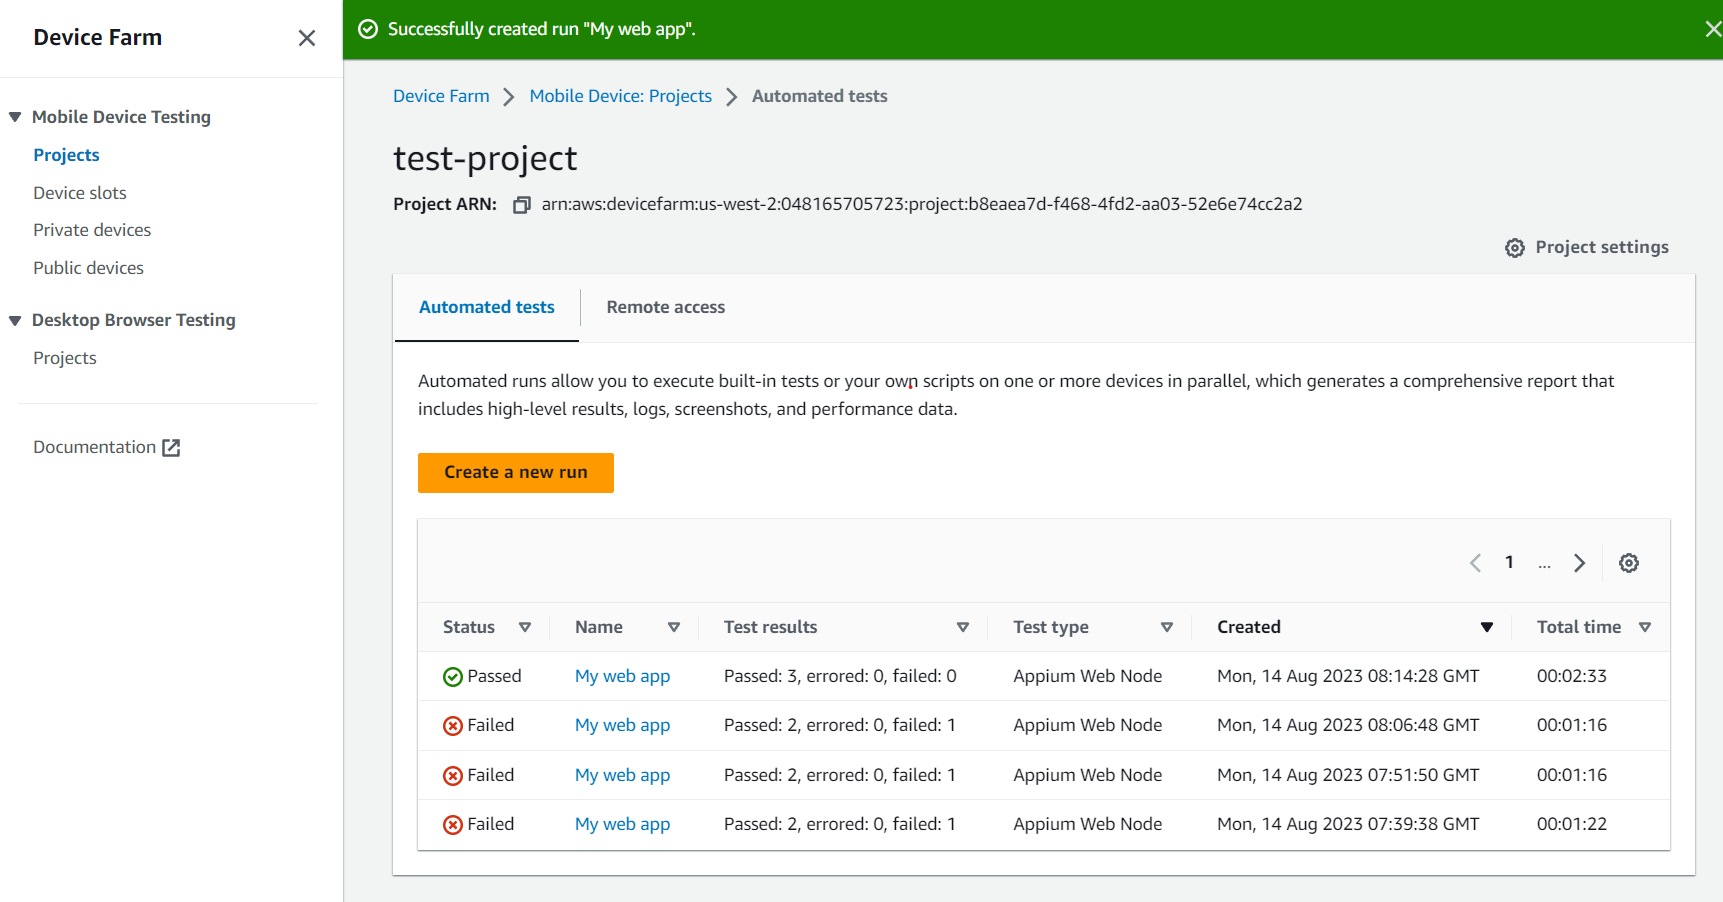
Project Nameにtest-projectと入力し「Create」ボタンをクリックします。
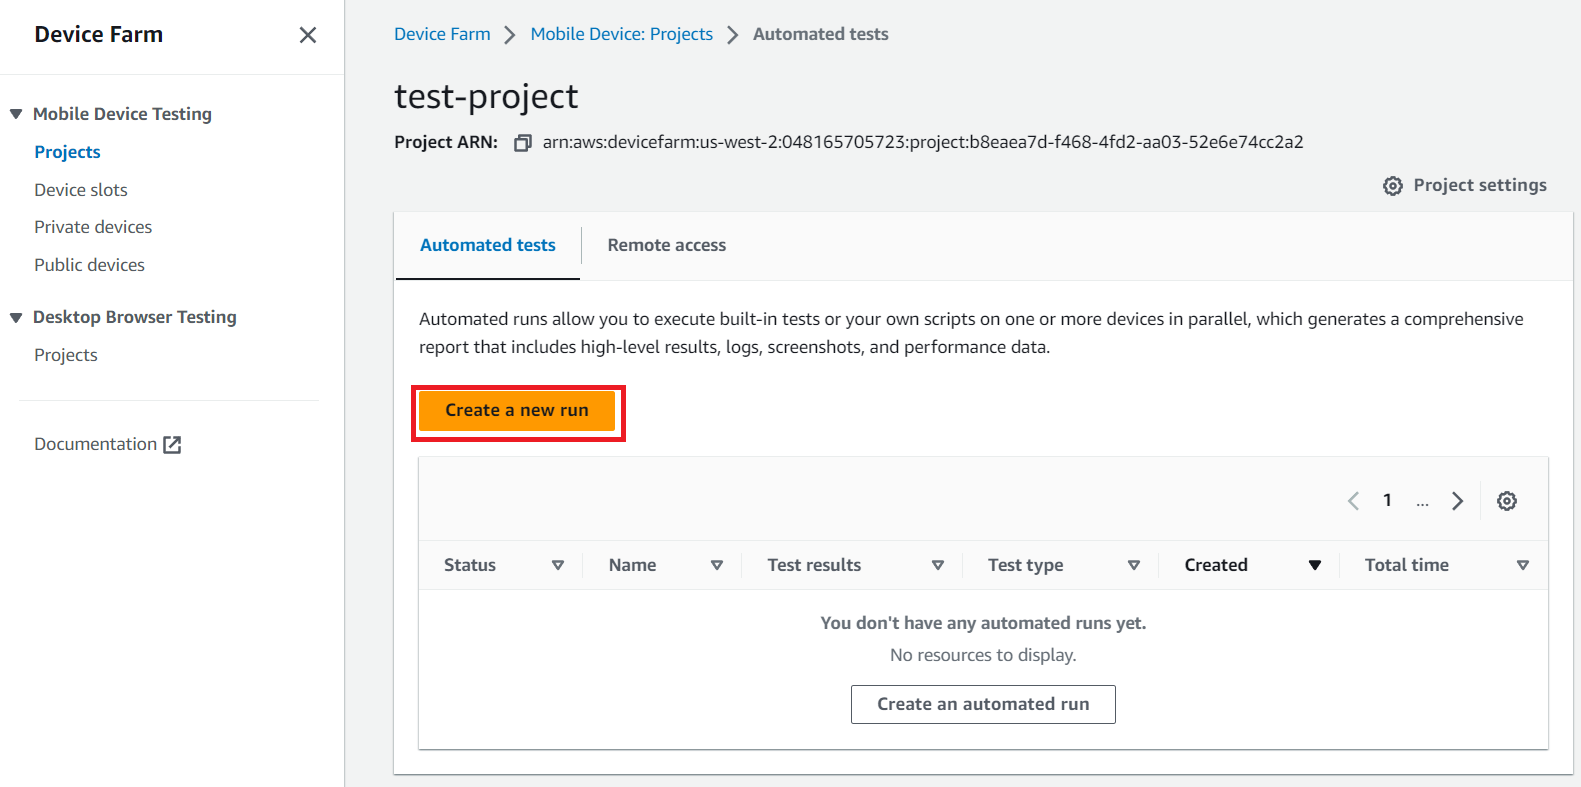
作成したプロジェクトが開かれた状態となりますので「Create a new run」ボタンをクリックします。
Web Appを選択し、Run Nameはデフォルトのままで「Next」ボタンをクリックします。

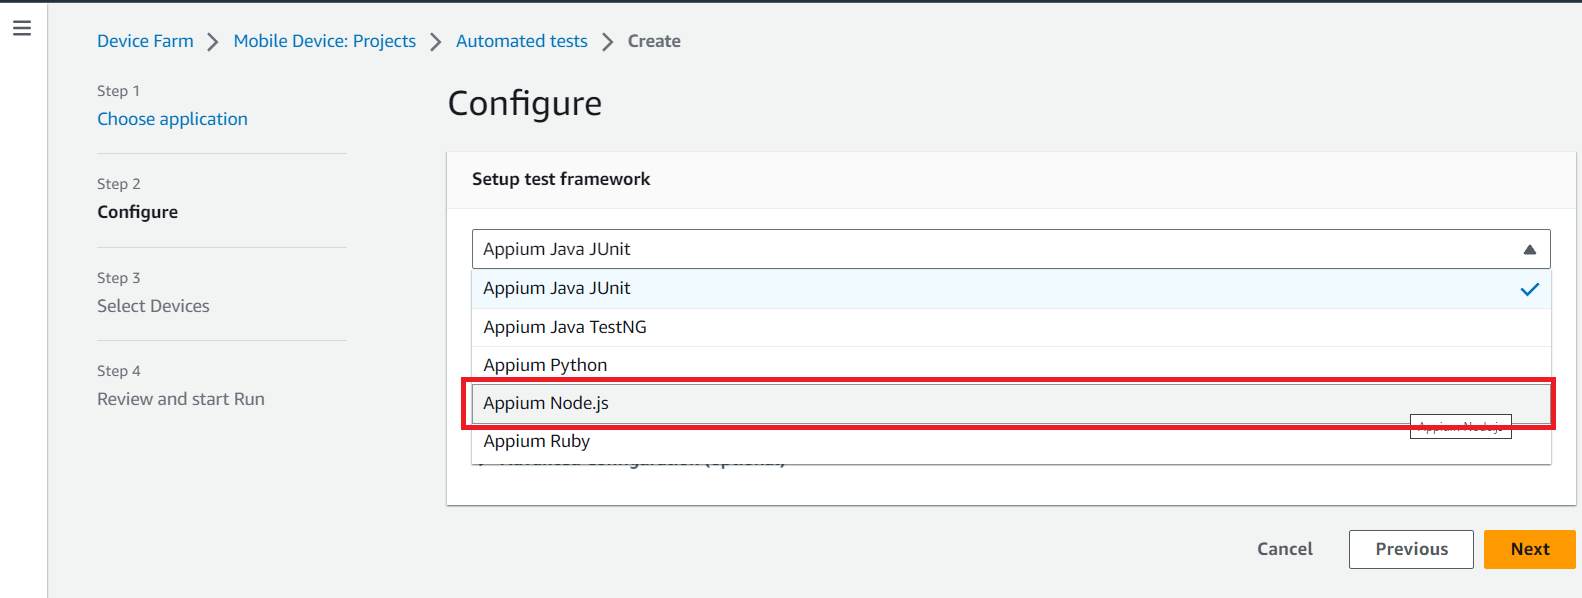
Setup test frameworkでAppium Node.jsを選択します。
Upload a zip containing your testsの「Choose File」を押下してファイル選択ダイアログを表示してファイルを指定します。
この領域にファイルをドラッグ&ドロップすることでも指定可能です。
指定するファイルはnode-sample.zipとなります。 ファイル指定後に「Next」ボタンをクリックします。
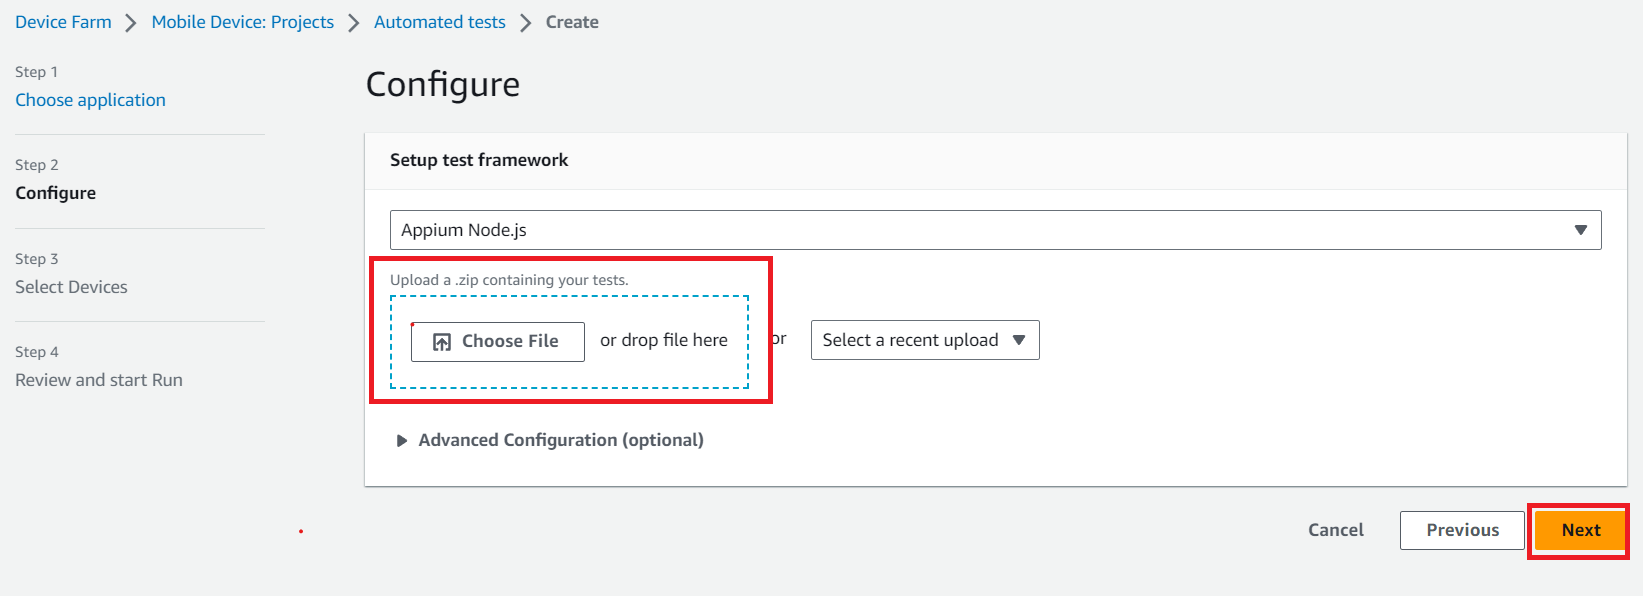
画面下部にスクロールし「Create a TestSpec」ボタンをクリックします。
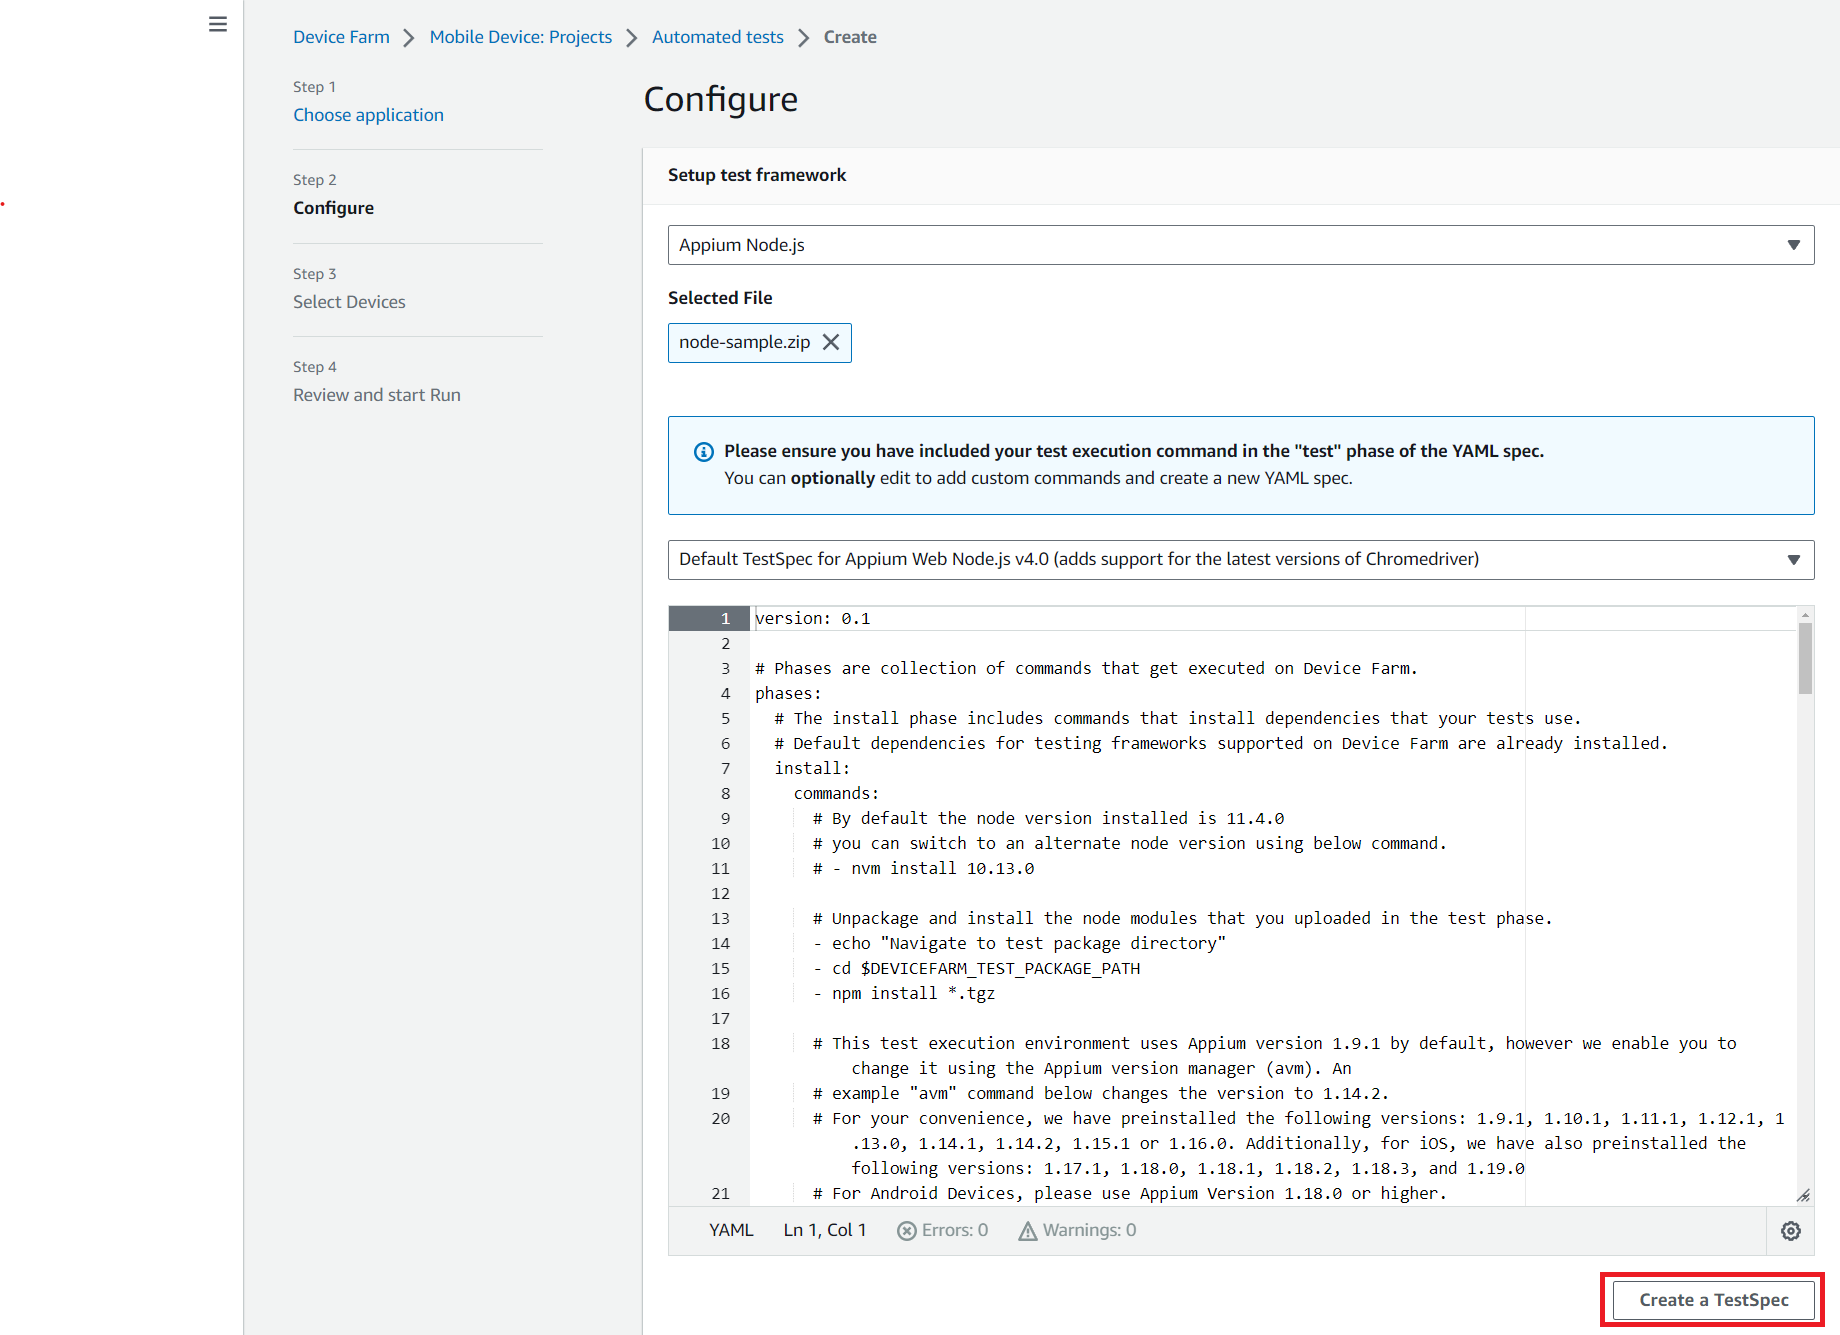
Edit your YAMLの下に表示されているyamlを編集します。以降では、このyamlファイルをTestSpecと記載いたします。
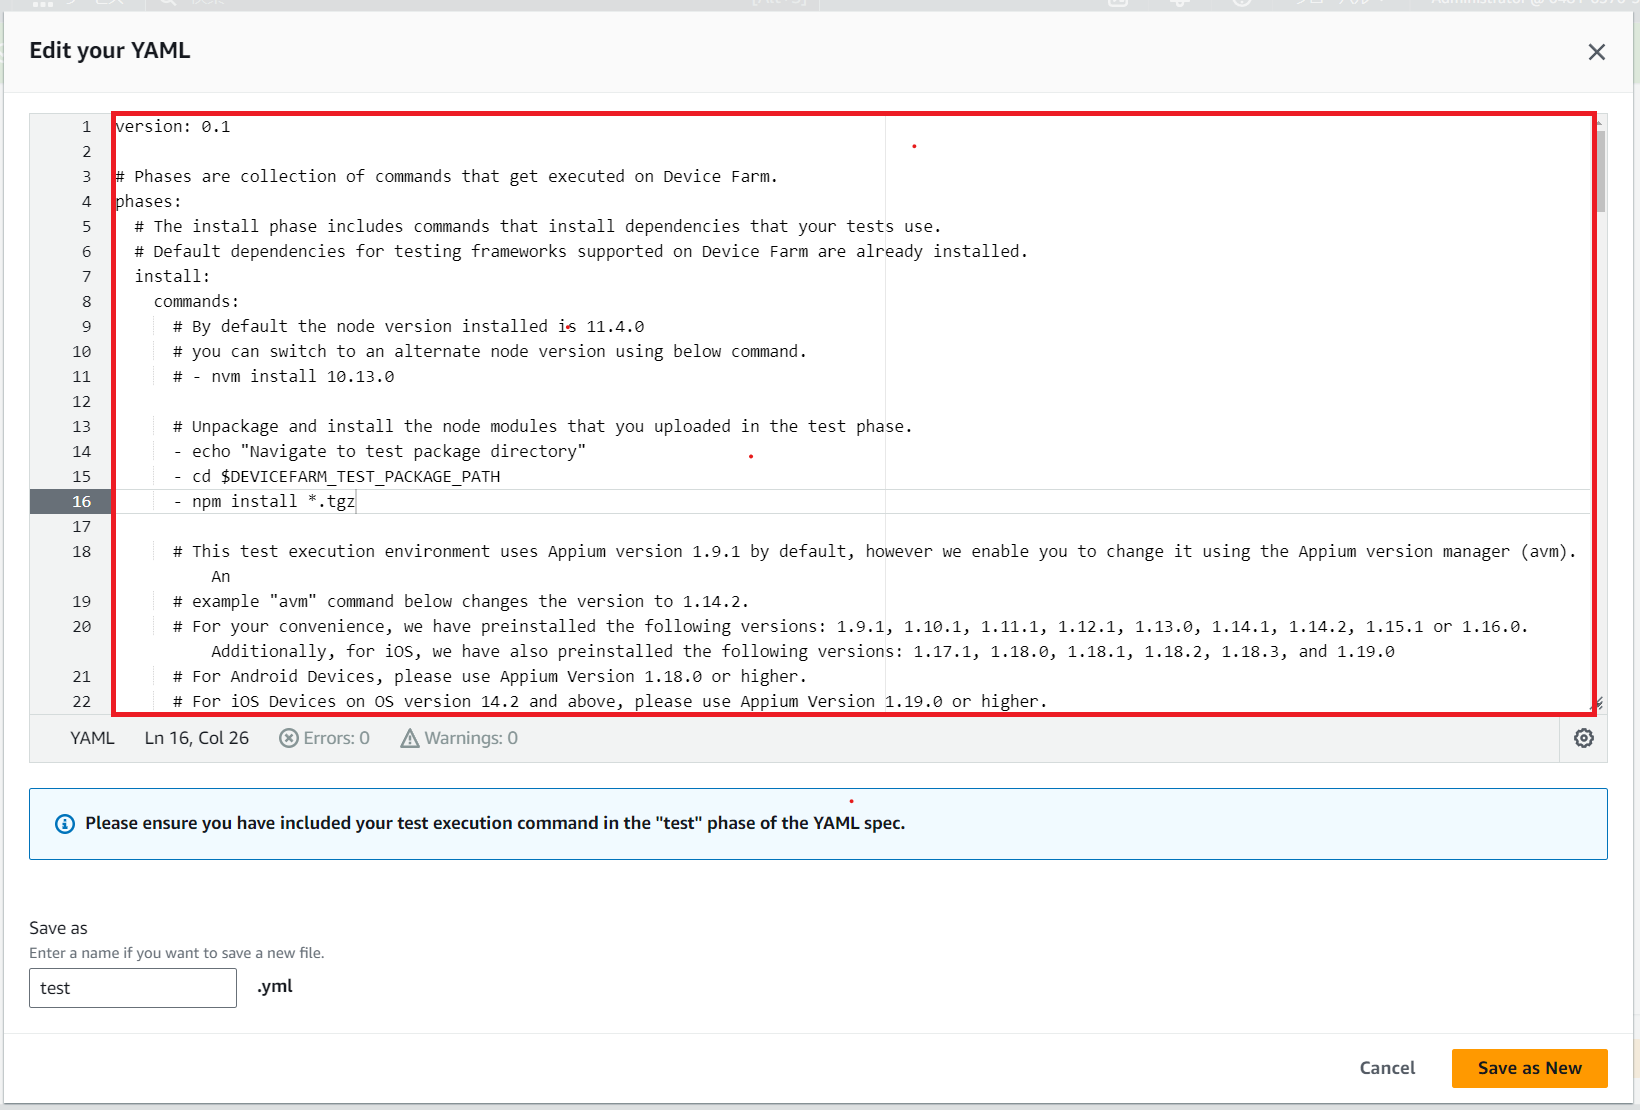
11行目の# - nvm install 10.13.0を- nvm install 16.20.1に書き換えます。
134行目の # The test phase includes commands that run your test suite execution.から
145行目の - node YOUR_TEST_FILENAME.jsまでを以下のように書き換えます。
  # The test phase includes commands that run your test suite execution.
  test:
    commands:
      # Go into the root folder containing your source code and node_modules
      - echo "Navigate to test source code"
      # Change the directory to node_modules folder as it has your test code and the dependency node modules.
      - cd $DEVICEFARM_TEST_PACKAGE_PATH
      - ls -l
      - cd $DEVICEFARM_TEST_PACKAGE_PATH/node_modules
      - ls -l
      - cd $DEVICEFARM_TEST_PACKAGE_PATH/node_modules/node-sample
      - ls -l

      - echo "Start Appium Node test"
      # Enter the command below to start the tests . The comamnd should be similar to what you use to run the tests locally.
      # For e.g. assuming you run your tests locally using command "node YOUR_TEST_FILENAME.js.", enter the same command below:
      - node android-sample.js
node-sample.tgzの構造が間違えている事に気づくためにディレクトリ移動を複数回実行し、ls -lを実行して、カレントディレクトリに含まれるファイルを確認できるようにしております。
$DEVICEFARM_TEST_PACKAGE_PATH/node_modules/node-sample配下にandroid-sample.jsが存在する事を期待するTestSpecとなります。
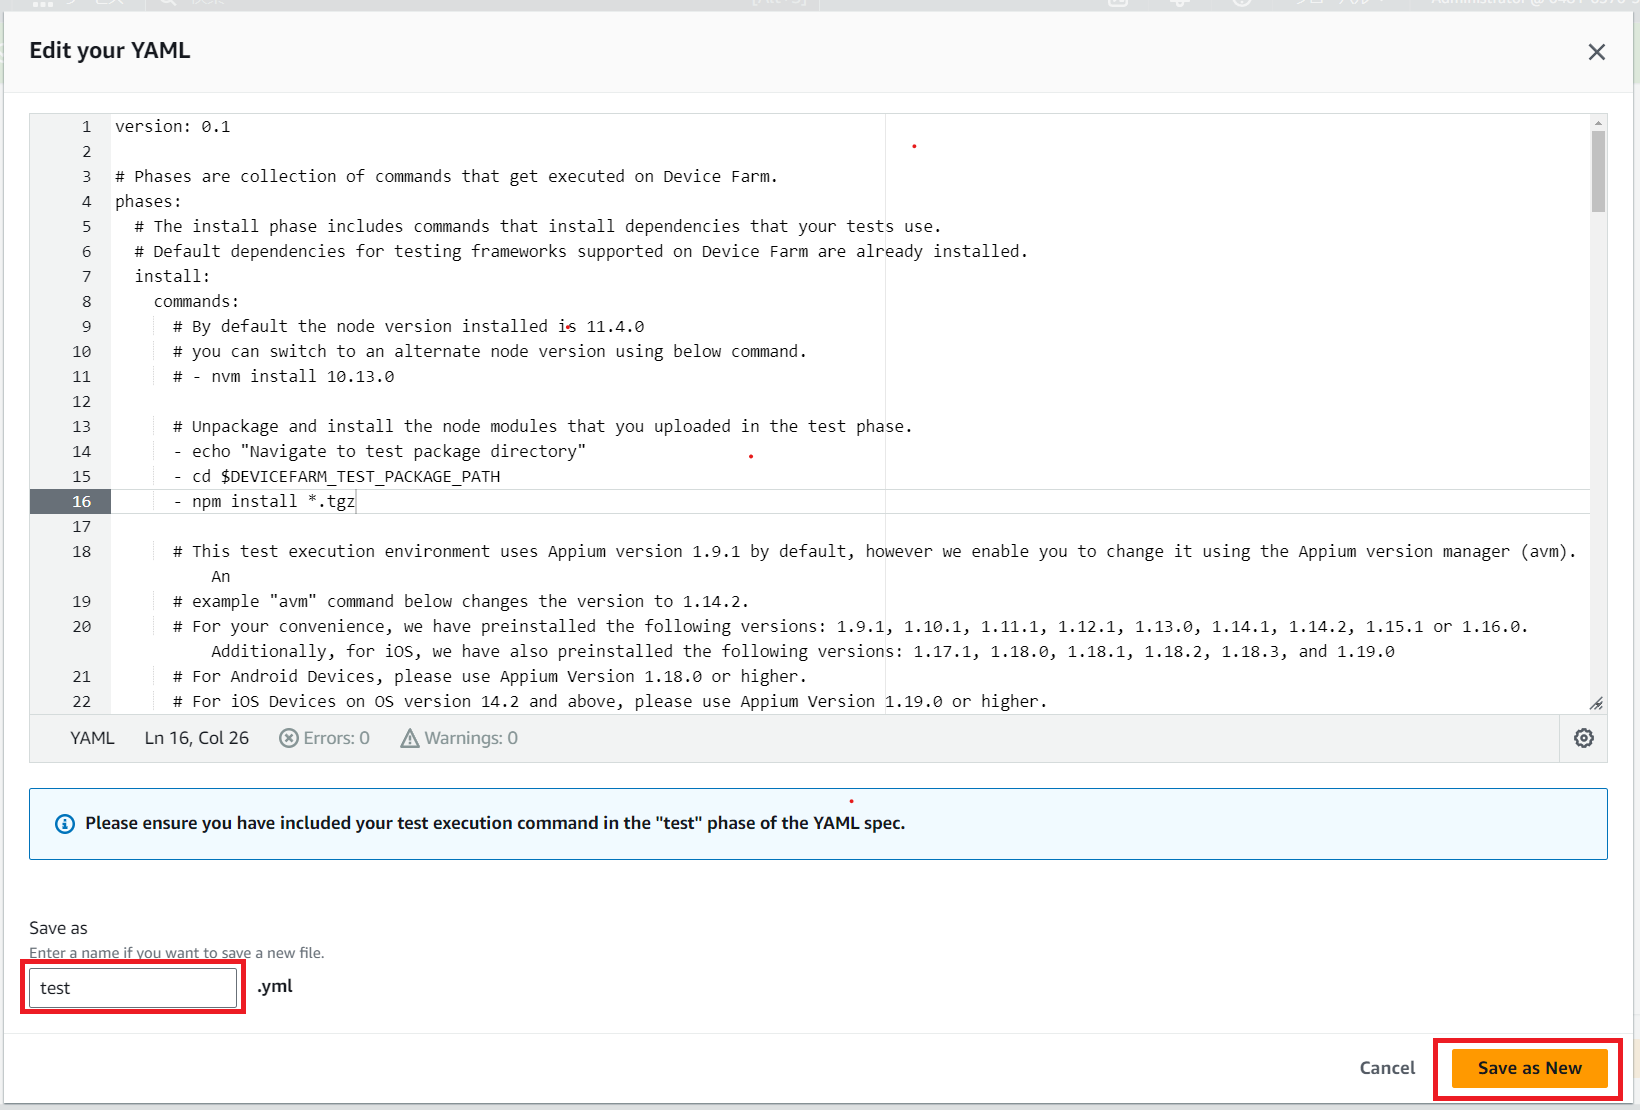
Save asのyamlファイル名を指定し、「Save as New」ボタンをクリックします。
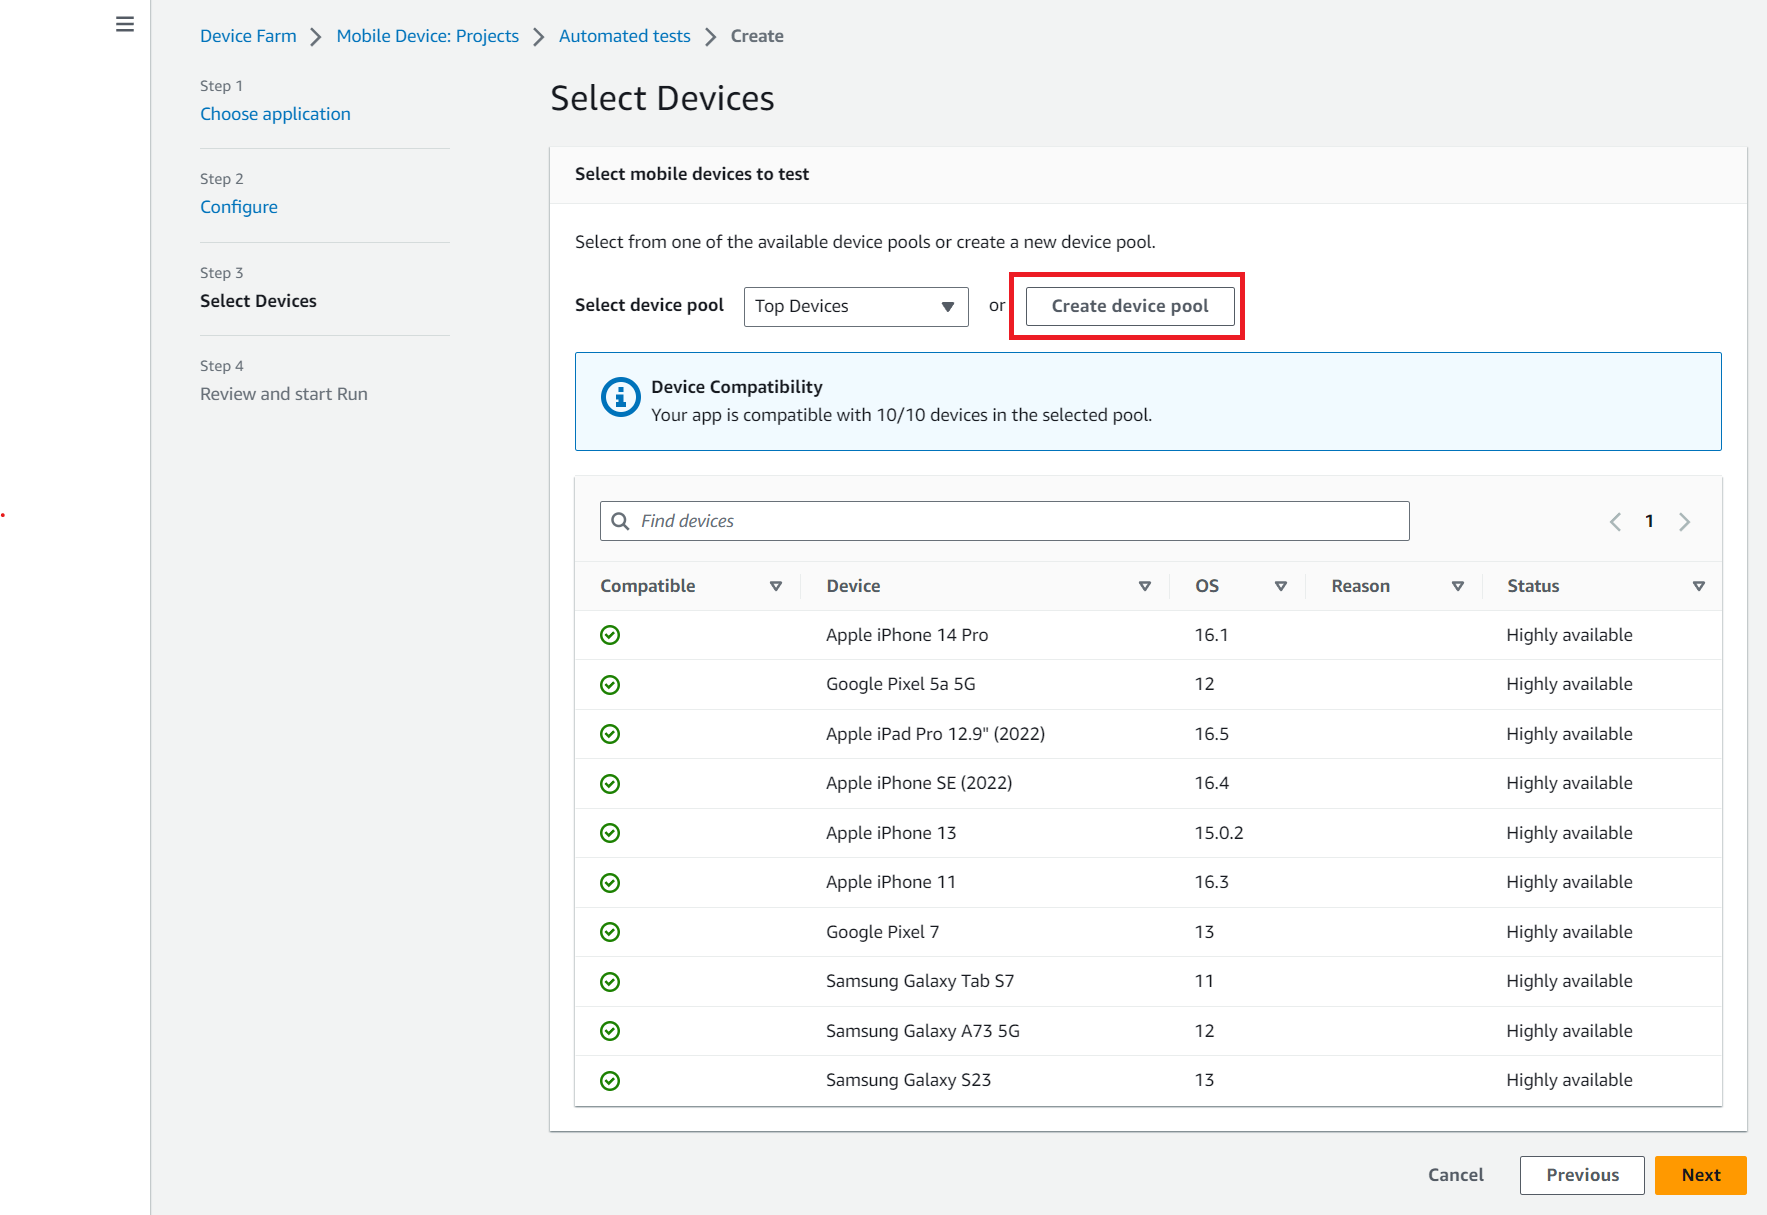
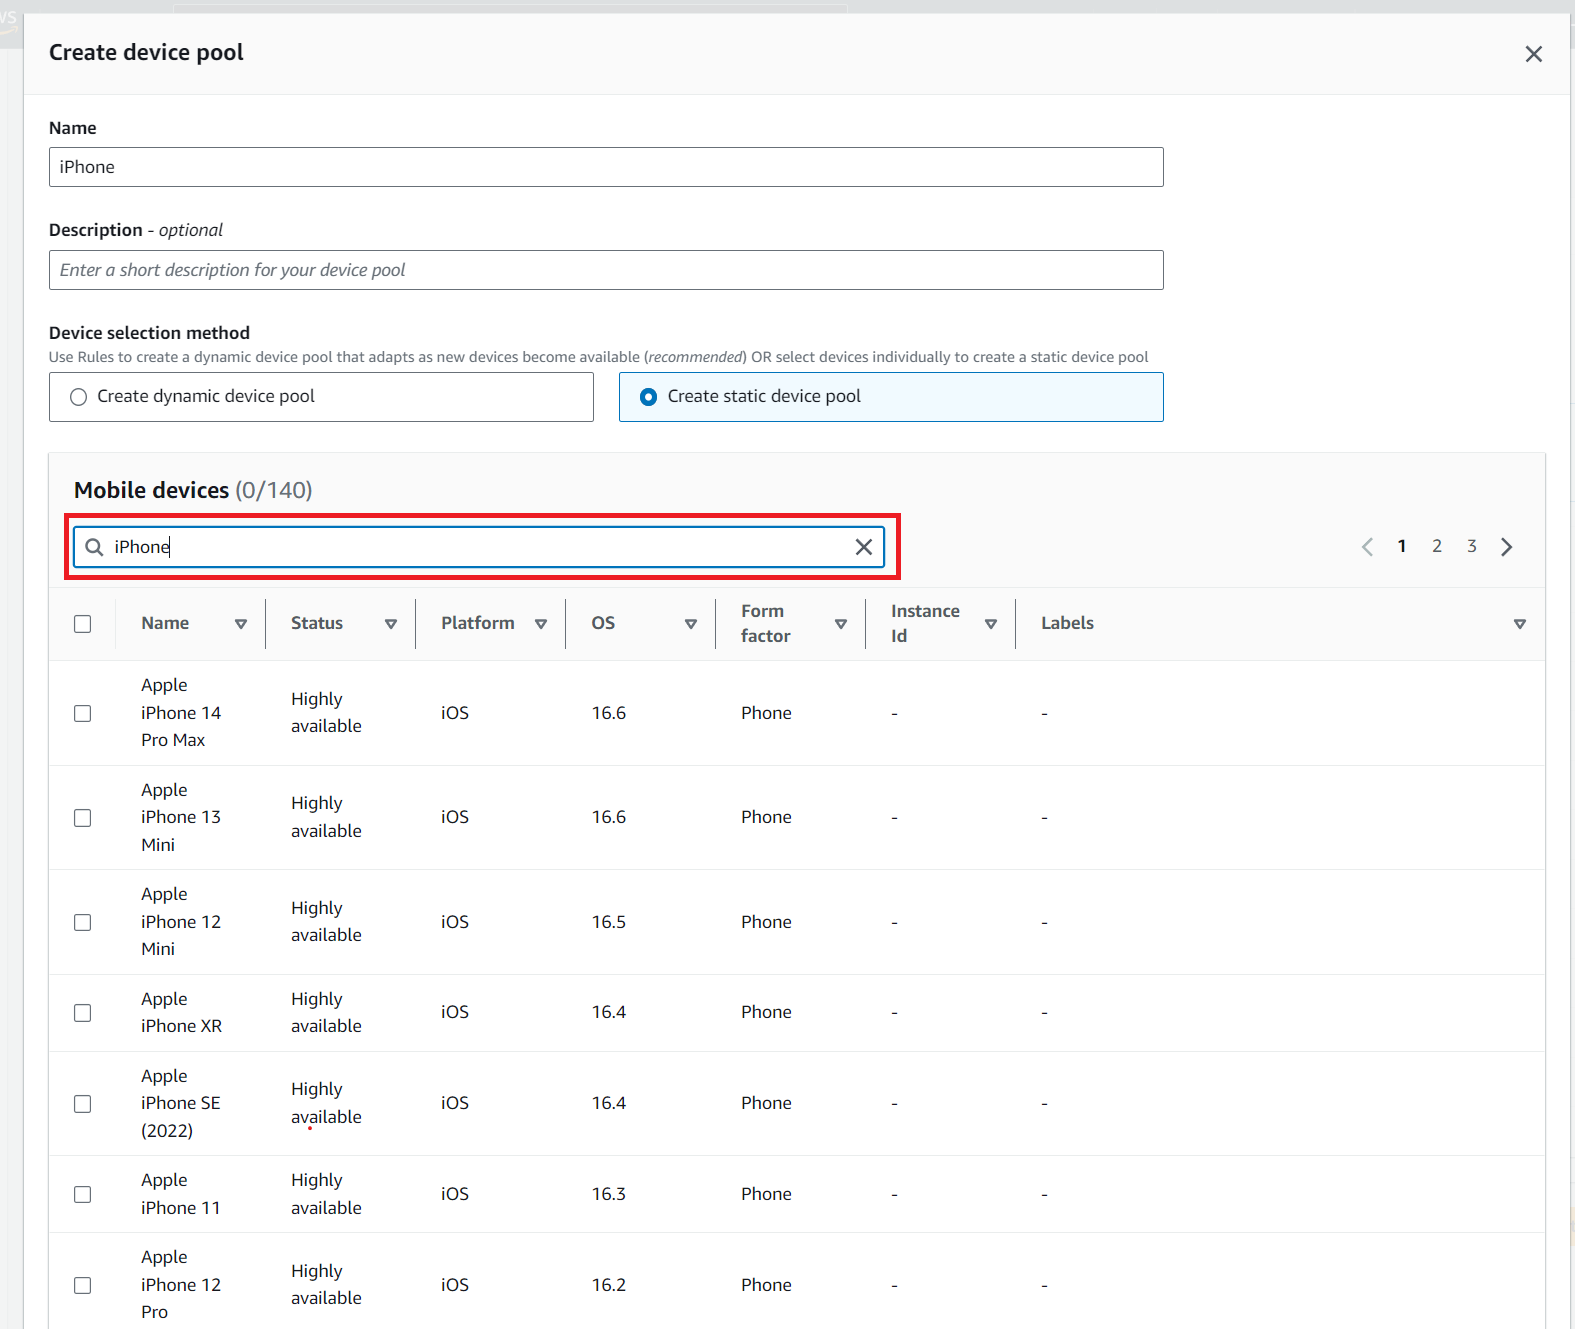
テストを実行するデバイスを指定します。「Create device pool」をクリックします。
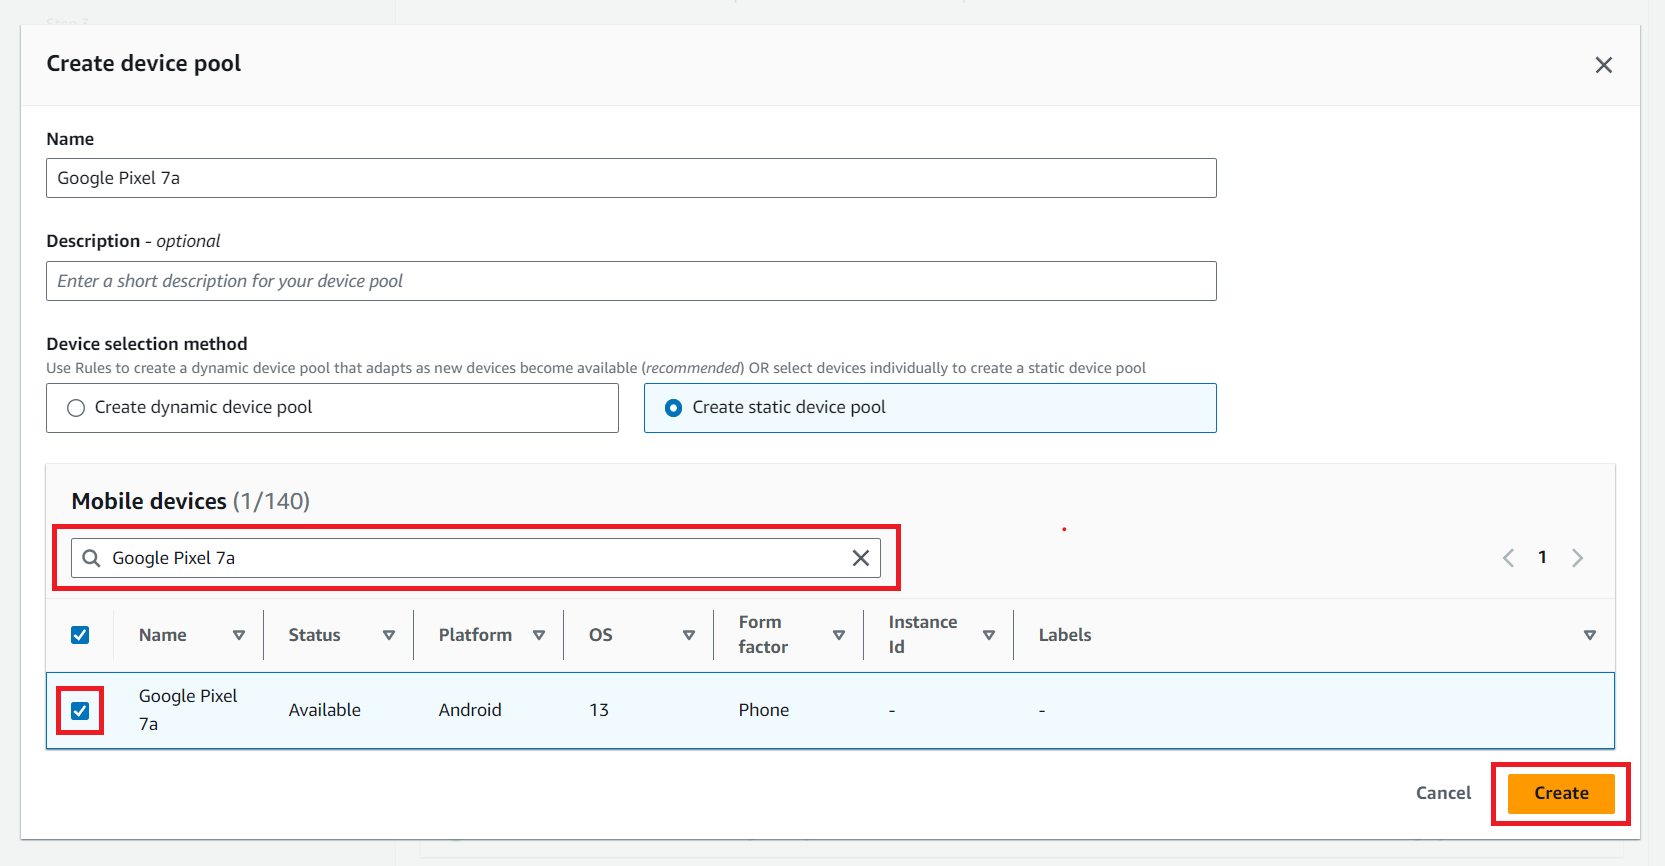
Mobile devicesにGoogle Pixel 7aを入力すると、条件に合ったデバイスのみが表示されますので、選択し「Create」ボタンをクリックします。
一覧に表示するデバイスを絞り込む必要はないのですが、画像の絵面的に見やすくするための操作となります。
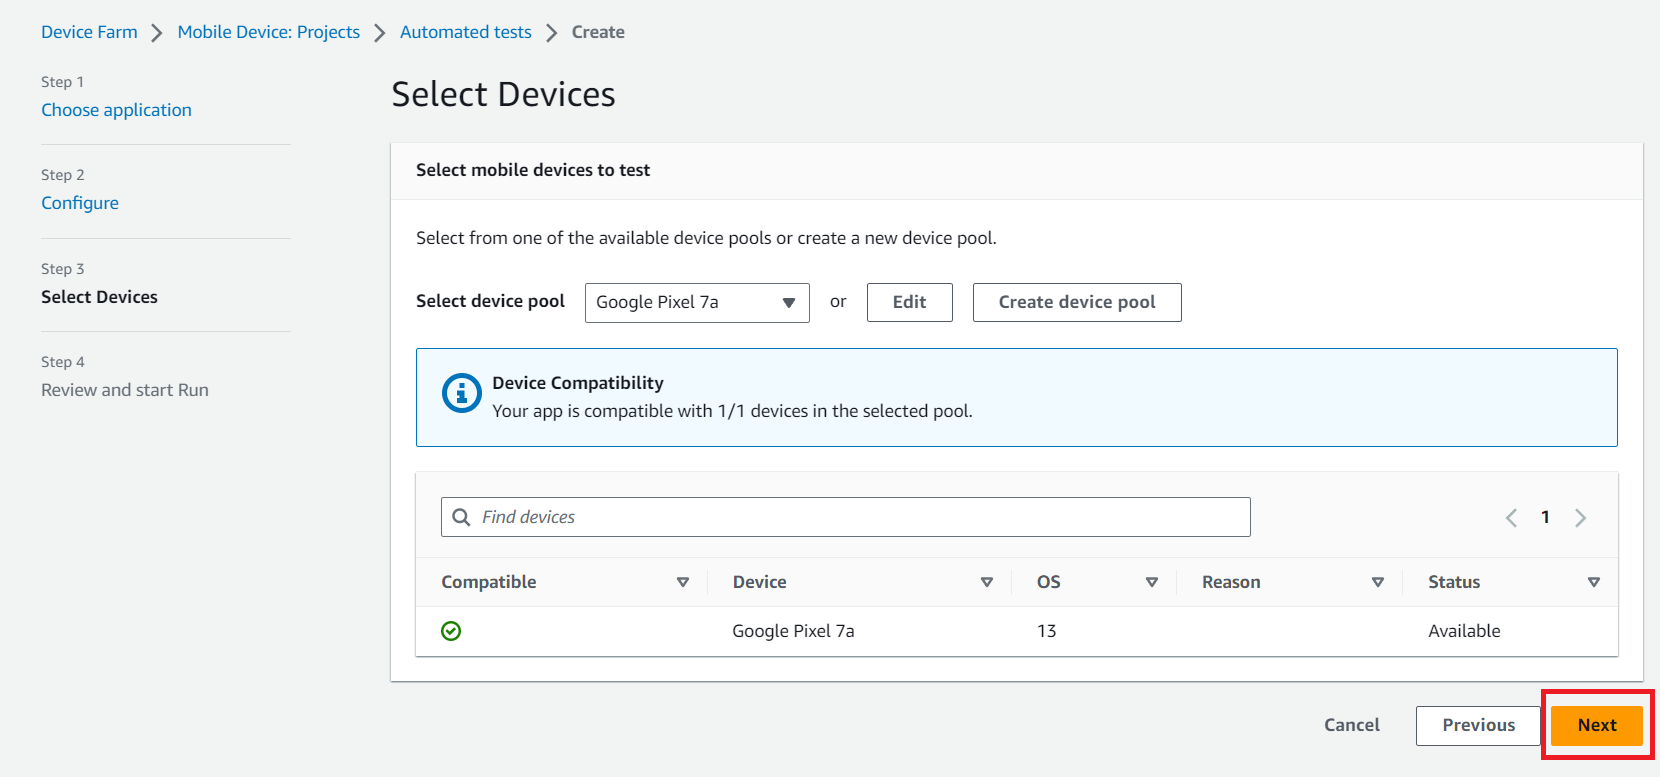
指定したデバイスが選択状態で表示されるので、「Next」ボタンをクリックします。
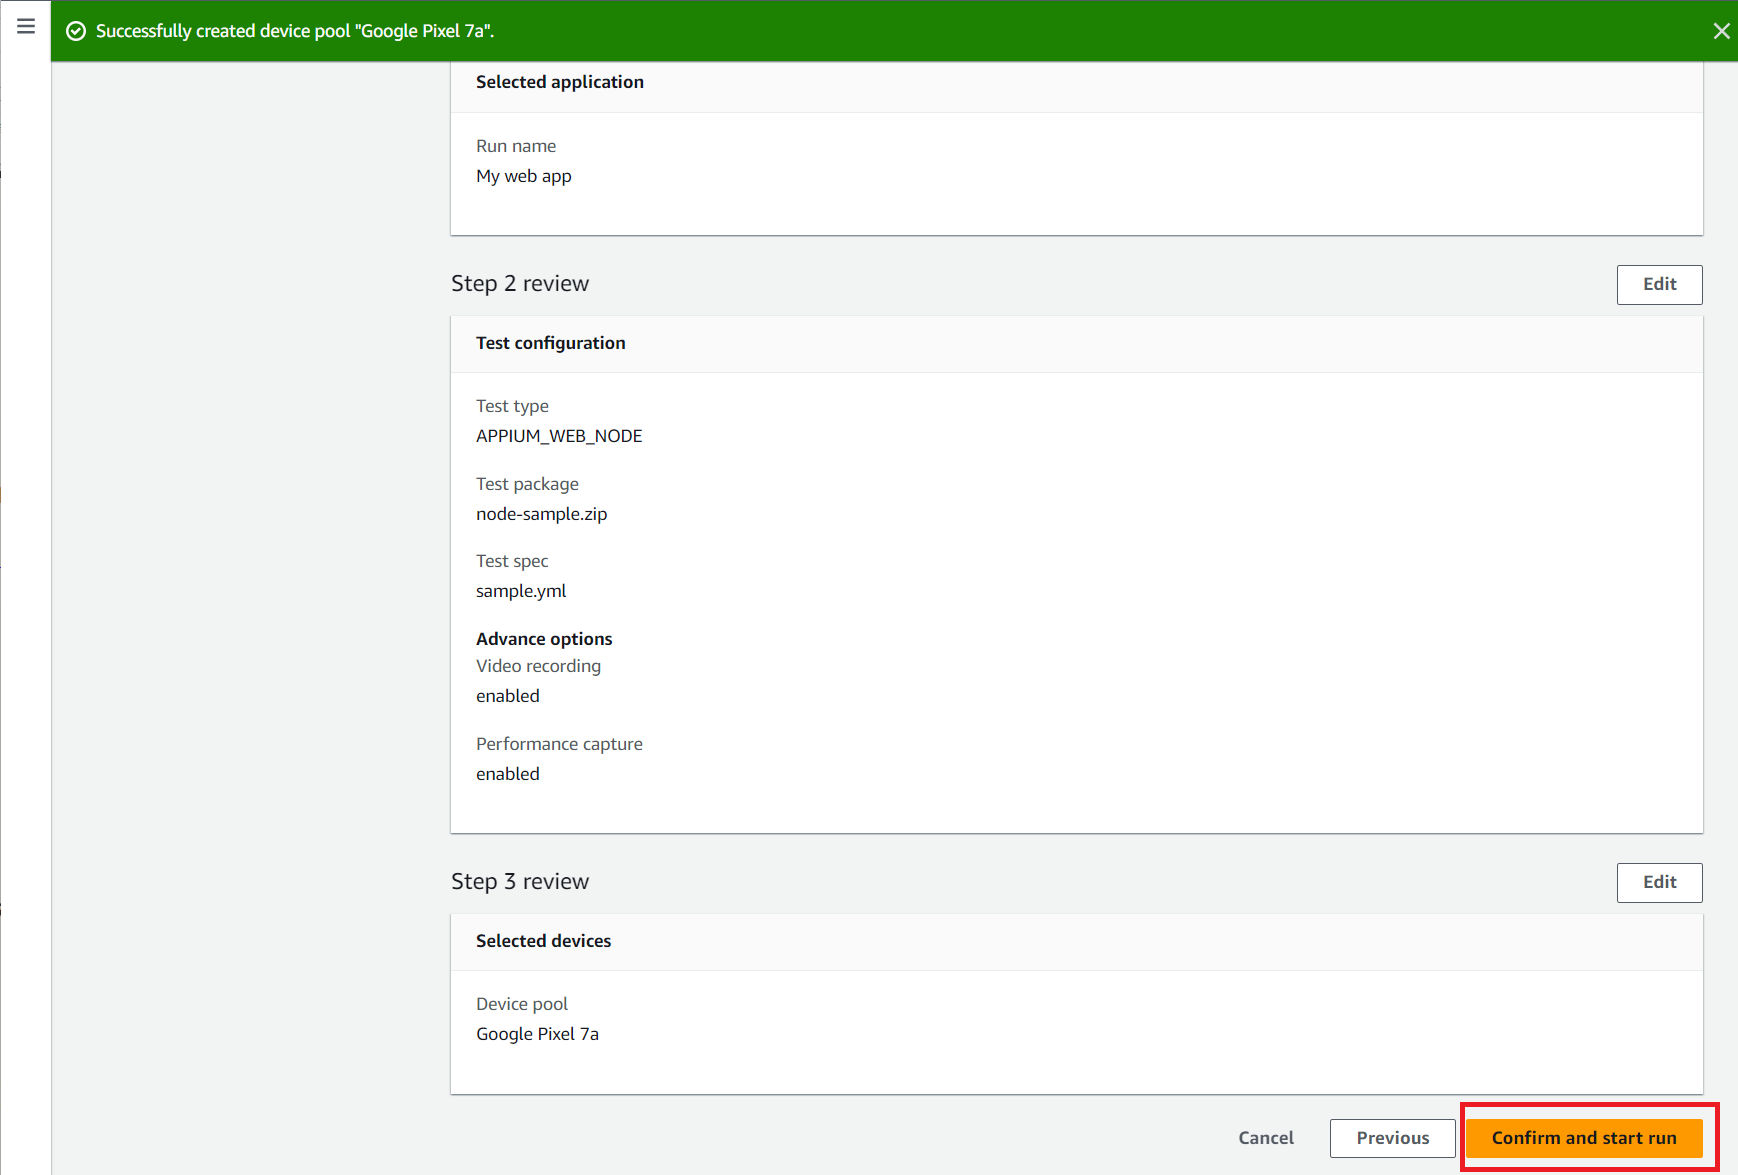
画面下部にスクロールし「Confirm and start run」ボタンをクリックします。
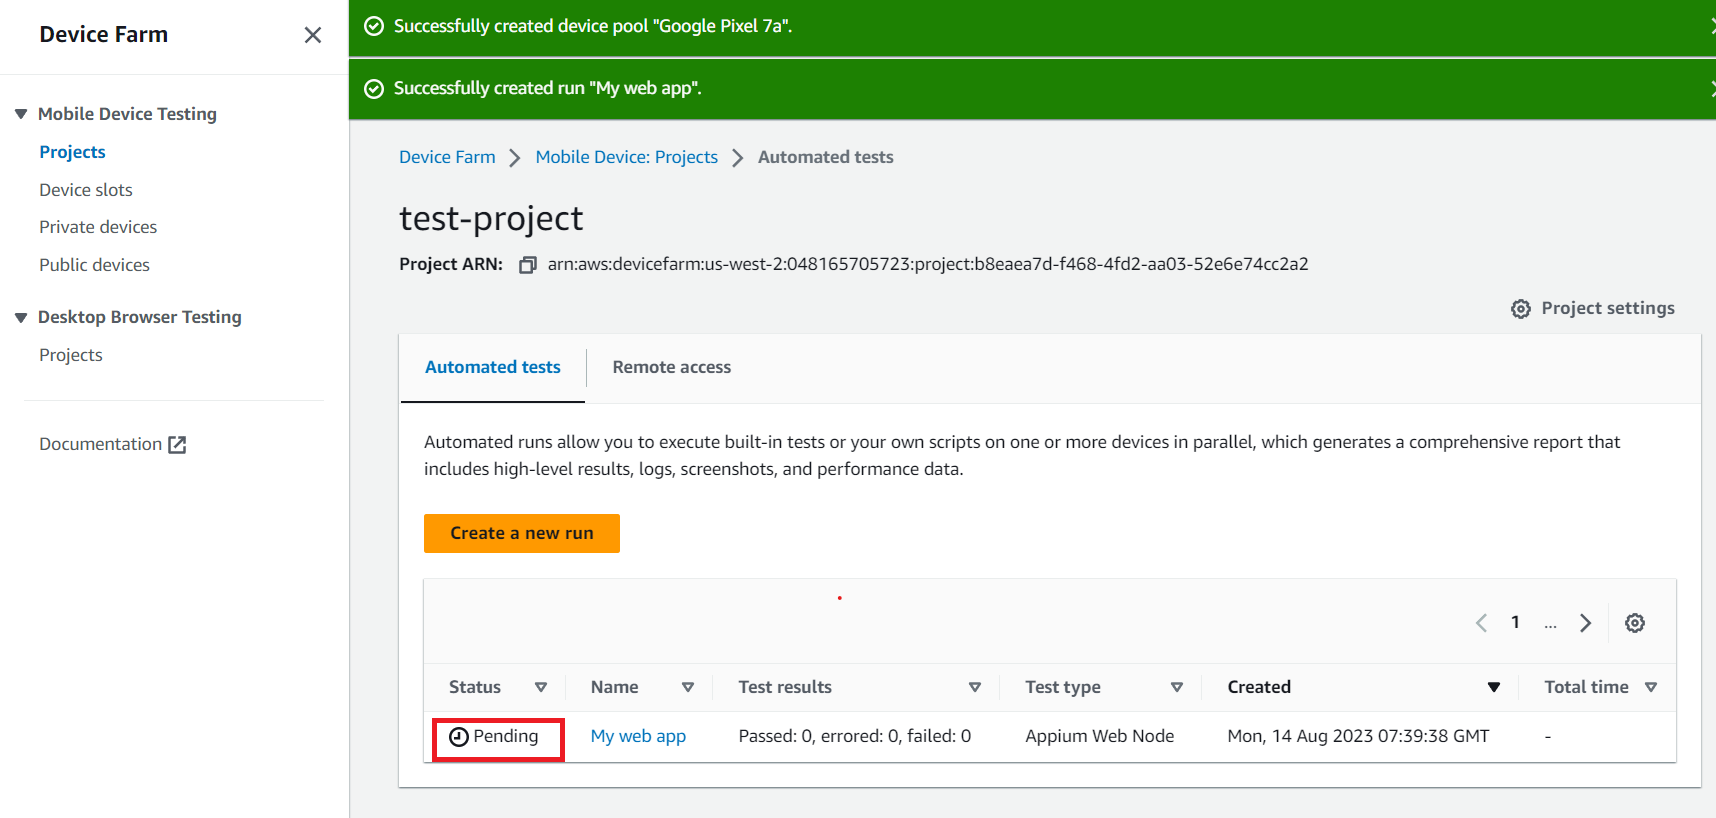
作成したテストがPending状態で一覧に表示されます。
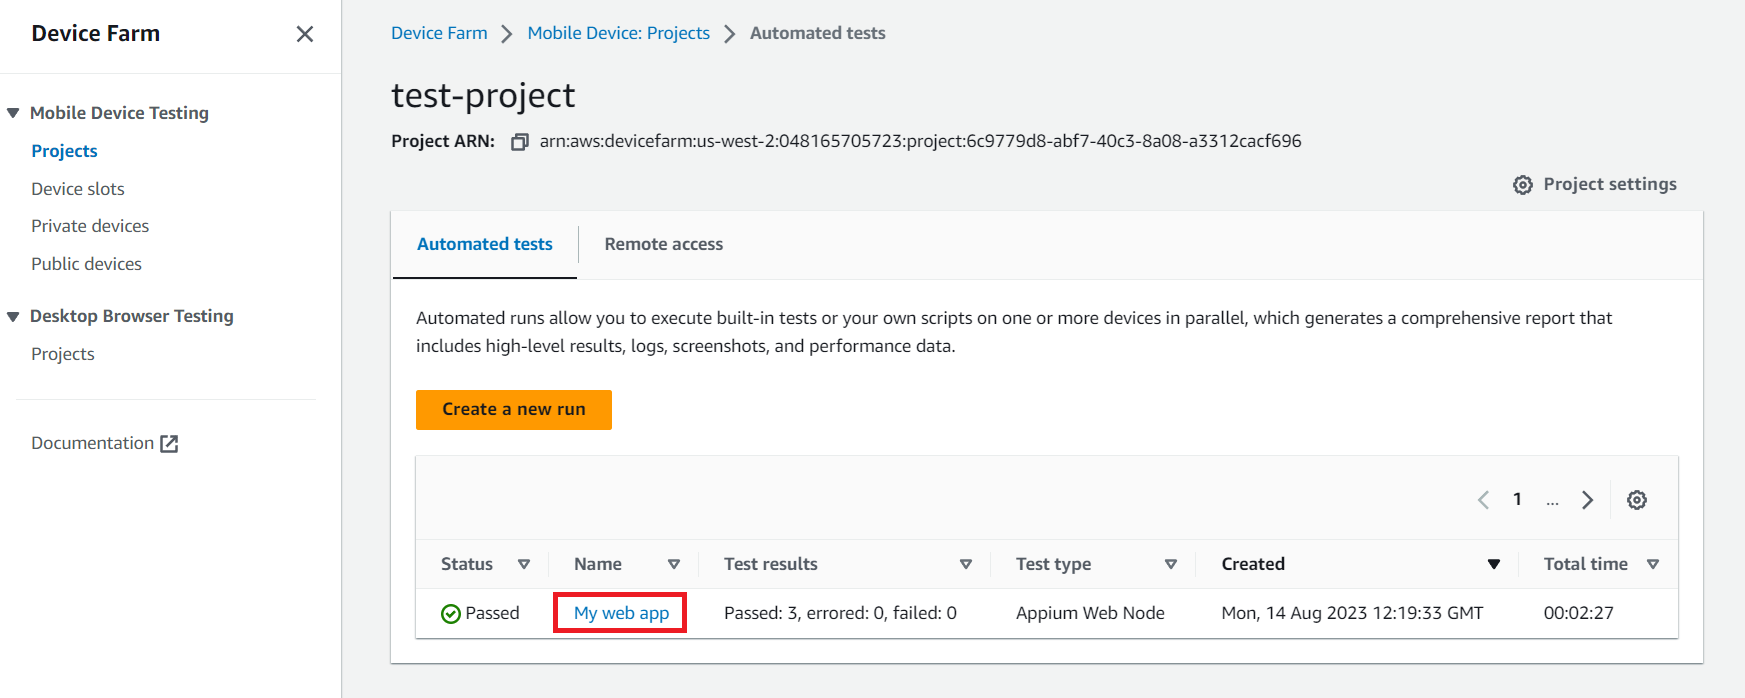
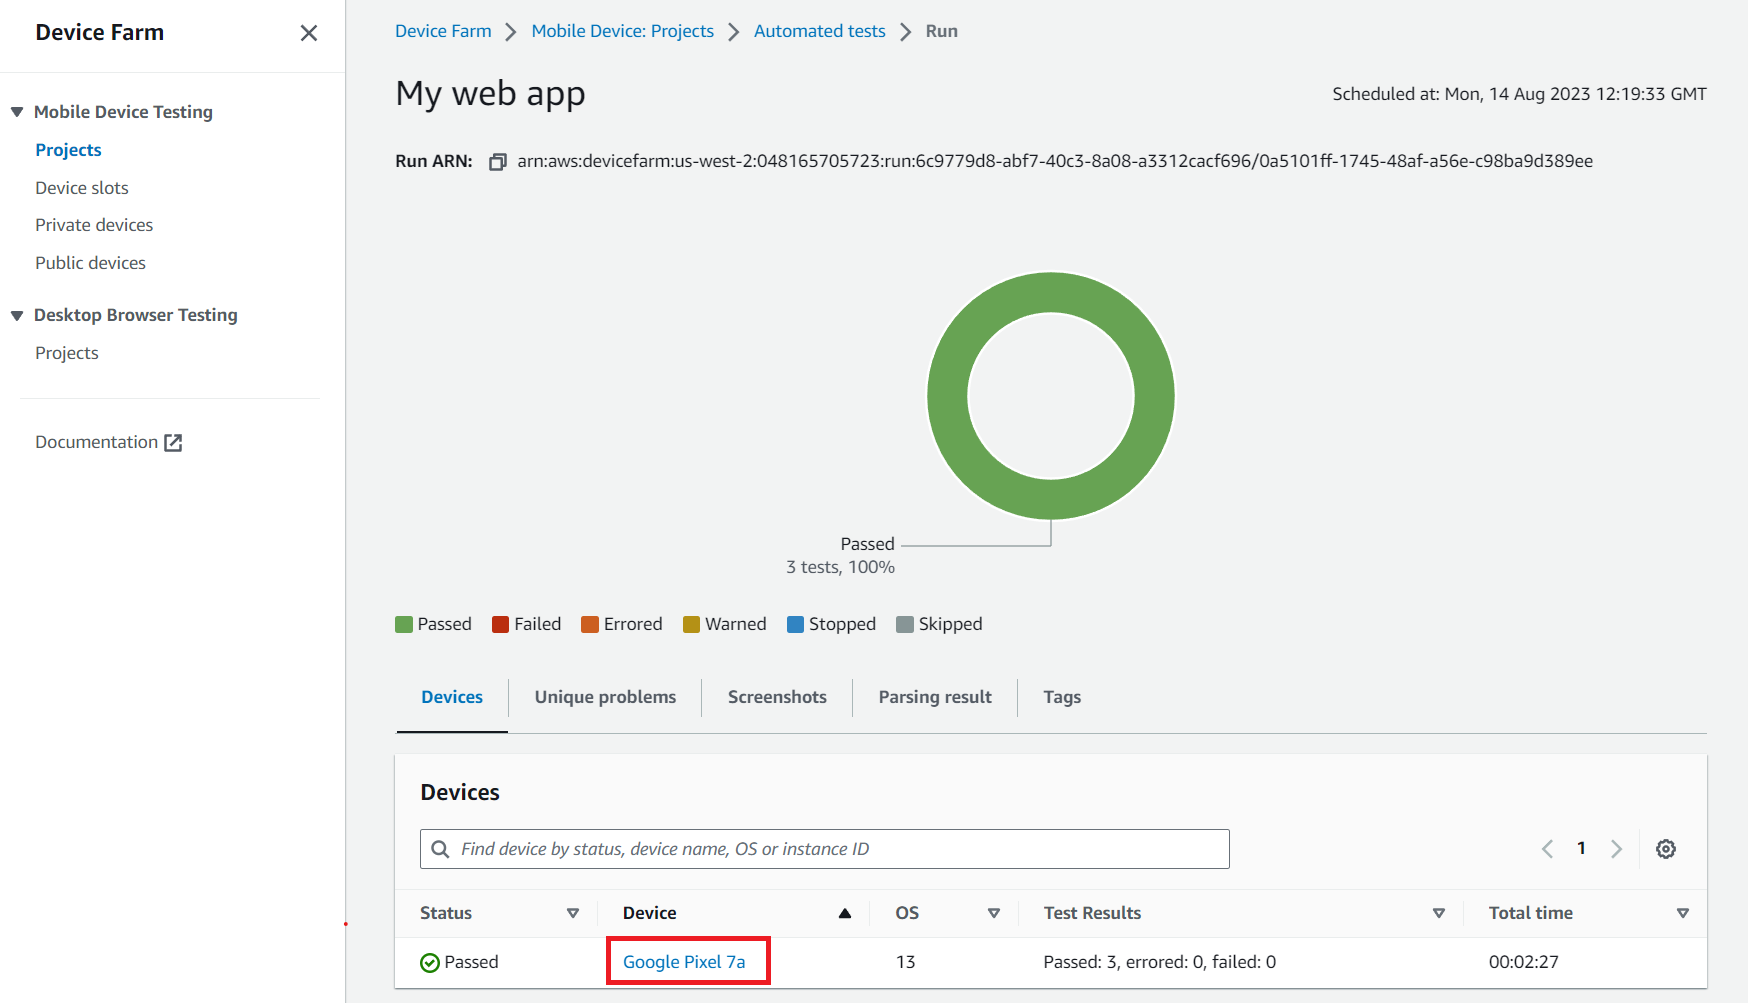
実行が成功すれば、3分弱でStatusがPassed状態になります。
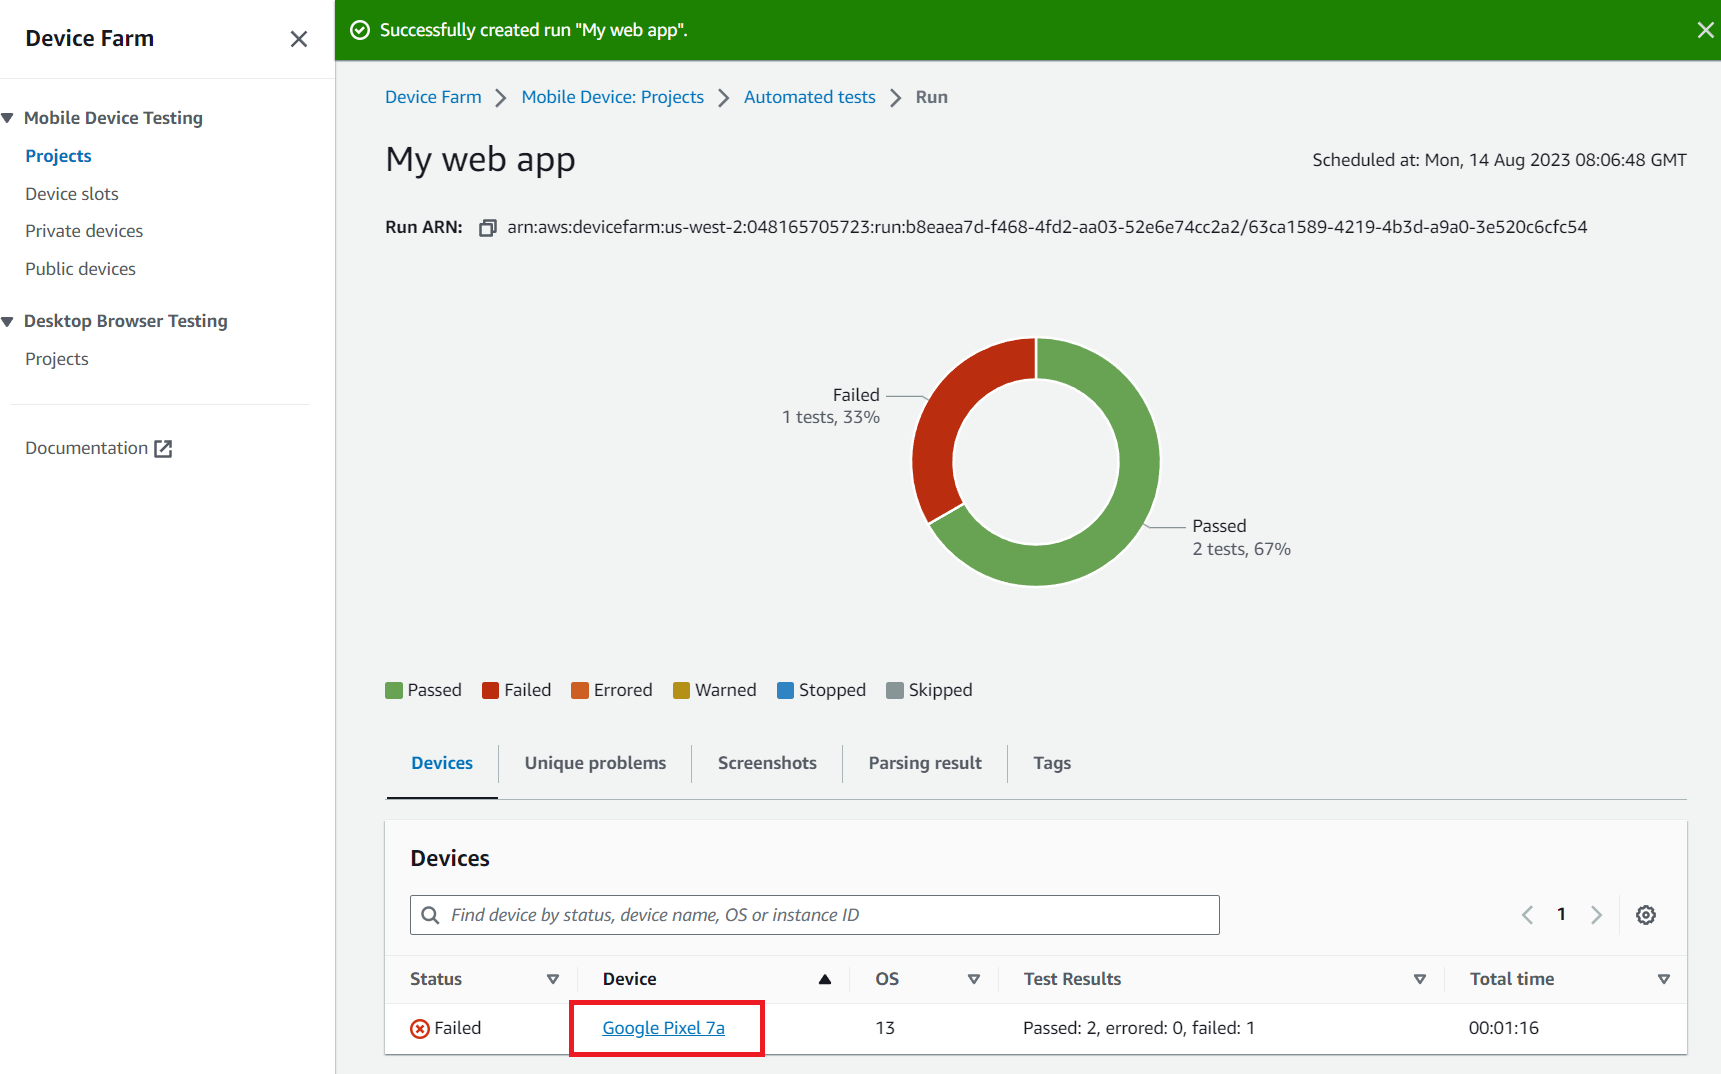
My wab appをクリックすると実行結果の詳細に遷移します。
実行結果の詳細では、デバイス毎の実行結果など、色々な情報を参照できます。
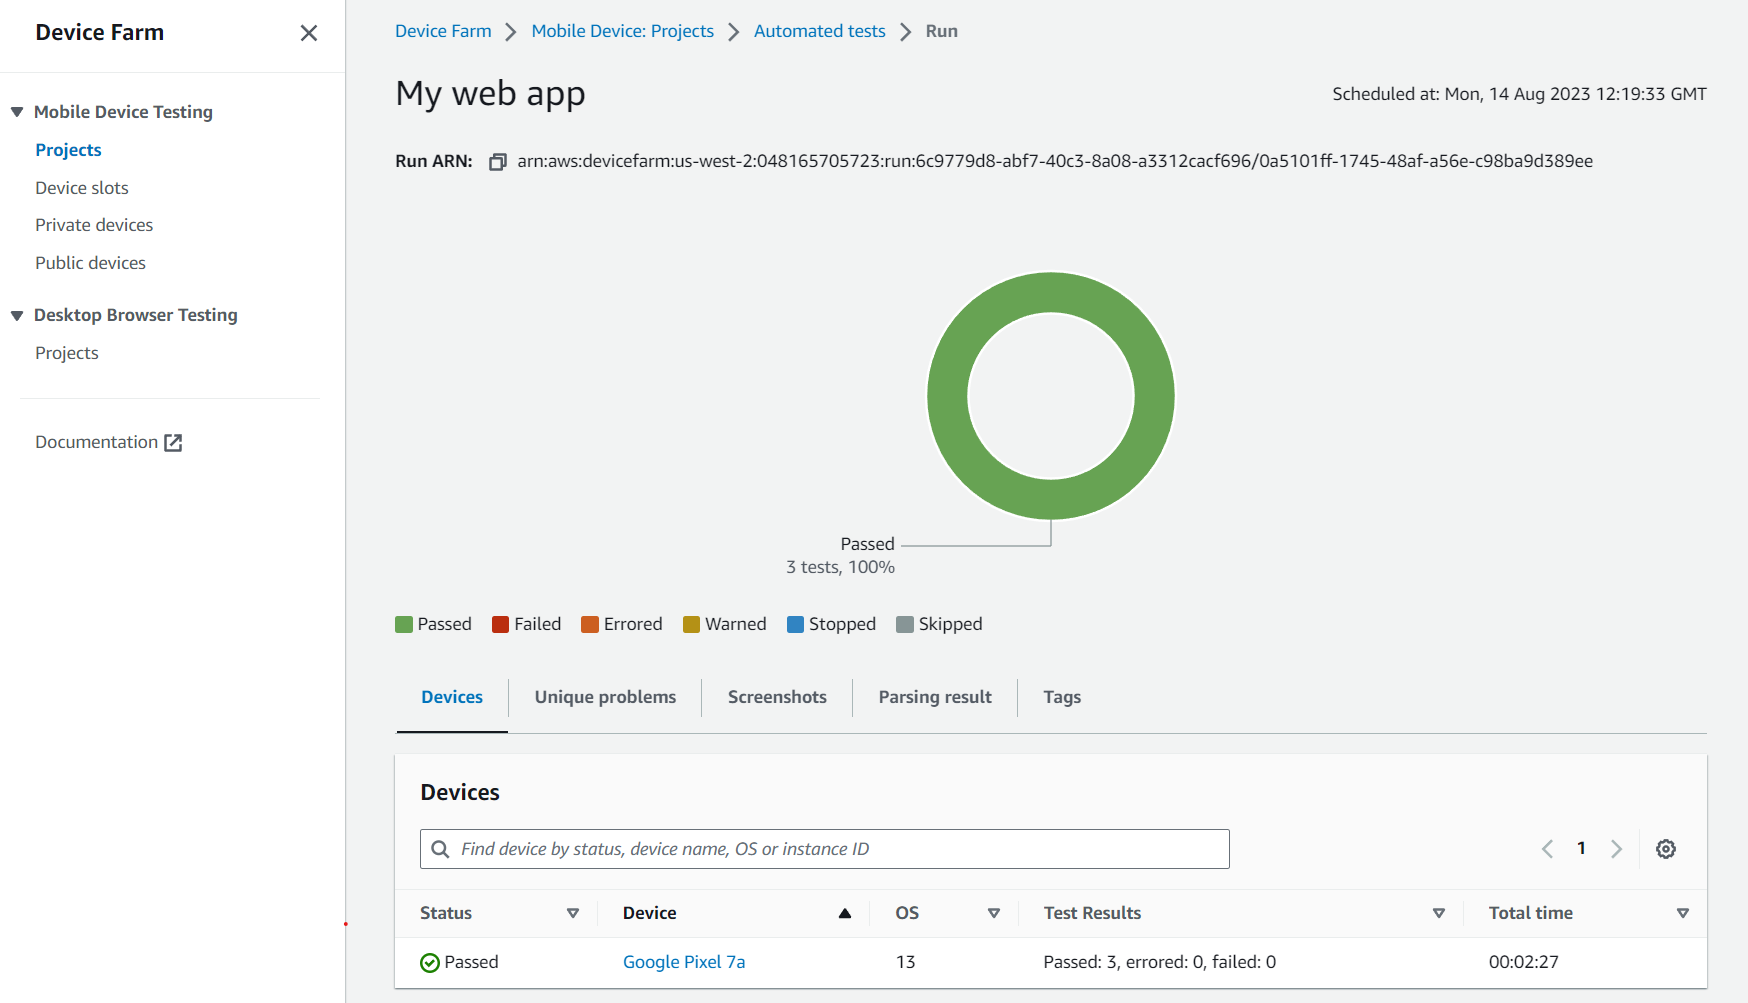
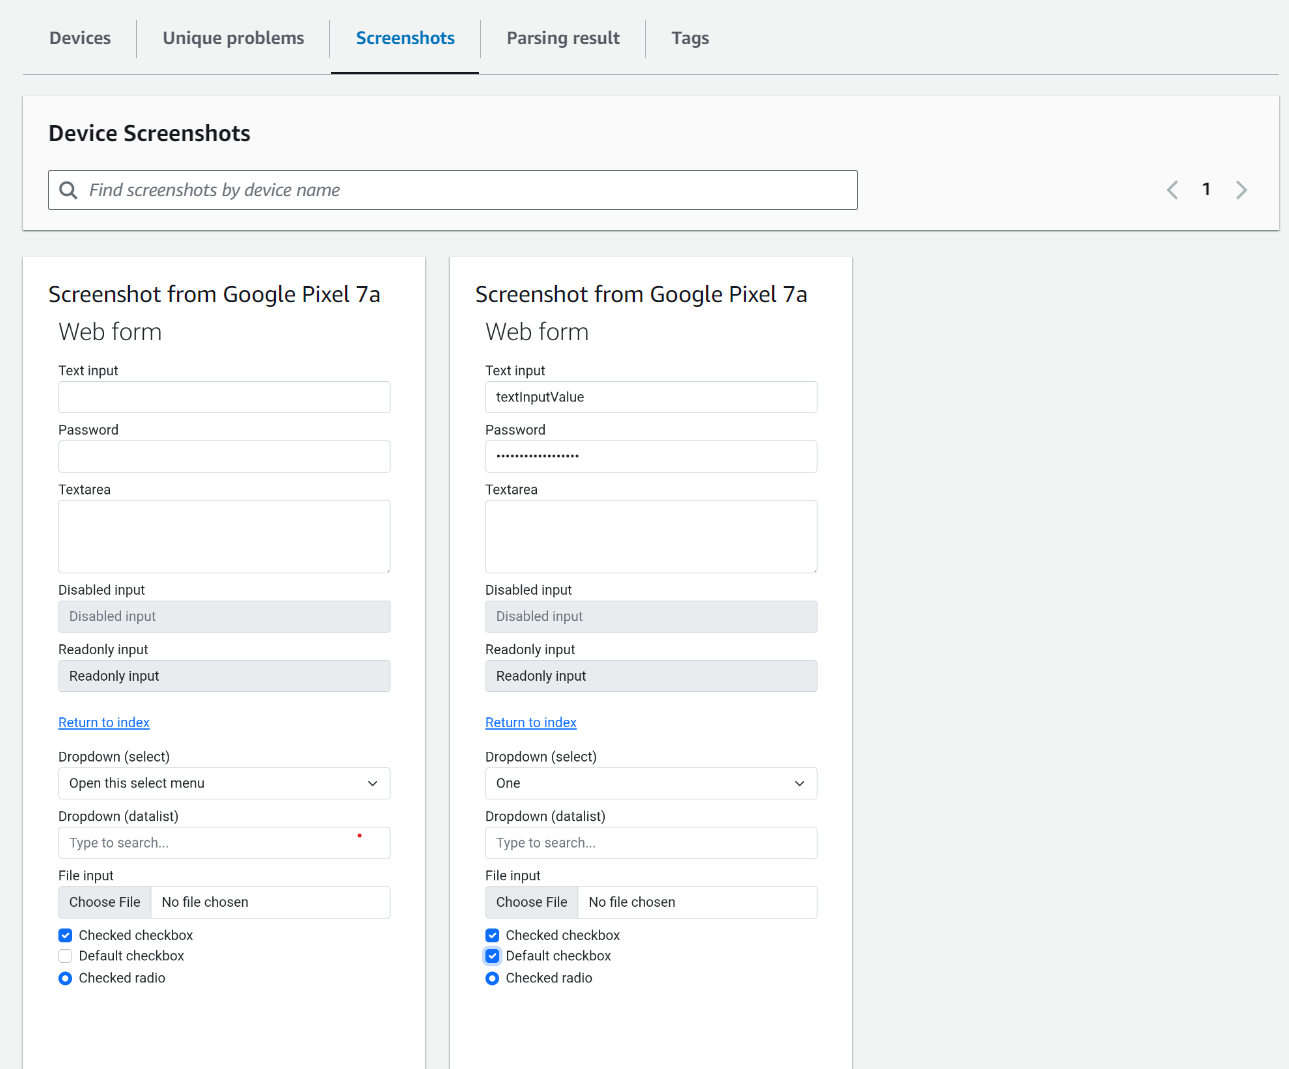
Screenshotsタブをクリックすると、client.saveScreenshotで取得した画像が参照できます。
DeviceのGoogle Pixel 7aをクリックするとデバイス毎の結果が参照できます。
Videoタブをクリックすると実行時に取得した動画を見ることができます。
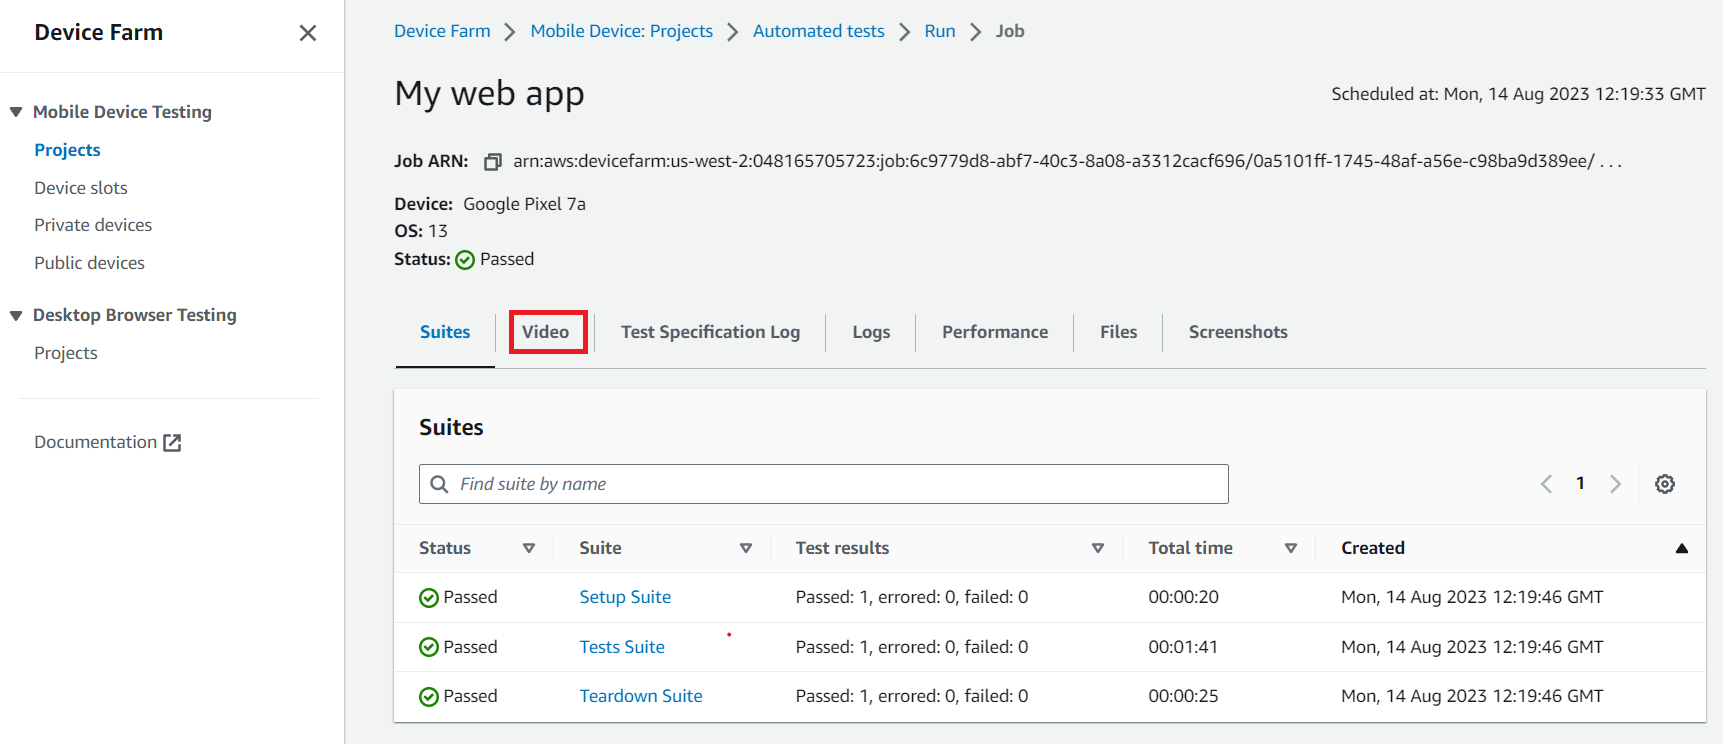
動画のイメージは以下のようになります。
実行が失敗したときの問題解決方法
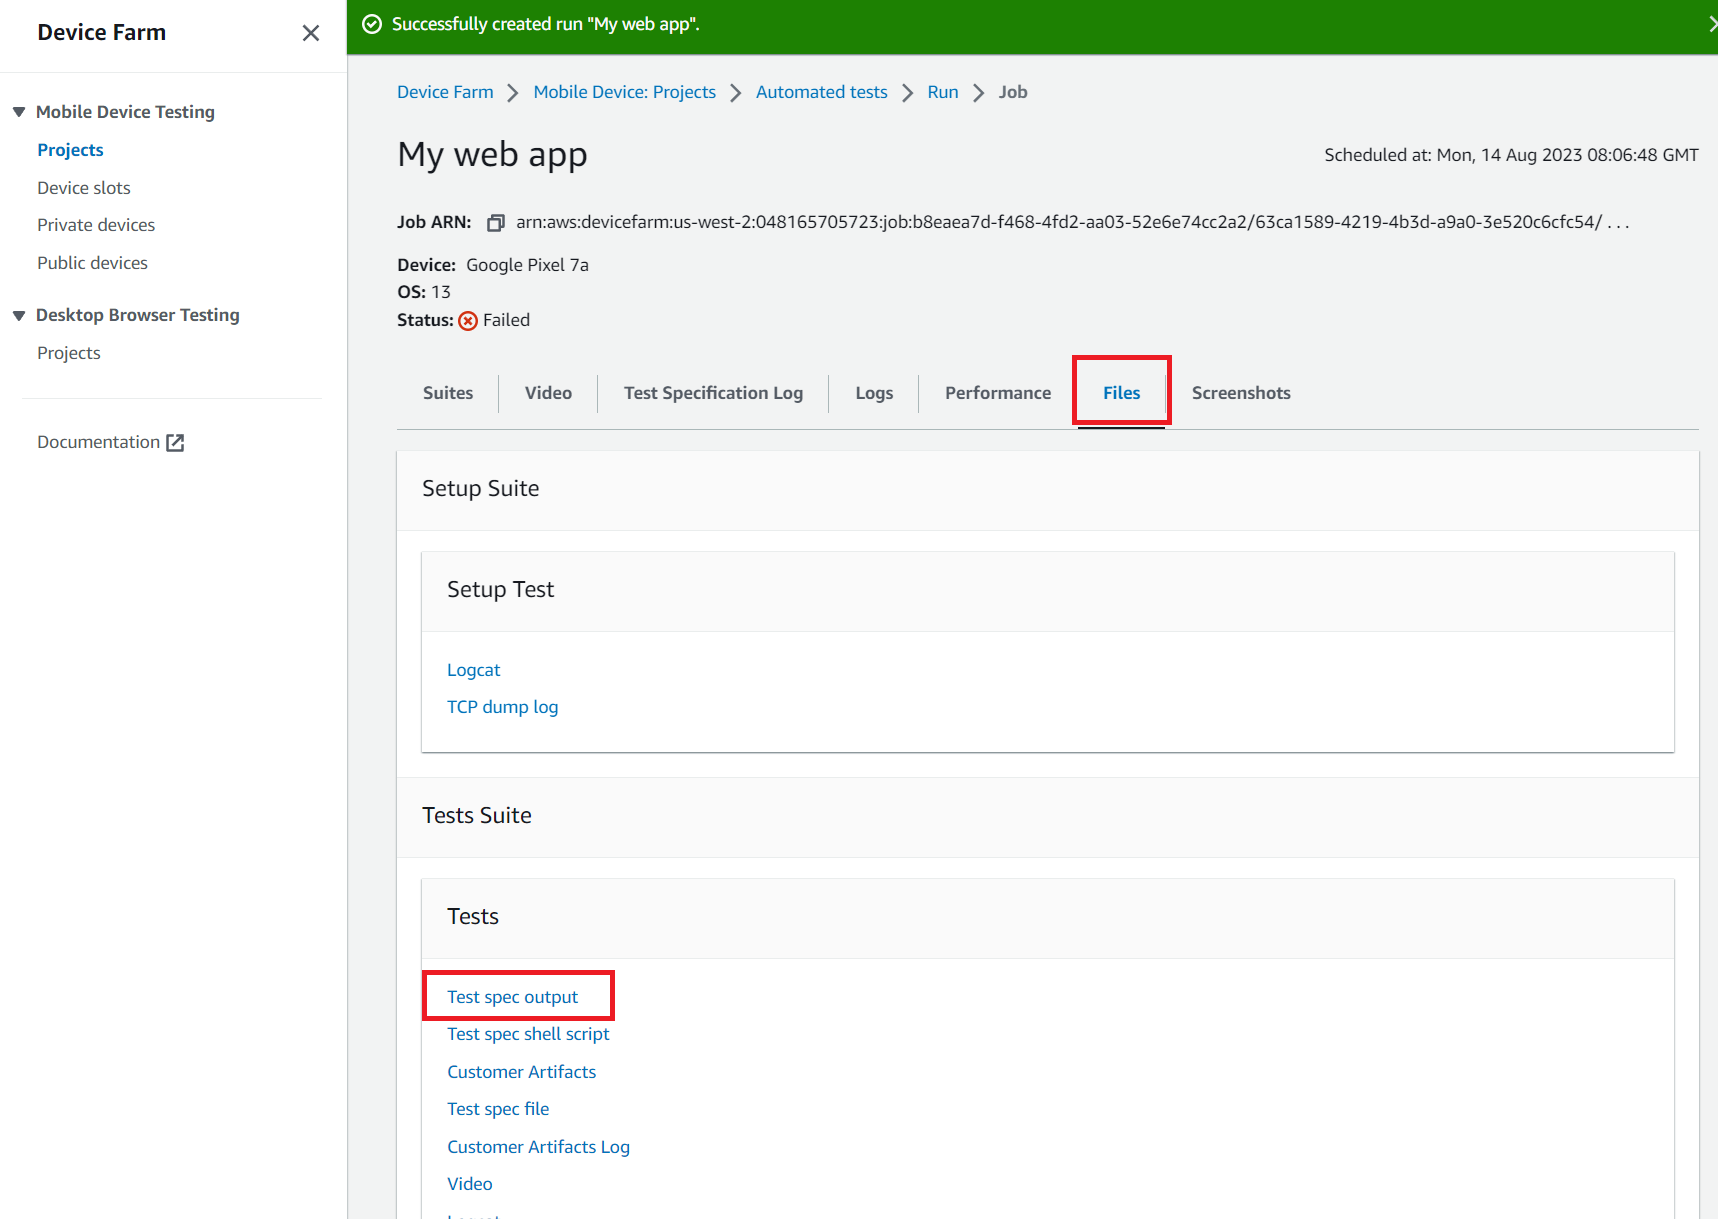
#何らかの理由で、テストが失敗した場合は、以下のようにStatusがFailedになります。失敗したテストのNameのリンクをクリックします。
デバイスをクリックします。
「Files」タブをクリックし、Test spec outputをクリックすると実行時のログファイルがダウンロードできます。
TestSpecでNode.jsの18.17.1を指定すると何故か失敗するのですが、 nvm install 18.17.1を指定した時のログの抜粋は以下のようになります。
##################                                                        26.2%
##################################################                        69.5%
######################################################################## 100.0%
Computing checksum with sha256sum
Checksums matched!
nvm is not compatible with the npm config "prefix" option: currently set to ""
Run `npm config delete prefix` or `nvm use --delete-prefix v18.17.1` to unset it.
[DeviceFarm] echo "Navigate to test package directory"
Navigate to test package directory
[DeviceFarm] cd $DEVICEFARM_TEST_PACKAGE_PATH
[DeviceFarm] npm install *.tgz
npm ERR! Invalid dependency type requested: alias

npm ERR! A complete log of this run can be found in:
npm ERR!     /home/device-farm/.npm/_logs/2023-08-14T08_07_40_464Z-debug.log

[DEVICEFARM] ########### Entering phase test ###########

[DeviceFarm] echo "Navigate to test source code"
Navigate to test source code
[DeviceFarm] cd $DEVICEFARM_TEST_PACKAGE_PATH
[DeviceFarm] ls -l
total 9884
-rwxrwxrwx 1 rwx rwx 10119087 Aug 14 08:07 node-sample.tgz
[DeviceFarm] cd $DEVICEFARM_TEST_PACKAGE_PATH/node_modules
/tmp/scratchNduzP5.scratch/shell-script-ZqqMFX/shell_script.sh: line 149: cd: /tmp/scratchNduzP5.scratch/test-package4Ufrd9/node_modules: No such file or directory

[DEVICEFARM] ########### Entering phase post_test ###########
[DEVICEFARM] ########### Finish executing testspec ###########
[DEVICEFARM] ########### Setting upload permissions ###########
[DEVICEFARM] Tearing down your device. Your tests report will come shortly.
npm install *.tgzが失敗し、$DEVICEFARM_TEST_PACKAGE_PATH/node_modulesが存在しないのでテストが失敗している事が分かります。
npm install *.tgzが成功したときのログの抜粋は以下のようになります。
[DEVICEFARM] Setting up your device. This usually takes 2-3 minutes.
[DEVICEFARM] ########### Start executing testspec ###########


[DEVICEFARM] ########### Entering phase install ###########

[DeviceFarm] nvm install 16.20.1
Downloading and installing node v16.20.1...
Downloading https://nodejs.org/dist/v16.20.1/node-v16.20.1-linux-x64.tar.xz...

##################                                                        25.4%
#######################################################                   76.9%
######################################################################## 100.0%
Computing checksum with sha256sum
Checksums matched!
Now using node v16.20.1 (npm v8.19.4)
[DeviceFarm] echo "Navigate to test package directory"
Navigate to test package directory
[DeviceFarm] cd $DEVICEFARM_TEST_PACKAGE_PATH
[DeviceFarm] npm install *.tgz

added 1 package, and audited 329 packages in 16s

56 packages are looking for funding
  run `npm fund` for details

found 0 vulnerabilities
cd $DEVICEFARM_TEST_PACKAGE_PATH実行後に、ls -lでファイル一覧を出力したログの抜粋は以下のようになります。
[DeviceFarm] echo "Navigate to test source code"
Navigate to test source code
[DeviceFarm] cd $DEVICEFARM_TEST_PACKAGE_PATH
[DeviceFarm] ls -l
total 10168
drwxrwxr-x 3 device-farm device-farm     4096 Aug 14 08:15 node_modules
-rwxrwxrwx 1 rwx         rwx         10119087 Aug 14 08:14 node-sample.tgz
-rw-rw-r-- 1 device-farm device-farm       70 Aug 14 08:15 package.json
-rw-rw-r-- 1 device-farm device-farm   281045 Aug 14 08:15 package-lock.json
[DeviceFarm] cd $DEVICEFARM_TEST_PACKAGE_PATH/node_modules
[DeviceFarm] ls -l
total 4
drwxrwxr-x 3 device-farm device-farm 4096 Aug 14 08:15 node-sample
[DeviceFarm] cd $DEVICEFARM_TEST_PACKAGE_PATH/node_modules/node-sample
[DeviceFarm] ls -l
total 672
-rwxrwxr-x   1 device-farm device-farm   3042 Aug 14 08:15 android-sample.js
drwxrwxr-x 246 device-farm device-farm  12288 Aug 14 08:15 node_modules
-rwxrwxr-x   1 device-farm device-farm    319 Aug 14 08:15 package.json
-rwxrwxr-x   1 device-farm device-farm 131845 Aug 14 08:15 package-lock.json
[DeviceFarm] echo "Start Appium Node test"
iPhoneのSafariで実行
#Create device poolでiPhoneのデバイスを選択して実行します。
ローカル環境でiPhoneのSafariで実行する場合は、capabilitiesでbrowserName: "Safari"を指定する必要があるのですが、AWS Device Farmの場合は、TestSpecのyamlファイルのテンプレートに以下の記載が存在するため、特別な考慮は不要です。
# For IOS, Device farm starts the ios-webkit-debug-proxy before starting the appium server.
# So don't start ios-webkit-debug-proxy in the yaml file.
- >-
  if [ $DEVICEFARM_DEVICE_PLATFORM_NAME = "iOS" ];
  then
  echo "Start appium server for iOS";
  (appium --log-timestamp
  --default-capabilities "{\"usePrebuiltWDA\": true, \"derivedDataPath\":\"$DEVICEFARM_WDA_DERIVED_DATA_PATH\",
  \"deviceName\": \"$DEVICEFARM_DEVICE_NAME\", \"platformName\":\"$DEVICEFARM_DEVICE_PLATFORM_NAME\",
  \"automationName\":\"XCUITest\", \"udid\":\"$DEVICEFARM_DEVICE_UDID_FOR_APPIUM\", \"platformVersion\":\"$DEVICEFARM_DEVICE_OS_VERSION\", \"browserName\":\"Safari\"}"
  >> $DEVICEFARM_LOG_DIR/appiumlog.txt 2>&1 &);
  fi
まとめ
#AWS Device Farmで実際にテストを実行する方法を説明させていただきました。
Web アプリでも、端末とブラウザの組み合わせで動作しないといった現象は発生しますし、スマホ向けのアプリは、端末固有の問題がより多く発生しますので、AWS Device Farmで自動テストの仕組みを実現していると、新規OSや新規端末の検証のコストが大幅に削減できると感じます。ただ、仕組みの実現には結構なコストがかかるとも感じます。