Efficient Web Development with C# and Razor! A Thorough Guide with Sample Code
Back to TopTo reach a broader audience, this article has been translated from Japanese.
You can find the original version here.
C# has a very powerful view engine called Razor. By using Razor, you can perform highly efficient web development.
This was back in the early 2010s when I was still a novice. .NET MVC had just appeared, and I migrated from WebForms, but I felt that development efficiency hadn’t noticeably improved.
Then Razor came onto the scene, and when I tried it, I found it incredibly efficient and remarkable. Ever since, I’ve been a fan of Razor.
In this article, I—a Razor enthusiast—will explain how to use Razor with sample code for the following types of people. Harness Razor to do efficient development like a pro.
- Developers with limited C# experience
- Those new to IT engineering
- Those who have experience in other languages but ended up working with C# due to a job change or project assignment
- Developers with C# experience but who haven’t used Razor much
What is Razor
#Razor is a view engine you can use when creating web pages in ASP.NET. Using Razor can improve the efficiency of developing web interfaces.
A key feature of Razor is that it allows you to write C# and HTML together seamlessly. That alone feels like a bit of a cheat.
First, let’s look at some sample code. In a .cshtml view file—a file where you write HTML and scriptlets—you write code like the following:
@if (DateTime.DaysInMonth(DateTime.Now.Year, DateTime.Now.Month) == 31)
{
    <p>This month has 31 days.</p>
}
else
{
    <p>This month has 30 days or less.</p>
}
The syntax is basically a simpler version of standard scriptlets, but the fact that you can write C# and HTML together within the same scriptlet is what makes it so convenient.
Normally, if you want to write HTML you need to close the scriptlet first. But with Razor, you don’t have to do that tedious work.
Razor can greatly boost UI development efficiency, but because of its nature, it’s also possible to cobble together complex layouts recklessly.
Therefore, to avoid sacrificing code readability, refrain from being too forceful. If you’re tempted to write hacky code, it’s better to revisit your design.
Sample Data Used in This Article
#Here is the data used in the sample code of this article. To make it easy to try out, it’s provided as CSV files.
The data is about set meal menus from a cafeteria and the items that compose them. There are many points ripe for criticism, but please bear with it—it’s just sample data.
menu_id,menu_name,price
1,Grilled Fish Set,1000
2,Fried Chicken Set,900
3,Sashimi Set,1200
4,Tempura Set,1100
5,Fried Horse Mackerel Set,1100
menu_id,menu_item_id,menu_item_name
1,1,Rice
1,2,Miso Soup
1,3,Salt-grilled Salmon
1,4,Pickles
2,1,Rice
2,2,Miso Soup
2,3,Fried Chicken
2,4,Salad
3,1,Rice
3,2,Miso Soup
3,3,Sashimi
3,4,Pickles
4,1,Rice
4,2,Miso Soup
4,3,Tempura
4,4,Pickles
5,1,Rice
5,2,Miso Soup
5,3,Horse Mackerel Fry
5,4,Salad
The model class code is also shown below.
namespace RazorSample.Models
{
    public class Menu
    {
        public int Id { get; set; }
        public string Name { get; set; } = string.Empty;
        public Decimal Price { get; set; }
        public List<MenuItem> Items { get; set; } = new List<MenuItem>();
    }
}
namespace RazorSample.Models
{
    public class MenuItem
    {
        public int Id { get; set; }
        public string Name { get; set; } = string.Empty;
    }
}
Basic Razor Syntax
#File Structure
#First, let’s explain the file structure of Razor.
As shown in the figure below, a Razor page consists of a view and its code-behind. It’s the same structure as ASP.NET WebForms or Windows Forms applications.
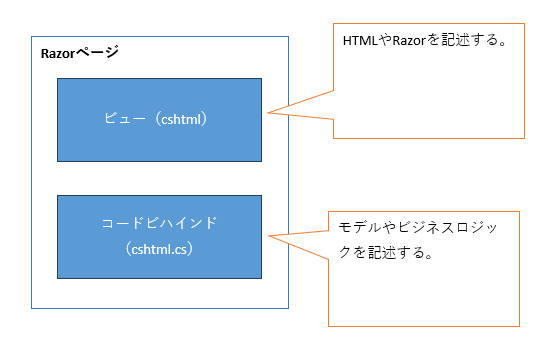
In the past (during the .NET Framework v4.x era), there was an MVC structure separating views and controllers, but since ASP.NET Core, it’s as shown in the above diagram.
Layout File
#Next, let’s explain layout files after covering the Razor page structure.
You don’t have to pay much attention to this when creating Razor pages, but if you want to adjust design or layout across all pages, you need to modify the layout file.
When you create an ASP.NET Core web app or any project that includes Razor pages, a file named Pages/Shared/_Layout.cshtml is generated.
This file acts as the page template, and it contains references to JavaScript and CSS as well as layout definitions.
Around the middle of this file, you’ll find @RenderBody(). When you create a Razor page, its content is injected here at runtime.
<div class="container">
    <main role="main" class="pb-3">
        @RenderBody()
    </main>
</div>
Also, toward the end, there’s a line @await RenderSectionAsync("Scripts", required: false).
As I’ll explain later, when you include JavaScript in a Razor page, you write it in a script section, and then it’s injected here.
Razor Syntax
#To write Razor, you use @ and {}. You can write C# code directly after @ or inside @{ }.
Also, to specify the model or include classes/libraries you want to use in your C# code, you write using statements at the top of the Razor page with @.
By the way, there are the terms Razor syntax and Razor expression. Think of the former as the Razor grammar and the latter as each individual C# expression in Razor.
Here’s a sample page.
@page
@using RazorSample.Utils
@model RazorSample.Pages.BasicSampleModel
@{
// Use ViewData to specify the title
ViewData["Title"] = "Basic Sample Page";
}
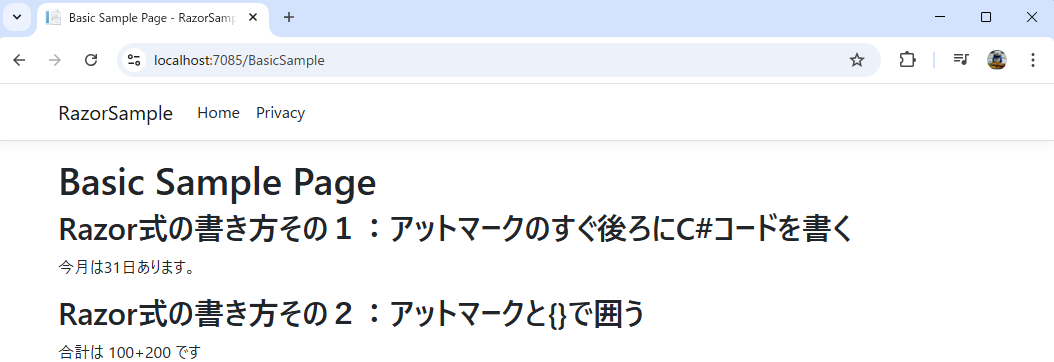
<h1>@ViewData["Title"]</h1>
<h2>Razor Expression Style 1: Write C# code immediately after the @ symbol</h2>
@if (DateTime.DaysInMonth(DateTime.Now.Year, DateTime.Now.Month) == 31)
{
<p>This month has 31 days.</p>
}
else
{
<p>This month has 30 days or less.</p>
}
<h2>Razor Expression Style 2: Enclose code with @ and { }</h2>
@{
int num1 = 100;
int num2 = 200;
<text>The total is @num1+@num2</text>
}
The rendered page looks like this:
How to Use Functions
#You can also define and use functions in Razor pages. Here’s sample code.
@page
@using RazorSample.Utils
@model RazorSample.Pages.BasicSampleModel

<h2>Function Usage Sample</h2>
@functions {
    public string GetGreeting()
    {
        return "Hello, Razor!";
    }

    public int Add(int a, int b)
    {
        return a + b;
    }
}

<p>@GetGreeting()</p>
<p>1 + 2 = @Add(1, 2)</p>
The rendered page looks like this:

How to Use HtmlHelper
#In Razor pages, you can use something called HtmlHelper to create common components found on HTML pages, like text boxes.
You write it as @Html.Xxx. If you want to display model values on the page or bind input values to the model, use methods like @Html.XxxFor.
Here’s some sample code. For dropdown list content, use SelectList. In this sample, we’re converting an enum into a SelectList.
@page
@using RazorSample.Utils
@model RazorSample.Pages.BasicSampleModel
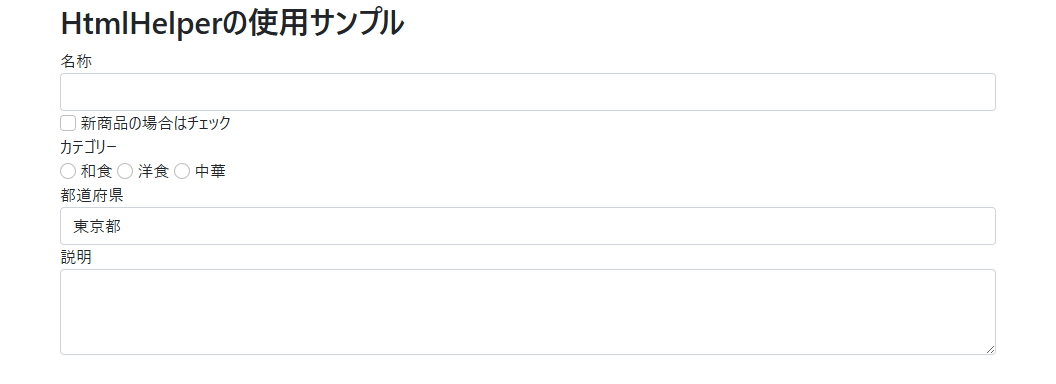
<h2>HtmlHelper Usage Sample</h2>
<div class="form-group">
@Html.DisplayName("Name")
@Html.TextBoxFor(model => model.Name, new { @class = "form-control" })
</div>
<div class="form-group">
@Html.CheckBoxFor(model => model.IsNew, new { @class = "form-check-input" })
@Html.DisplayName("Check if it's a new product")
</div>
<div class="form-group">
<div class="form-group">
@Html.DisplayName("Category")
</div>
<label class="form-check-label" for="lbl-category">
@Html.RadioButtonFor(model => model.Category, Category.和食, new { @class = "form-check-input" })
@Html.DisplayName(Category.和食.ToString())
</label>
<label class="form-check-label" for="lbl-category">
@Html.RadioButtonFor(model => model.Category, Category.洋食, new { @class = "form-check-input" })
@Html.DisplayName(Category.洋食.ToString())
</label>
<label class="form-check-label" for="lbl-category">
@Html.RadioButtonFor(model => model.Category, Category.中華, new { @class = "form-check-input" })
@Html.DisplayName(Category.中華.ToString())
</label>
</div>
<div class="form-group">
@Html.DisplayName("Region")
@Html.DropDownListFor(model => model.Region, new SelectList(Enum.GetValues(typeof(Region))), new { @class = "form-control" })
</div>
<div class="form-group">
@Html.DisplayName("Description")
@Html.TextAreaFor(model => model.Description, new { @class = "form-control", rows = 3 })
</div>
The code-behind defines the model properties, and the enums for category and region:
using Microsoft.AspNetCore.Mvc;
using Microsoft.AspNetCore.Mvc.RazorPages;

namespace RazorSample.Pages
{
    public class BasicSampleModel : PageModel
    {
        public void OnGet()
        {
        }

        public string Name { get; set; }
        public string Category { get; set; }
        public bool IsNew { get; set; }
        public string Region { get; set; }
        public string Description { get; set; }
        public BasicSampleModel()
        {
            // Initialize properties to avoid NullReferenceException in cshtml when a property is null
            Name = "";
            Category = "";
            Region = "";
            Description = "";
        }
    }
    public enum Category
    {
        和食,
        洋食,
        中華
    }
    public enum Region
    {
        東京都,
        神奈川県,
        千葉県,
        埼玉県
    }
}
Creating Dynamic Pages with Razor
#How to Pass Data to the View
#To perform processing during page rendering in the code-behind and display the result in the view, simply set values in the model.
Besides the model, you can use something called ViewData to set arbitrary values.
Here, we’ll assign a sample message to ViewData and display it on the page in sample code.
using Microsoft.AspNetCore.Mvc;
using Microsoft.AspNetCore.Mvc.RazorPages;

namespace RazorSample.Pages
{
    public class RegisterMenuModel : PageModel
    {
        public void OnGet(int id)
        {
            ViewData["SampleMessage"] = "This is the menu registration page.";
        }
    }
}
@page
@model RazorSample.Pages.RegisterMenuModel
@{
ViewData["Title"] = "Menu Registration";
}
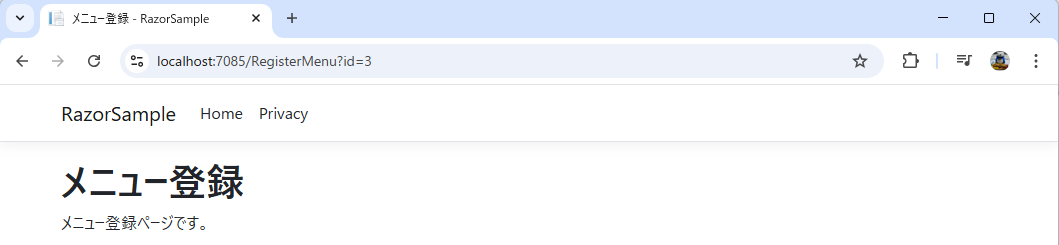
<h1>@ViewData["Title"]</h1>
<p>@ViewData["SampleMessage"]</p>
The rendered page looks like this:
How to Submit Form Data
#To send form input data to the server, use HtmlHelper. Here’s sample code.
First, let’s show the page image:
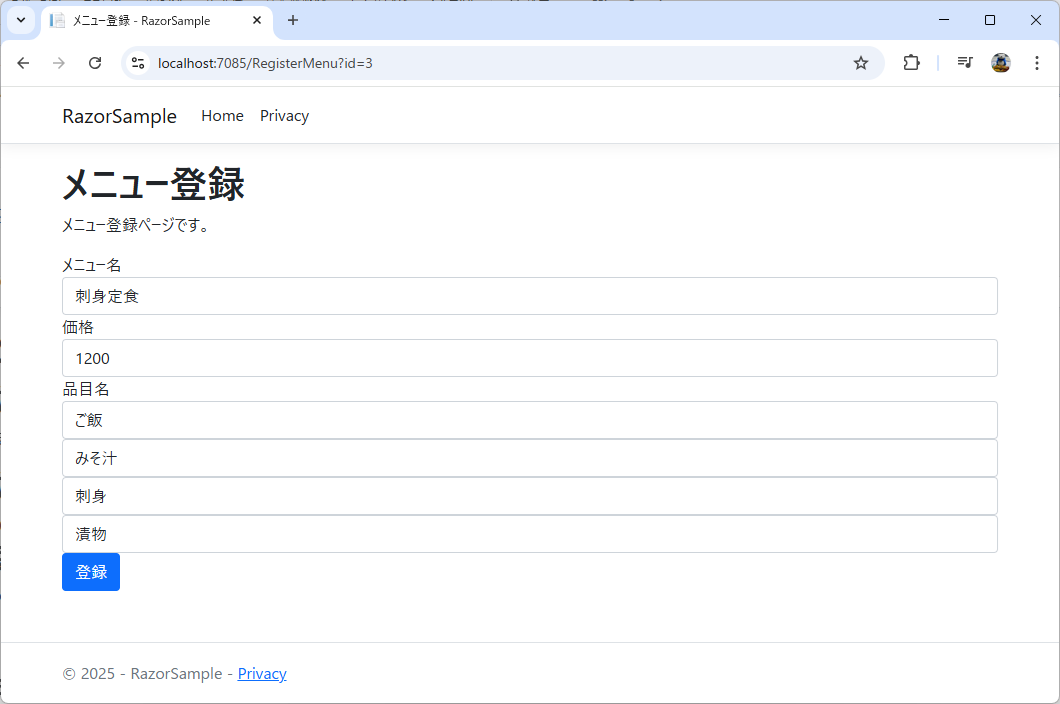
Let’s start with the view. Use @using and the Html.BeginForm method of HtmlHelper to create the form tag.
Then create each input field with HtmlHelper. If you want to bind input values to the model, use methods like @Html.XxxFor.
@page
@model RazorSample.Pages.RegisterMenuModel
@{
    ViewData["Title"] = "Menu Registration";
}

<h1>@ViewData["Title"]</h1>
<p>@ViewData["SampleMessage"]</p>
@using (Html.BeginForm("RegisterMenu", "Menu", FormMethod.Post))
{
    @Html.HiddenFor(model => model.Menu.Id)
    <div class="form-group">
        @Html.DisplayName("Menu Name")
        @Html.TextBoxFor(model => model.Menu.Name, new { @class = "form-control" })
    </div>
    <div class="form-group">
        @Html.DisplayName("Price")
        @Html.TextBoxFor(model => model.Menu.Price, new { @class = "form-control" })
    </div>
    <div class="form-group">
        @Html.DisplayName("Item Name")
    </div>
    @for (int i = 0; i < Model.Menu.Items.Count; i++)
    {
        @Html.HiddenFor(item => Model.Menu.Items[i].Id)
        <div class="form-group">
            @Html.TextBoxFor(model => Model.Menu.Items[i].Name, new { @class = "form-control" })
        </div>
    }
    <button type="submit" class="btn btn-primary">Register</button>
}
By the way, in this example there is a one-to-many relationship between the menu and its items.
In the past, I struggled when submitting this kind of list to the server and couldn’t handle it properly, so I’ve intentionally included this example in this article.
For this kind of list you must use a for loop instead of foreach. Unless you specify which index in the model list you’re using, you won’t be able to receive it correctly in the code-behind.
Let me explain why. Razor sets the model item names as the HTML id and name attributes. When you inspect the list generated by foreach in the browser dev tools, you’ll see HTML like this:
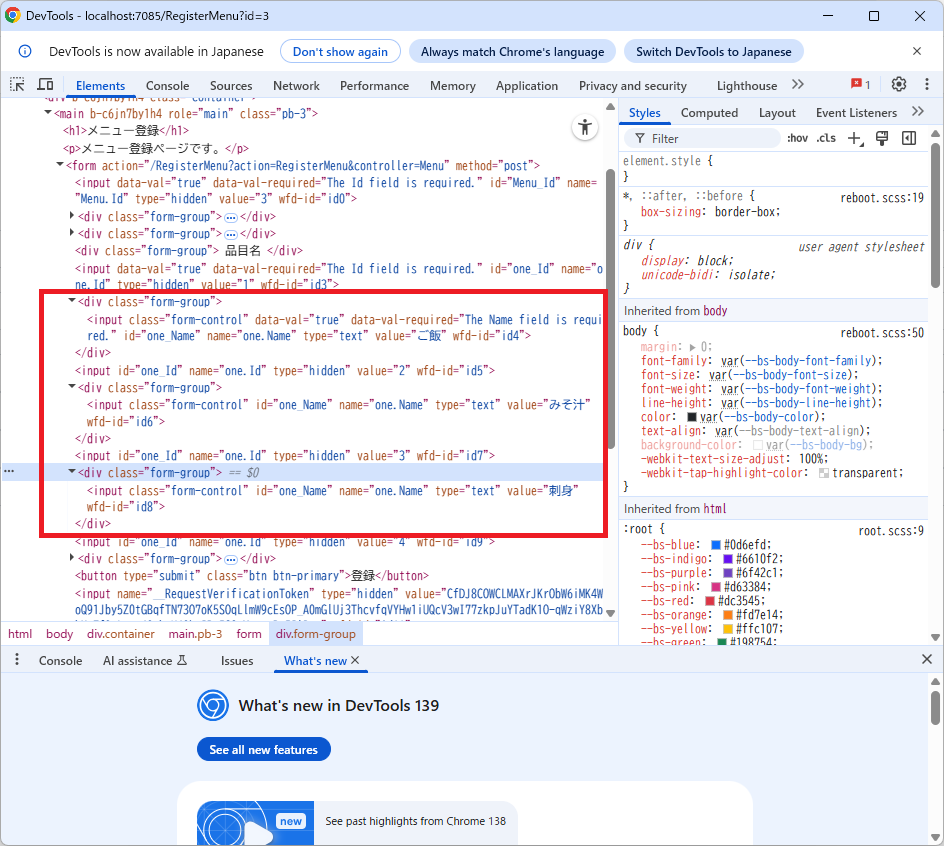
Surprisingly, the input tags’ id and name attributes lack the list index and only contain the item name. This makes it impossible to tell which index in the list each input belongs to. That’s why the server can’t correctly receive the list values.
Therefore, when you want to correctly map list items to the model, a for loop is essential. If you’re just looping for display purposes, foreach is fine.
Next, let’s move on to the code-behind.
In this example, when you receive a menu ID as a request parameter, you fetch the corresponding menu data from the CSV file and display it in the view. That’s what the OnGet method does.
When the form is submitted, the OnPost method is called.
To receive the values entered in the form in the code-behind, add the BindProperty annotation to the property that holds the input values. Then, when POSTing, the values entered in the form are automatically set.
using Microsoft.AspNetCore.Mvc;
using Microsoft.AspNetCore.Mvc.RazorPages;
using RazorSample.Models;
using RazorSample.Readers;
using System.Text;

namespace RazorSample.Pages
{
    public class RegisterMenuModel : PageModel
    {
        CsvReader csvReader = new CsvReader();

        // Add BindProperty annotation to the model used for input fields
        [BindProperty]
        public Menu Menu { get; set; }

        public void OnGet(int id)
        {
            ViewData["SampleMessage"] = "This is the menu registration page.";
            // If a menu ID is specified, retrieve that menu
            var menus = csvReader.ReadMenu();
            Menu = menus.FirstOrDefault(m => m.Id == id) ?? new Menu();
            // Retrieve the menu item details
            Menu.Items = csvReader.GetMenuItems(Menu.Id);
        }

        public IActionResult OnPost()
        {
            // Process the POSTed data
            if (ModelState.IsValid)
            {
                // Inspect the values
                Console.WriteLine("Menu ID: {0}, Menu Name: {1}, Price: {2} yen", Menu.Id, Menu.Name, Menu.Price);
                StringBuilder sb = new StringBuilder();
                sb.AppendLine("Menu Items:");
                foreach (var one in Menu.Items)
                {
                    sb.AppendLine(one.Name);
                }
                Console.WriteLine(sb.ToString());
            }
            return Page(); // Redisplay the same page in case of errors
        }
    }
}
Let’s access this page by appending ?id=3 to the URL. Then modify the values as shown below and click the Register button.
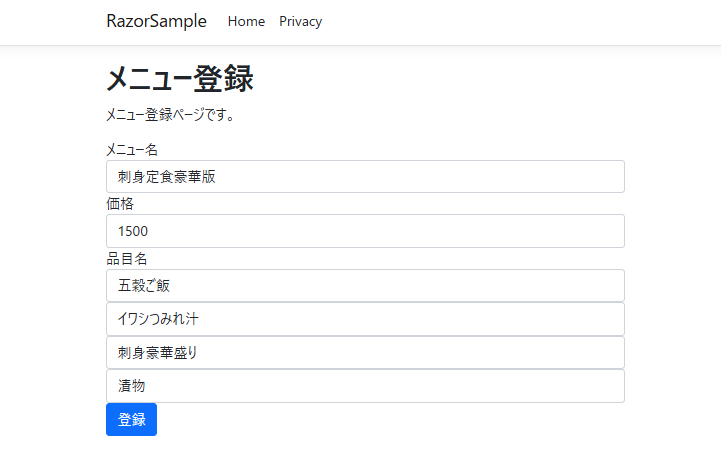
The console outputs the following values:
Menu ID: 3, Menu Name: Deluxe Sashimi Set, Price: 1500 yen
Menu Items:
Five-Grain Rice
Sardine Meatball Soup
Deluxe Sashimi Platter
Pickles
How to Use JavaScript
#To use JavaScript in Razor, write a script section.
Here’s sample code to display Hello World on the page when it first loads:
@page
@model RazorSample.Pages.JSSampleModel
@{
}

<p id="sample-message"></p>
<button onclick="getMessage()">Test Asynchronous Processing</button>

@section Scripts {
    <script>
        $(function () {
            alert("Hello World!");
        });
    </script>
}
By writing @section Scripts { }, you can include a script tag and run JavaScript.
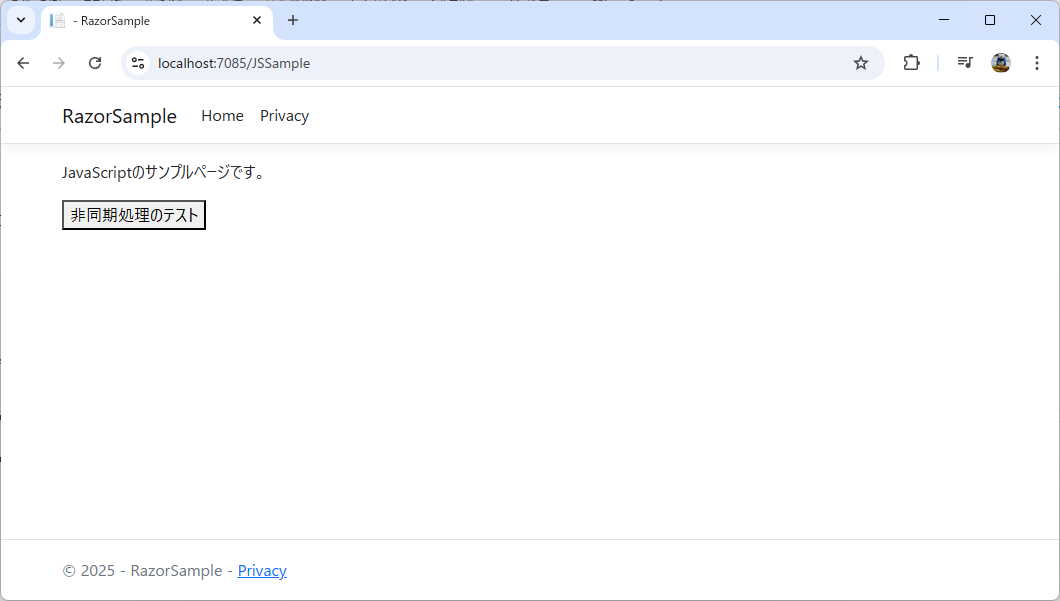
When you display the view above, it looks like this:

Implementing Asynchronous Processing Using JavaScript
#I’ll also explain how to implement asynchronous processing using JavaScript in Razor.
Just like with the previous JavaScript execution, create a script section and write your asynchronous processing code:
@page
@model RazorSample.Pages.JSSampleModel
@{
}

<p id="sample-message"></p>
<button onclick="getMessage()">Test Asynchronous Processing</button>

@section Scripts {
    <script>
        $(function () {
            alert("Hello World!");
        });

        function getMessage() {
            fetch('/JSSample?handler=Message')
                .then((response) => response.json())
                .then((data) => {
                    $('#sample-message').text(data.message);
                })
                .catch((error) => {
                    $('#sample-message').text('Failed to retrieve.');
                });
        }
    </script>
}
Be careful with the URL passed as the argument to fetch in the code above. To handle JavaScript asynchronous processing in Razor’s code-behind, you specify the page name and handler.
The page name is the name of the cshtml file. In this sample, since the page file is named JSSample.cshtml, the page name is JSSample.
Then specify the Xxx part of the OnGetXxx method as the handler.
In this example, to invoke the OnGetMessage method, the URL is /JSSample?handler=Message.
In the code-behind, a simple message is returned as JSON. By using an anonymous type in a key-value format and passing it to JsonResult, you can create a JSON object.
using Microsoft.AspNetCore.Mvc;
using Microsoft.AspNetCore.Mvc.RazorPages;

namespace RazorSample.Pages
{
    public class JSSampleModel : PageModel
    {
        public void OnGet()
        {
        }

        public JsonResult OnGetMessage()
        {
            return new JsonResult(new { Message = "This is a sample page for JavaScript." });
        }
    }
}
When you display the page and press the “Test Asynchronous Processing” button, you’ll see the following:
In Closing
#In this article, I’ve explained how to use C# Razor, including why I like it and the parts that gave me trouble.
Razor does require learning its syntax to some extent, but once you get used to it, you can develop web applications very efficiently. Be sure to master it.
Recently, a frontend framework called Blazor has also emerged. There are explanatory articles published on the Mamezou Developer Site, so be sure to check them out.